WCC05 – Watercooler Color Challenge – New and Old Meet in the Middle

Happy Sunday my friends.

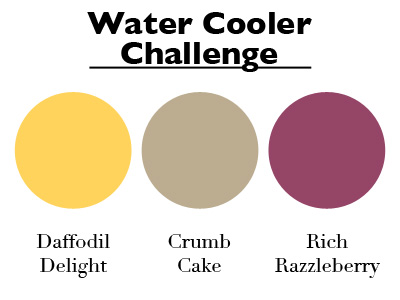
Time for another Watercooler Challenge (WCC05).   This time around our illustrious leader Terri A. has given us the following color set to work with.

WCC05 July 27th color challenge

I hope you’ll decide to play along and add your own creation to the Challenge linky found here.   You’ll also be able to see all of this weeks wonderful team creations at that link.
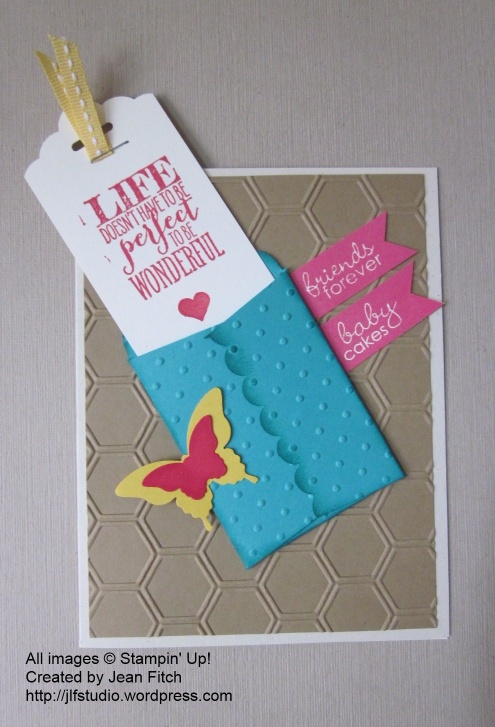
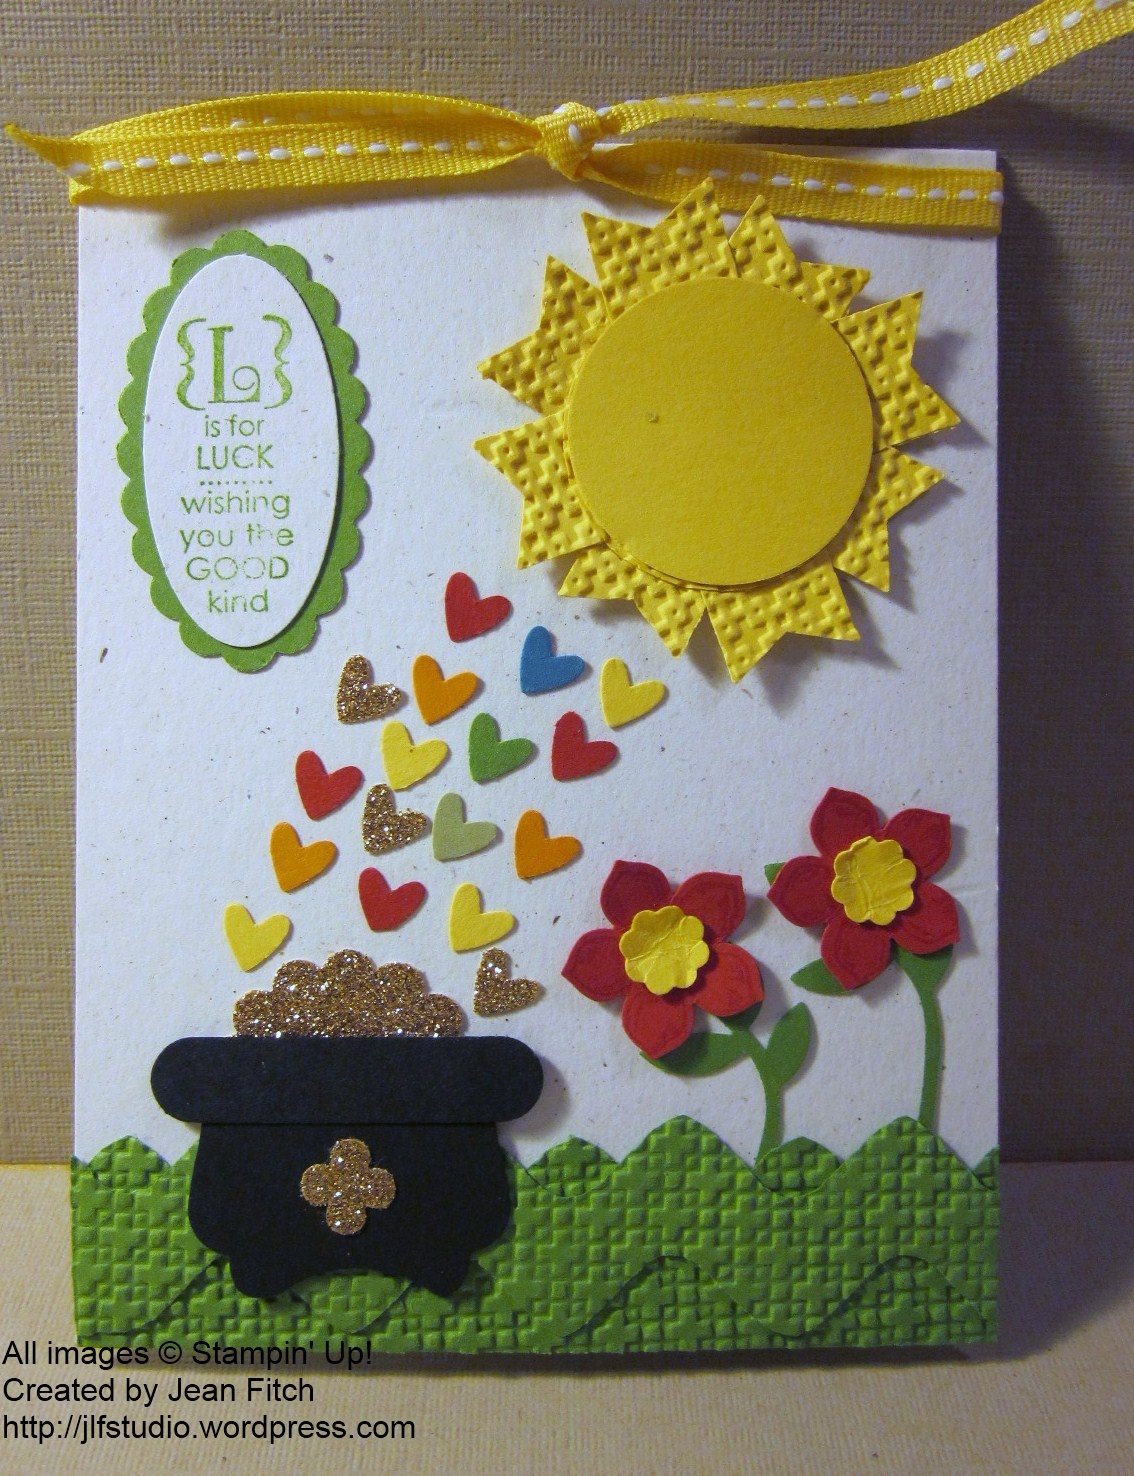
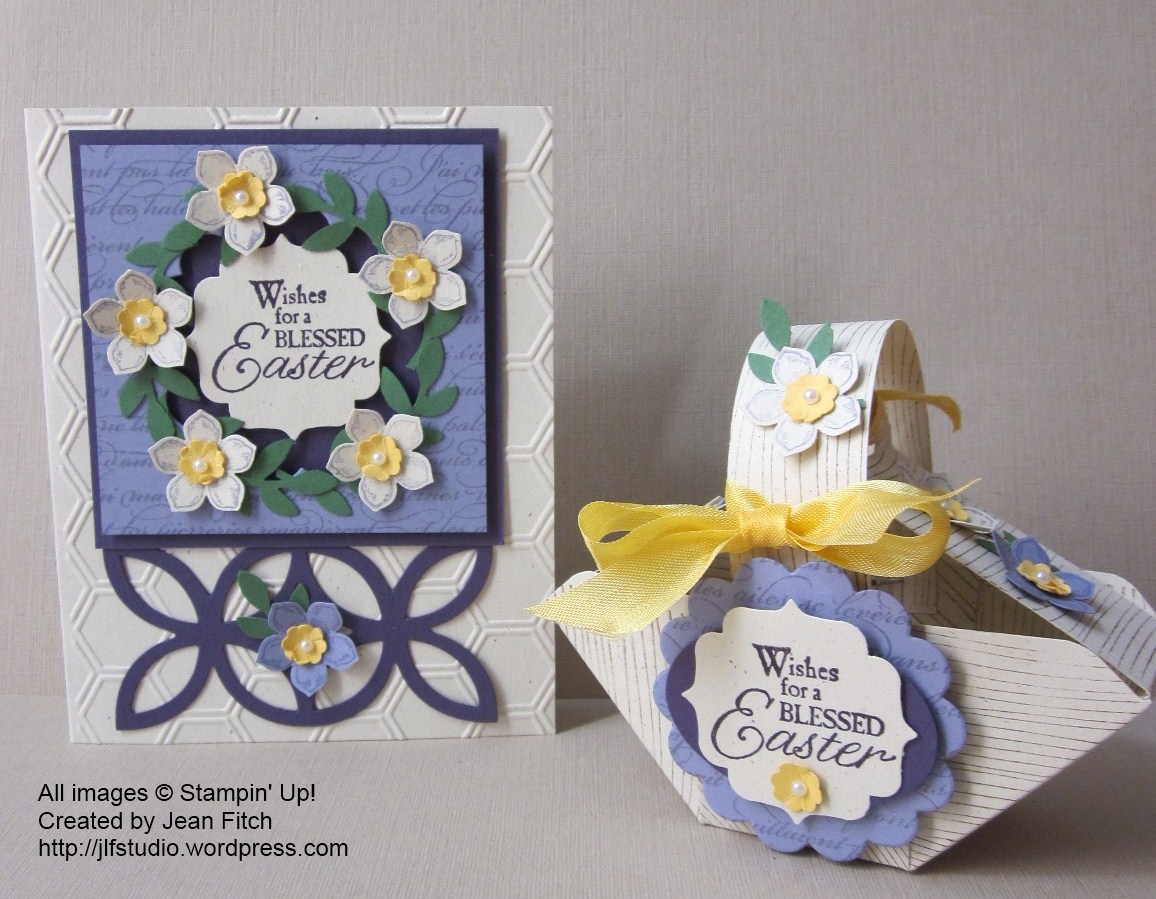
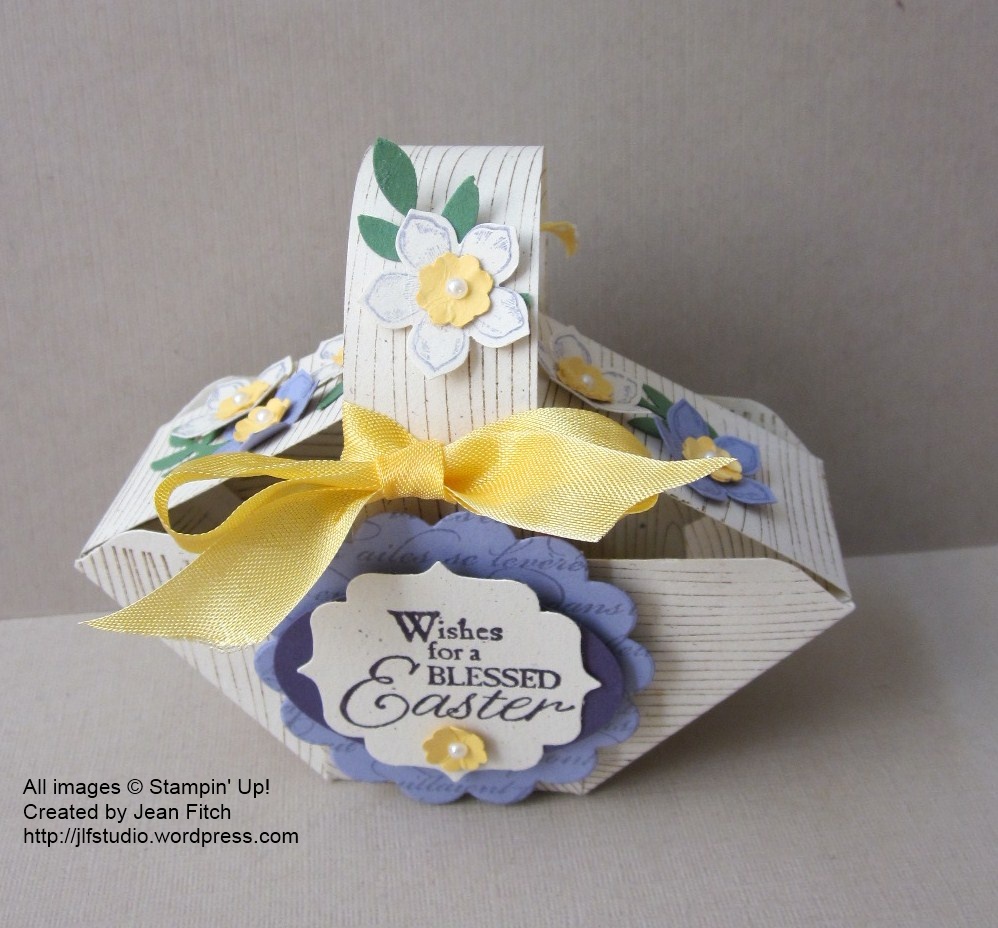
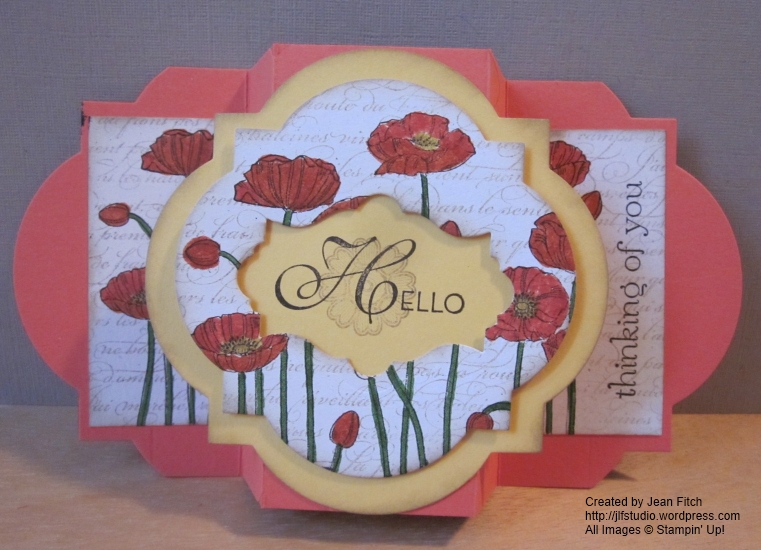
 

Here’s mine:

WCC05 Color Challenge   - created by  Jean Fitch using Work of Art and other Stampin' Up Supplies

Supplies:

Stamps:  Work of Art, Happy Watercolor (retired from Occasions 2014 catalog)

Paper: Rich Razzleberry, Crumb Cake, Very Vanilla Cardstocks.   Epic Day Designer Series Paper (retired)

Ink:  Rich Razzleberry, Daffodil Delight

Other: Big Shot,  Hearts Collection Framelits,  Adorning Accents Edgelit (retired) ,  Adorning Accents Embossing Folder (retired), Large Heart Punch (retired), Small Heart Punch (retired), Basics Jewels Rhinestones, 3/8″ Crumb Cake Taffeta Ribbon (retired).


I had a fun time with this challenge.   Especially because, as luck would have it, I had many scraps and project pieces littering my work space in exactly these colors.   That’s my excuse for using several retired items too!   Gotta clean up the work space right?  No matter the dates of the materials?  LOL

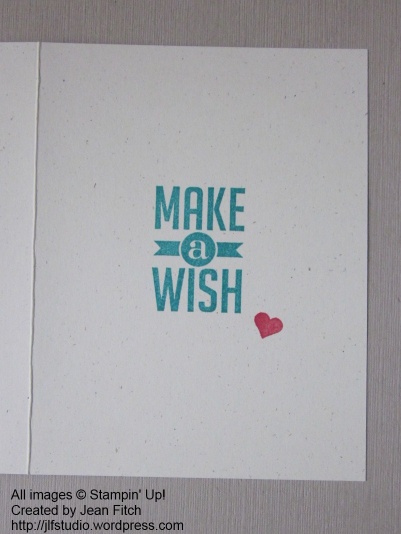
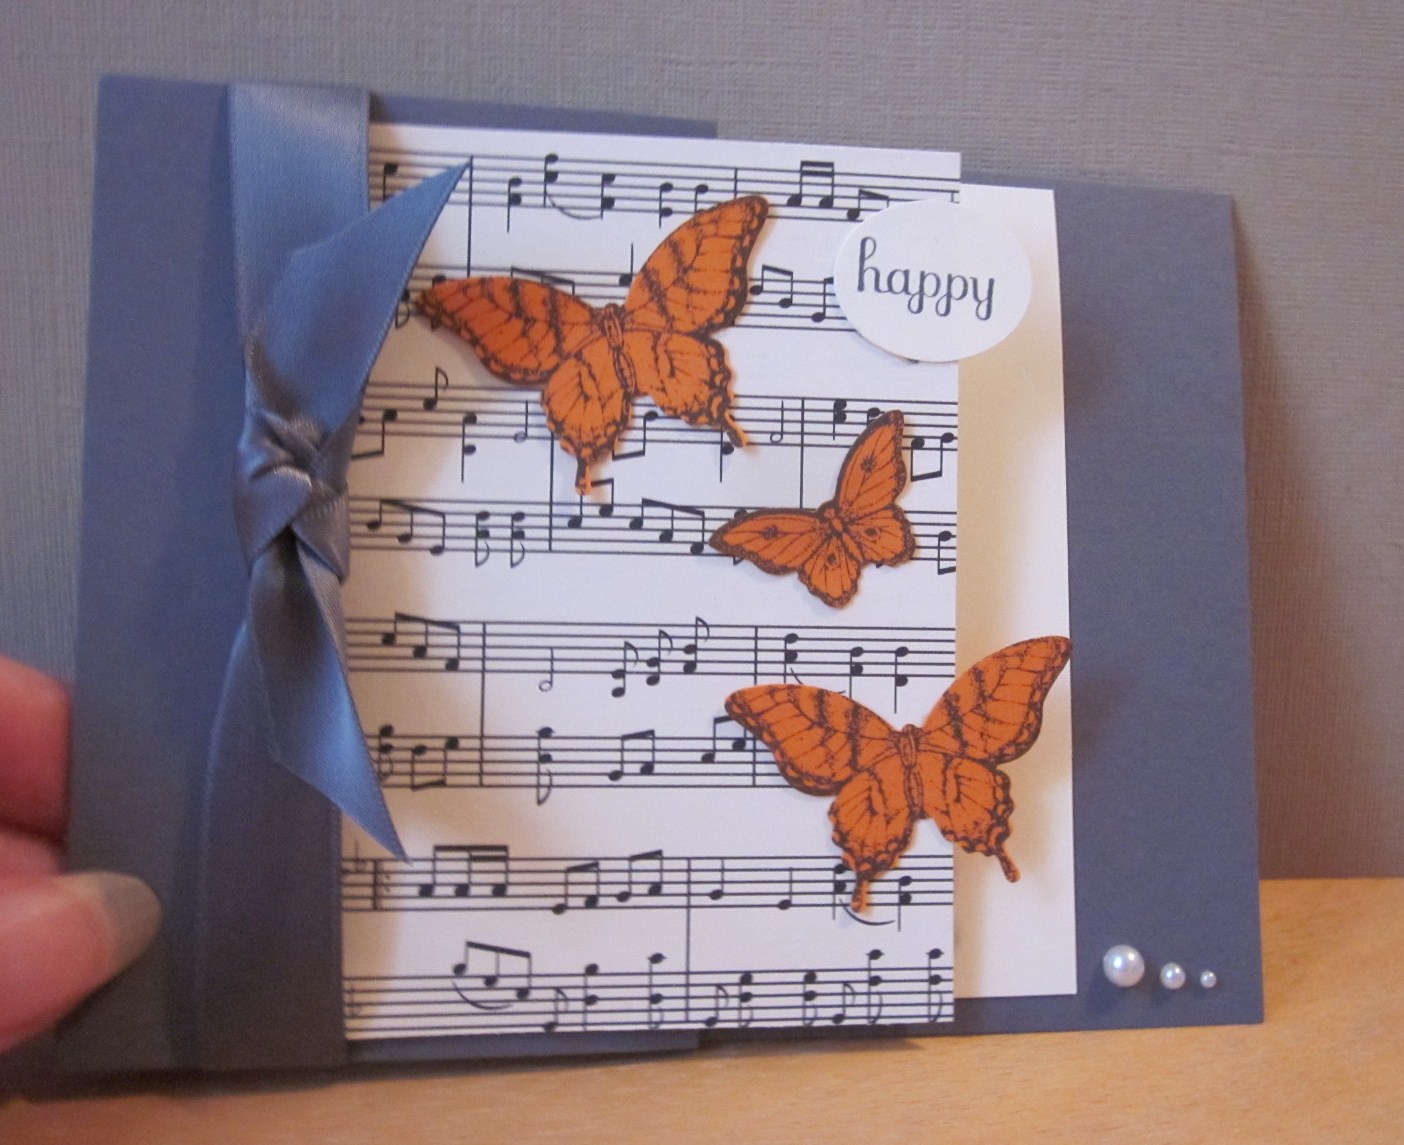
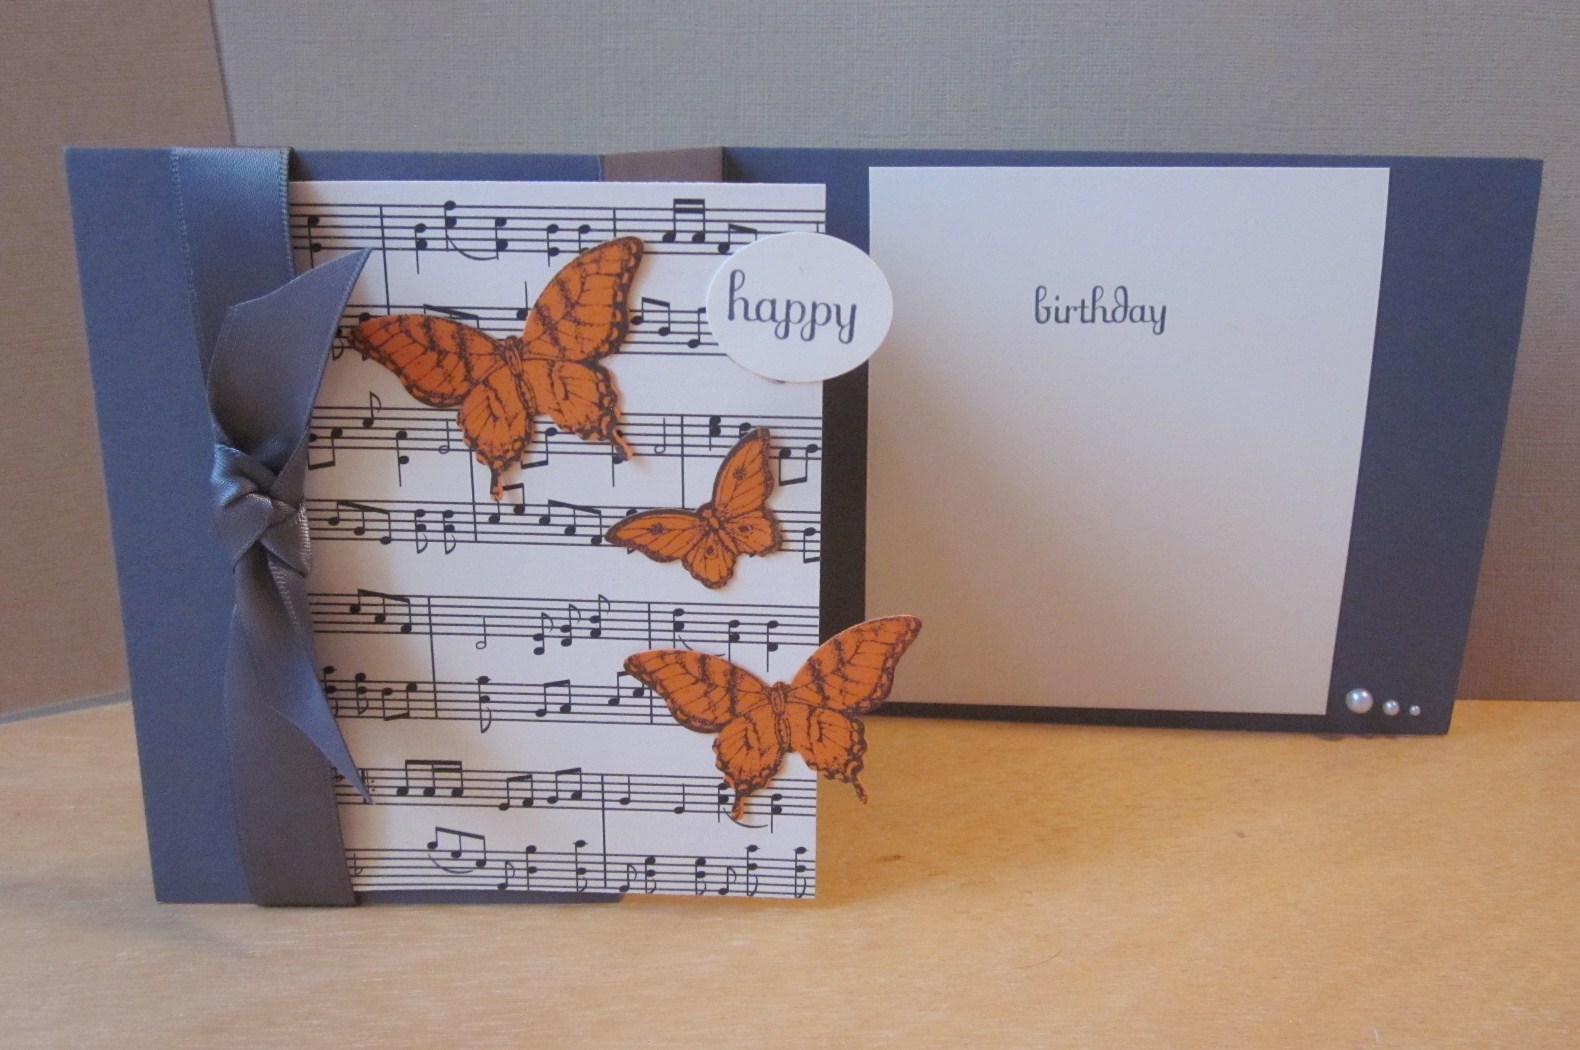
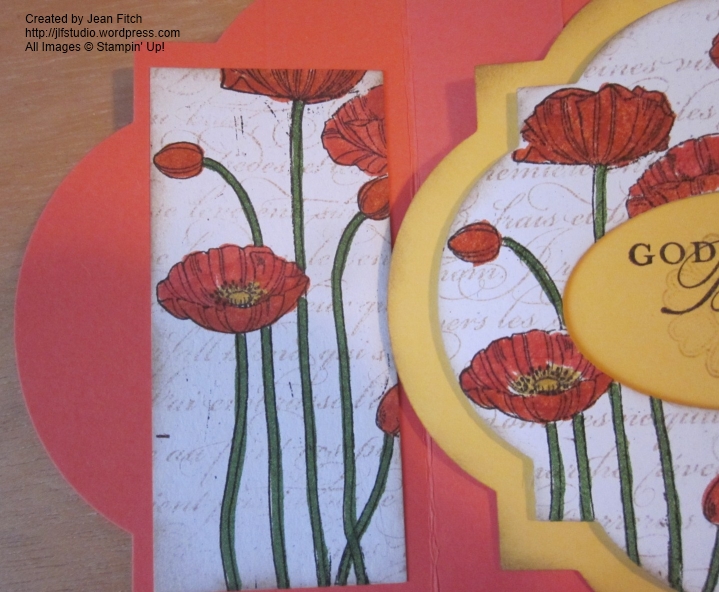
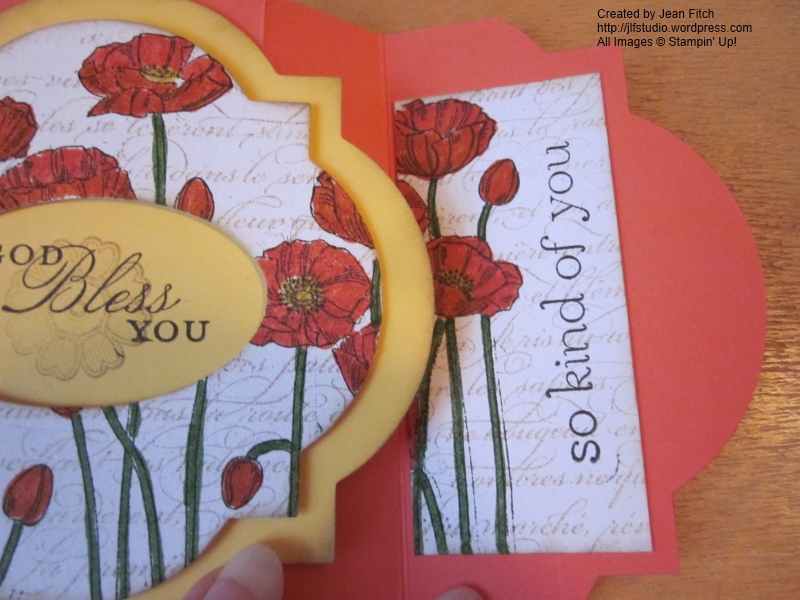
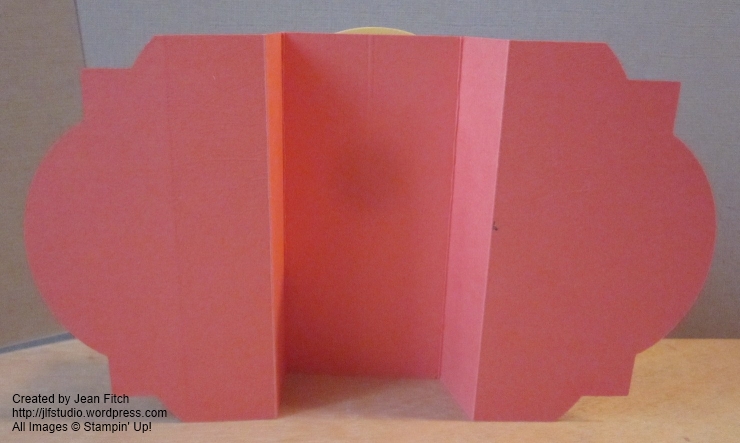
At some point in the last year or so I had created the Rich Razzleberry card base.   I was experimenting with edgelits and embossing folders that were new to me at the time but never got around to creating a fully finished card.   This was pre the Big Shot Magnetic platform and I probably thought that trying to create this with customers would be a bit of a challenge to get it all lined up and cut straight.   The two hearts were scraps from one of last years favorite DSP’s – Epic Day.   The perfect Daffodil Delight accent and I used last years large heart punch to create a layering piece in Rich Razzleberry.    Since the card base already had the little embossed hearts it seemed the perfect lead in to a heart theme which of course led me to use Thank You as a sentiment and create my own heart themed background.   And wouldn’t you know…last Spring’s Occasions set Happy Watercolor has the perfect sized Thank You and was sitting out just waiting to be added to that visible section of the inside of the card (I think my young nephew would call this a peekaboo card since some of the inside peeks through).     Don’t you love happenstance when you are creating on a deadline?   The eye settles here and there and it all just happens to go together!  SWEET!

Of course my latest favorite stamp set Work of Art was also already on the desk.  That set is sure turning out to be a work horse for me given it’s terrific versatility.  I wasn’t sure the two stamps that make up the Thank You would fit on the die cut heart I had already cut, but as luck (and happenstance) would have it, it did.   The bow even tied correctly the second time around (now that’s a first for me).  Somehow I have a feeling my much loved husband Steve was looking over my shoulder from Heaven and egging me on.  Placing everything I needed ready to hand.   Wouldn’t be the first time and Friday (when I was working on this) would have been our 33rd wedding anniversary.  So…yep…I’ll take all the angelic help I can get…especially when half my current supplies are still packed from my last event!

On another subject….I came across the following on Pinterest the other day.  Looks like a good set of points  to ponder for a weekend.    Of course doing would be even better right?    LOL

Life thoughtsI hope you are having a blessed weekend too and finding time to stamp.   Grab your colors and your scraps and join in.

Hugs, love and blessings to all of you –

Jean Fitch in pink

Happy Birthday Marsha: Friends Forever Baby Cakes!


Dearest Marsha,

May you do all this on your special day……


Dance, Laugh, Create, Dream

My buddy Marsha is having a birthday today so I thought I’d send her cyber wishes in case her card is late getting through all that snow between us.   The picture above carries all the ways I hope she is celebrating today.

*****


Happy Birthday Marsha: Friends Forever Baby Cakes!

Friends forever Baby Cakes - Marshas Birthday card

Marsha and I met through Stampin’ Up! as fellow demos, then we became blogging buddies through shared blog hops and the friendship grew from there.  Now a few years down the road a day rarely passes when we two, slightly older,  broads don’t chat.    Phone buddies really are wonderful aren’t they?  Someone to share the day with, the joys and the frustrations.   When something big happens I know I can call and when something is driving me wild I can call too.   Of course I may hear her famous…”suck it up buttercup” line but hey…that’s what friends are for right?  To celebrate with us and laugh with us and bring us up short when we need it.   If you want a bit of inspiration that covers many genres take a look at Marsha’s blog here.

Well today is Marsha’s special day and I want to celebrate it with a card I created with her in mind.    Of course, I promptly decided after creating it, that it was so cute I had to share it with stamping buddies at a Stamp a Stack last week too!  LOL


Here’s a view of the card with the tag pulled up:

Friends Forever Baby Cakes with tag

And of course the inside (before I added the mushy birthday greetings )

Friends Forever Baby Cakes - inside

Supplies:

Stamps: Perfect Pennants (Occasions Catalog), Banner Greetings (hostess set),  Banner Blast (Sale-a-Bration)

Ink: Real Red, Bermuda Bay, Baked Brown Sugar

Paper: Naturals Ivory, Real Red, Bermuda Bay, Baked Brown Sugar,  Crushed Curry, Very Vanilla

Punches: Scalloped Tag Topper, Elegant Butterfly, Small Butterfly, Small Heart, Itty Bitty Punch Pack, Scallop Border

Other: Big Shot, Polka Dots embossing folder, Honeycomb embossing folder, Stapler, Long Bladed Scissors, Daffodil Delight ¼” Stitched Grosgrain Ribbon

*****

When I post the rest of the Stamp a Stack projects I’ll share the template and directions I created for both the card and the pocket.

I was so jazzed when my brain looked at a pocket created with the old Scalloped Envelope die cut and immediately saw how to create something similar with the new Scalloped Tag Topper punch.   Gotta love creativity when it hits in a timely fashion right?   Makes one do a happy dance!   So of course all that creative happy dancing put me in mind of Marsha’s upcoming birthday and you saw the result!

Don’t forget…tonight at midnight (well really 11:50 pm)  the coach becomes a pumpkin, the horses return to mice and the last call for Sale-a-Bration orders will be heard.

Don’t miss out on the Banner Blast stamp set, the Banner punch, and so much more….email me your order quick so I can get it in under the deadline or place the order here and select me as your demonstrator.  Many thanks for a wonderful SAB celebration.

And one last wish for you Miss Marsha:

birthday_candles

Hugs and Blessings –

Jean Fitch in pink

Happy St. Patrick’s Day!

St. Patrick's Day banner

Whether you celebrate it in the religious manner

with Mass and sermons on the Trinity

St. Patrick

or

 your thoughts turn to gold & rainbows

pot o goldToday is the day everyone is Irish

and wears a bit of the green.

green sheep

*****

Here’s how we celebrated at our March  Stamp Camp.

And check further down in the post to see how you can celebrate with

Free Shipping today!

Lucky Day Card - March 2014 Stamp Camp - watermarked

Once again the Envelope Punch Board was front and center creating the grass and my many punches did the rest.  I’ve been hooked on all the sun’s everyone is creating with the new Banner punch from Sale-a-Bration (luckily you still have a couple of weeks to take advantage of getting it for free!) so had to try my hand at one.

I counted them up and in addition to the Envelope Punch Board which probably qualifies as a punch in and of itself I used 12 other punches to create this card!  I think that’s a record for me.  It sure added to the weight of the boxes being transported to the church hall for this event.  Filled the center of the table too.

Here’s the supply list.

Supplies:

Stamps:Occasions Alphabet, Petite Petals, Teeny Tiny Wishes & Trust God (inside).  Assortment of retired St. Patrick’s Day stamps.

Ink: Gumball Green, Real Red (optional Black Journaling pen/marker for making a sun face.)

Paper: Gumball Green (1”x 4-1/4”), Real Red, Daffodil Delight, Naturals White, Basic Black Cardstock & Champagne Glimmer Paper.  Little hearts: Real Red, Daffodil Delight, Pear Pizzazz, Gumball Green, Island Indigo, Pumpkin Pie

Punches: 1-3/8” Circle, Petite Petals, 1-1/4” Scallop Circle, Decorative Label, Owl Builder, Word Window, Banner (from SAB), Bird Builder, Scallop Oval, Small Oval, Large Oval, Itty Bitty Punch Pack.

Other: Envelope Punch Board, Big Shot, Square Lattice embossing folder, Daffodil Delight ¼” stitched grosgrain ribbon, two way glue pen, tweezers, adhesives.

And here are the directions I shared with my stamp camp attendees:

Lucky Day Card Directions with picture

And a few tips on creating the various elements (no worries…these pictures are also in the directions):

Line up the 8 banner punched pieces on the back of the sun circle in two sets of overlapping squares.   Then run through the Big Shot with the Square Lattice folder and add another circle on top.

sun piecessun pieces

For the Pot O’ Gold I punched a Decorative Label piece then put the half piece on a post it note for better control and using the small oval punch I snipped just a hint out of the middle to get rid of the point and preserve the “legs” for the pot.  Added a word window punch and a half a scalloped circle of glimmer paper and there’s the pot.

Pot o' Gold

For the grass I created a base piece and a rick rack piece.  Embossed with the Square Lattice and overlaid the two pieces at the base of the card.

Create your two grass strips with the two 1”x 4-1/4” Gumball Green strips + the Envelope Punch Board. Strip 1: Place the strip first with the edge of the paper lined up with the tip of the score guide. Punch.

First punch lined up with the score guide

Slide strip over to the 1-1/2” mark, punch. Slide strip to the 2-1/2” mark, punch. Continue sliding down 1 more inch and punching till you reach the end of the strip.

Strip 2: Create the same as Strip 1 then flip over and center each “mountain” then punch, continue sliding and aligning and punching till you have a full rick rack looking strip.

Punching between the hills

Base & rick rack pieces to form grass

Place both completed strips in the Square Lattice embossing folder the longways and run through the Big Shot. Over lap both strips so you have a series of peaks and valleys between the two strips, adhere strips together and then adhere “grass” piece to card base. Trim edges if necessary.

overlapping base and rick rack

Cool trick isn’t it.  Creating rick rack with the Envelope Punch Board.   It does take a bit of flipping around to get the right orientation so the peaks show between the valleys but it’s a fun puzzle.    Of course if you have the Tasteful Trim die it might be a bit quicker but I love that with the Envelope Punch Board I’m not limited to the length of the rick rack pieces I create.   Oh…and the “mountain” base piece also works for a sponging mask to create hills.  Especially if you vary the measurements you use to punch the base.

Hope you’ve enjoyed this fun project.  I can’t tell you how many movies I watched while punching enough “owl” hearts for 12 people to create this card.  Fun!

Please note:   In honor of St. Patrick’s Day I am offering FREE shipping on any Stampin’ Up! orders over $25 placed today March 17th 2014!

And don’t forget to pick up more FREE product during the last two weeks of Sale-a-bration.  I’d be happy to be your demonstrator.  When you click on the online store button in the sidebar select me as your demo and place your order.    I especially recommend the Envelope Punch Board.  It really is a wonder!   You can see what else it can do on my Pinterest board here.

You have a couple options for ordering:

  • Visit the online store, select me as your demonstrator in your profile and place your order~ I will refund your shipping after the order is placed or
  • Email me at  jlfstudio@live.com  and let me know what you want to order – include your phone number and email ~ I will then contact you to make arrangements for payment minus shipping.
  • Don’t forget to place your order (minimum $25) or send your email before Midnight – March 17, 2014 to get your free shipping.  😀

*****

To celebrate my own Irish roots let me leave you with this traditional blessing and a few YouTube videos with blessings and Celtic music to enjoy the day.

Irish Blessing card 2-500x500

Hugs & blessings – Jean

The Wacky Watercooler March Blog Hop – Anything Goes!

Wacky Watercooler New Catalog(ue) Blog Hop

Welcome everyone to the Wacky Watercooler March Blog Hop.   This month…Anything Goes!   If it’s current we’re featuring it.   The Wacky Watercooler people are an international crew so don’t be surprised if you see a few different spellings and price guides along the way.   The Occasions Catalog & Sale-a-Bration are still going and if you want some inspiration along those lines check out our last couple of hops here and here.

If you are moving in hop order you’ve arrived from the very talented Heidi Weaver’s blog.   Heidi’s always the first on my list to check every day – her projects never fail to excite me.  You’ll definitely want to go back and check her past posts after the hop.   If you are working in reverse order weren’t your socks knocked off by Jeanne’s  wonderful projects?  Jeanne is our American living in Germany addition to our Watercooler Hop schedule as well as a dear friend I discovered through stamping and hers is another blog to investigate after the hop for sure!   Her cooking and family stories and what can I say…wacky style will keep you scrolling for hours.

However you are viewing the hop we’ve built it in a circle so you can join and hop on and off at will.   If you get lost just click the hop banner or the home watercooler to get back to our hop home site with the list of participants.    You may want to keep an eye on that site in between blog hops as we have plans to post somewhat regularly there too.

*****

Here’s my first entry.

Petite Petals Blessed Easter Duo

Petite Petals Easter Duo - watermarked

And a couple of close ups:

Petite Petals Blessed Easter Card - watermarked

Blessed Easter Petal Basket - watermarked

Have I mentioned that I love the new Stampin’ Up!  Envelope Punch Board?   Yep…it’s my latest heart throb.  I can’t stop making and inventing things with it.   I’ve even created a Pinterest Board here with a steadily growing set of projects to CASE.    And that lovely punch board makes this basket so very, very easy!   The little basket is a CASE more or less from a fellow demo and you can find more information in this pin.   This is another one of those projects that I’m prepping a tutorial for and that you’ll find yourself wanting to make over and over for many occasions.

Supplies:

Stamps: Petite Petals, Blessed Easter, Woodgrain (basket), En Francais

Ink: Wisteria Wonder, Elegant Eggplant, Soft Suede (basket)

Paper: Naturals Ivory, Garden Green, Elegant Eggplant, Daffodil Delight, Wisteria Wonder

Punches:  Scallop Tag Topper , Bird Builder  (for the branch), Petite Petals, Label Bracket , Extra Large oval

Other: Big Shot, Lattice Die, Honeycomb Embossing Folder, Circle Thinlit Card Accessory dies,  mini silver brads, Daffodil Delight Ribbon – Seam Binding & Stitched Grosgrain, Piercing Tool, Pearls Basic Jewels,

*****

Here’s another Lattice Cross  project and a link to a quick tutorial/template  for the cross part of it.

This time I’m also using the Scallop Tag Topper punch  that would also fit as part of the grouping above.   Can you tell I’m in love with the Petite Petals punch & stamp set?   Not to mention the En Francais background stamp?   I’ll have a picture tutorial available for this little darling next week.  Just one more picture to take and it’s done!  I think you’ll be surprised at just how easy this box is to make.  Trust me when I say you’ll soon be addicted!   I think you’ll also see this hop that I’m hooked on the Scallop Tag Topper Punch as well.

Tag Topper Lattice Cross Box - watermarked

Supplies:

Stamps: Petite Petals, En Français (background), Teeny Tiny Wishes

 Paper: Pear Pizzazz, Naturals Ivory, Wisteria Wonder, Garden Green, Elegant Eggplant, Daffodil Delight

 Ink: Garden Green, Elegant Eggplant, Wisteria Wonder

 Punches: Scallop Tag Topper, Petite Petals, Itty Bitty Punch Pack (scallop Circle), Bird Builder (leaves), Banner (tag end)

 Other: Big Shot, Lattice Bigz die, Simply Scored Board, Paper Snips, Sticky Strip, Adhesives, Daffodil Delight Seam Binding, Pearl Basic Jewels.

*****

  Next up is one I’m sending out at Passover this year.   If you remember the Hanukkah Hop from a couple of years ago you’ll remember that I love these Star Fold cards.  This time around I wanted the look and texture of  matzo bread – a traditional accompaniment to a Seder meal.   And the dove with olive branch is another potent symbol for this celebration.   Just as Judaism predates and provides a foundation for Christianity so this year Passover is preceding Easter by just a few days.  Appropriate don’t you think?  I’ll be sharing more about this card later next week so if you want to see the inside and find links to a tutorial (the Hanukkah Hop link has a basic tutorial link) check back.

Star Fold Chag Sameach - watermarked

Supplies:

Stamps: Jewish Celebrations (interior)

Ink: Midnight Muse (interior)

Paper: Very Vanilla, Garden Green, Whisper White, Midnight Muse Cardstock.  Champagne Glimmer Paper

Punches: Bird Builder, 2-1/2″ Circle, 2-3/8″ Scallop Circle

Other: Big Shot, Square Lattice Embossing folder, Simply Scored Scoring Tool, Dimensionals

*****

And lastly a quick look at a gift card/business card holder I’ve just created.  I’ll have more details for this in a follow up post next week.  Just thought you’d like a quick peek.

Chick Card Holder all in one - watermarked

Chick Gift Card Holder in pieces - watermarked

Needless to say…I’m working on a tutorial for this one too.  Since I just invented it last night it may just take another week to get it to you.  Still…in plenty of time for Easter.

Supplies:

Stamps: Teeny Tiny Wishes

Ink: Stazon Black, Crushed Curry (inked on the Honeycomb embossing folder)

Paper: Whisper White, Daffodil Delight, Real Red, Basic Black, Gumball Green, Pumpkin Pie

Punches: 2-3/8″ Scallop Circle, Petite Petals, Small Heart, Owl Builder (heart & eyes), 1″ Square, Scallop Tag Topper, Bird Builder, Extra Large Oval, itty bitty punch pack

Other: Big Shot, Ovals Collection Framelits, Circle Card Thinlit accessory dies, Honeycomb embossing folder, Argyle embossing folder, Polka Dots Embossing Folder.  Whisper White 3/8″ Taffeta Ribbon, Daffodil Delight 1/4″ stitched Grosgrain Ribbon

*****

That’s it for my post for this third Watercooler Hop of 2014.   Hop along now to see the rest of the fabulous hop entries and look for our Wacky Watercooler crew in the coming months as we create more new hops for your viewing and crafting pleasure.   Click the watercooler buttons to find your way and may your Season of Sale-a-Bration (January 28th-March 31st) be filled with creativity, inspiration and of course lots of FREE new stamping stuff!

Home Buttonnext watercooler crock buttonPrevious Button

Wacky Watercooler Project PDF available

Hi All,

I’ve had a few requests for a PDF of the recent hop projects I showed here.   So cut and paste to the rescue as well as Open Office and its PDF generator and you’ll find pictures, supply lists and a few basic tips for completion to add to your CASE files.  Hope that answers the requests.

 Wacky Watercooler 2014 SAB Blog Hop – Jean’s Projects – PDF file

Hope too, you had a wonderful Valentine’s Day and fun time hopping with the Wacky Watercooler Crew.

Here’s a review of the projects:

Mini File Folder Treat Holder - Wacky Watercooler SAB Blog Hop You're Lovely Banner Card - Wacky Watercooler SAB Blog Hop You're Lovely Gift Bag-Box - Wacky Watercooler SAB Blog HopDon’t forget you can order any needed materials and earn your Sale-a-Bration rewards in my online store here.

Hugs & Blessings – Jean

The Wacky Watercooler February Sale-a-Bration Blog Hop

Wacky Watercooler New Catalog(ue) Blog Hop

Welcome everyone to the Wacky Watercooler February Sale-a-Bration Blog Hop.   We’re an international crew so don’t be surprised if you see a few different spellings and price guides along the way.  To clear up any confusion…here in the States it takes a $50 purchase to earn a FREE Sale-a-Bration item…the pricing in other parts of the globe may vary so don’t be surprised if you see different listings in different catalogs from different countries during the hop.

While we also have a nearly new Occasions Catalog(ue) as you saw in last month’s hop, today’s hop is focusing on Sale-a-Bration and all it’s awesome FREE goodies!   Whoo hoo!  Who doesn’t love FREE…right?  If you haven’t seen the new Sale-a-Bration (SAB) catalog take a quick gander then jump right back into the hop.  With all the inspiring hop projects you’ll see you’ll also want to keep a pen and order form handy so you can create your very own versions of what you see this weekend…and…earn FREE products while doing so!

SAB brochure imageClick image to download the brochure

You’ve never before seen such a full Sale-a-Brations Catalog.  Lots of inspiring samples, additional offers for hostesses and recruits and a few suggestions for other catalog products that will get you to that $50 goal.  If you like the bundle listed there is even a simple and single order number…if you already have some of those items just add the items individually to create the “bundle” you do want to earn your FREE items.

Something else to note…if you fall in love with the new Decorative Dots embossing folder or the new Banner punch don’t despair if you forget to opt for those.  Both of those cool new products will be available for sale in the upcoming 2014-2015 Annual Catalog

Here’s the U.S.  2014 Occasions Catalog you might like to select your $50  incremental purchases from so you can earn your FREE SAB merchandise.  Of course any of our currently offered products and merchandise promotions will help you earn your way to FREE SAB product.

2014 Occasions Catalog

Occasions Stampin’ Supplies  (PDF)

Revised Holiday Carryover List (PDF)

If you are moving in hop order you’ve arrived from the very talented Jackie’s Jack Otter Stamp blog.   I love the title of her blog…love Jackie too – her blog title really gives you a sense of her fun side.  You’ll definitely want to go back and check her past posts after the hop.   If you are working in reverse order weren’t your socks knocked off by Susan’s wonderful projects?   Susan is a wonderful new addition to our Watercooler Hop schedule as well as a dear friend I discovered through stamping and hers is another blog to investigate after the hop for sure!

However you are viewing the hop we’ve built it in a circle so you can join and hop on and off at will.   If you get lost just click the hop banner or the home watercooler to get back to our hop home site with the list of participants.    You may want to keep an eye on that site in between blog hops as we have plans to post somewhat regularly there too.

*****

As I mentioned last hop… in this new year…I’m keeping it fresh & simple with designs you can create quickly and cleanly…you can even prep some pieces ahead so when you are ready to sit down and create it will literally only take you minutes.   Today’s trio of hop projects illustrates that perfectly.  With February being notorious for crisp clear colors like red and white (well Valentine’s as well as Winter probably has something to do with that color set) I’ve chosen to go Real Red, Whisper White and a hint of one of our latest In Colors – Coastal Cabana.  All three projects work well together as a set or for individual uses.  The designs also adapt themselves to pretty much any color scheme all year round.

Edited to Add:  I’ve had a few requests for a PDF for this set of projects so I’ve put together a very basic collection of the pictures, supply lists and basic tips.  You can download it here.

*****

You’re Lovely Treat Bag/Box

You're Lovely Bag - watermarked

Box measures: 4″ x 3-1/2″ x 1-1/2″

First up is a sweet little box/bag.  Practical too as you can get 2 box/bags out of a single sheet of 12″ x 12″ cardstock or Designer Series Paper.  I found the perfect tutorial on a fellow demo’s blog and of course quickly pinned it to my Pinterest Simply Score Board.  You can see it here.  Thanks Jill for taking the math work out of this fun creation.  Just score, fold, adhere, add handles and go.   I’ve substituted the Sweater Trim from the Clearance Rack (yes those reduced price purchases also qualify you for free merchandise from SAB) for the Cotton Ribbon Jill used.   This size is so handy for a variety of treats and gifts that you may want to keep several on hand in a variety of colors ready for quick decoration for any occasion.   I like to keep them folded flat but scored and then just add Sticky Strip for a quick construction and decoration.

You're Lovely Bag Side View - watermarkedSide view of the bag/box

Supplies:

Stamps: You’re Lovely (SAB) 133575 wood and 133578 clear

Ink: Coastal Cabana, Real Red

Paper: Whisper White and Real Red Core’dinations Cardstock

Other: Big Shot,  Deco Labels Collection Framelits, 1 ¾” Circle Punch, Stampin’ Dimensionals, Basic Rhinestones, Whisper White Sweater Trim (Clearance Rack), Simply Scored, Bone folder, Crop-a-Dile.

*****

You’re Lovely Banner Style Card

You're Lovely Banner Card - watermarked

You're Lovely Banner Card - points down - watermarkedShown points down so you can see the banner effect.

I’ve had my eye on a creating a banner style card for some time now.   It’s filled my thoughts, my sketches and even my dreams…lots of them.   With hop, it seemed today was the day!   Now that I’ve done one I can see more in my future.   Lots of fun and very easy.  I’m also hoping that having made one my dream self will be satisfied that I won’t forget how to do these.

Details:  Measure to the halfway point on your card, make a mark.  Then draw a line straight up from that mark to the height you want for your banner indent.  Then using either your trimmer or long bladed pair of Craft Scissors cut from the corner point to that end point of your indent mark.   Do that for both sides and Voila!   A banner card.   A bit of contrasting color on the inside so the banner points show up clearly and you are ready with your banner card base.  Add decoration and there you have it.  A simple but effective design anyone of any gender will enjoy.

One note about embossing the front of the card.  Some folders including the Square Lattice will shrink the front edge of your card back just a bit so you may want to wait to score the card’s fold until after you’ve embossed the front end unless you enjoy fixing boo boo’s with the trimmer.  Uh huh…ask me how I learned this tip.   Sigh….

Supplies:

Stamps: You’re Lovely (SAB) 133575 wood and 133578 clear

Ink: Coastal Cabana, Real Red

Paper: Coastal Cabana, Real Red, Whisper White, Fresh Prints Designer Series Paper Pack

Other: Big Shot, Square Lattice Embossing folder,  Deco Labels Collection Framelits, 1 ¾” Circle Punch, Stampin’ Dimensionals, Basic Rhinestones, Whisper White 3/8″ Taffeta Ribbon, Simply Scored, Bone folder.

*****

Last and perhaps simplest yet….a mini file folder that holds a Hershey’s treat.   If it’s Feb. 13 and your darling daughter or son just asked you for Valentine’s treats for school this may be your life saver.  Otherwise it’s a nice treat to drop in a lunch or place on a coworkers desk.   Nice on a pillow too! 😀     If you want to kick it up a notch you could run the Coastal Cabana piece through the Adorning Accents mini hearts embossing folder.  Of course I thought that might be just a bit too precious for the boy this folder is destined for.

Mini File Folder Treat Holder

Chocolate File Folder - watermarked

Hershey's File Folder - watermarked

Pairs beautifully with either the coordinating card or  bag:

You're Lovely Card and Mini Chocolate Folder - watermarked

You're Lovely Bag & Chocolate File Folder - watermarked

Supplies:

Stamps: Fabulous Phrases

Ink: Real Red

Paper: Real Red, Whisper White & Coastal Cabana Cardstocks.  Silver & Red Glimmer Papers.

Punches: Small Heart & Word Window

Other: Envelope Punch Board (#133774), Linen Thread, Hershey’s bar (or other similar sized)

*****

Have I mentioned that I love the new Stampin’ Up!  Envelope Punch Board?   Yep…it’s my latest heart throb.  I’ve even created a Pinterest Board here with a steadily growing set of projects to CASE.

Here’s the quick and simple details for the Mini File Folder Treat Holder.  Start with a 4″ square piece of cardstock and score at 2″ & 2-1/4″ in one direction.   Fold and crease with a bone folder.   Open out flat and using the Envelope Punch Board, place the left edge of the paper centered in the opening and punch.  Then slide the edge over to the 2″ marking and punch again.   Flip to the other end of the paper and repeat for a second tab.   Then use your Stampin’ Trimmer to trim the excess cardstock by aligning the bottom of dips/troughs of the punched sections along the cutting line.   Fold up around the candy bar.  Use Linen thread (Washi Tape works too) to wrap around and secure the candy in the folder.   Decorate as the spirit moves you.   Better be fast though so you don’t succumb to the lure of the chocolate within the folder.  To be on the safe side it helps to have a few extra bars around than you need to complete your project.  Unless of course your willpower is much, much greater than mine.  😀

Note:  After I completed my project I discovered another demo had made a fun video showing much the same thing (don’t you love it when great minds think alike?) and that might help you see the steps.  Our measurements and candy choice are different but sometimes seeing the process makes it easier to follow a description.  You can find my pin of Becky’s post and video here.  Just click the Pinterest pin’s picture and you’ll be right where you can see it all.

*****

That’s it for my post for this second Watercooler Hop of 2014.   Hop along now to see the rest of the fabulous hop entries and look for our Wacky Watercooler crew in the coming months as we create more new hops for your viewing and crafting pleasure.   Click the watercooler buttons to find your way and may your Season of Sale-a-Bration (January 28th-March 31st) be filled with creativity, inspiration and of course lots of FREE new stamping stuff!

Home Buttonnext watercooler crock buttonPrevious Button

Guest Artist goes Grunge!

Yep…Linda is back as my guest artist again and this time she does Grunge…Gorgeously!

Check it out.  This was Linda’s second project from our most recent Stamp Camp.  Don’t you wish you could have been there to make one for yourself?   We have a gift camp coming up this Saturday if you’d like to join us.  We’ll make several gift type projects so you can get a jump on your holiday gift planning.

For this project Linda took her inspiration from one of the make and takes from the 2013 Stampin Up Convention.  Linda was lucky enough to attend this year’s 25th Anniversary Convention and brought back lots and lots of ideas and has been busy sharing the inspiration and excitement of her experiences in Salt Lake City.  She also brought back some loot for Cheryl and I in the form of Memento Mall goodies.  Don’t you love friends who bring you gifts from a trip?  Very special.  Will have to dedicate a post just to that sometime soon!   something else she brought back was hundred’s of swaps!   Lucky Linda now has loads of inspiration for those days when the mojo runs dry.  As you can see from this card though…her mojo is just fine!


Gorgeous Grunge - Linda Miller


Here it is paired with a gorgeously grungy envelope too!

Gorgeous Grunge Combo - Linda Miller

Linda has been kind enough to hook us all up with her supply list and directions.

Supplies:

Stamp Sets: Gorgeous Grunge, Hello, Lovely

Card Stock: Whisper White, Crisp Cantaloupe, Coastal Cabana, Silver Glimmer

Ink: Bermuda Bay, Crisp Cantaloupe, Coastal Cabana, Old Olive, Summer Starfruit, Calypso Coral Classic Pad and Marker

Accessories: Whisper White Baker’s Twine 9”, Very Vintage Designer Button, Epic Day This & That Designer Washi Tape, Glue Dots, SNAIL Adhesive, Bone Folder, ” 1 ¾” Circle Punch, Paper Snips, Stamping Sponges, Stamp-a-Ma jig, Simply Scored. Sticky Strip.

Instructions:

  1. Score standard Whisper White card base at 5 ½” with Simply Scored and crease fold with bone folder.
  2. Cut Coastal Cabana Cardstock into an arrow using Paper Snips. Stamp ½ of arrow lengthwise with the stripe stamp inked with Coastal Cabana onto arrow and then adhere Silver Glimmer paper to the back of the arrow to create the border. (may need to use a little Sticky Strip to get it to hold)
  3. Adhere to card front.
  4. Stamp off the spatter images from Gorgeous Grunge in Bermuda Bay and Summer Starfruit ink on scrap paper, then stamp on the card front and envelope without re-inking the stamp.
  5. Ink the “Hello, Lovely” sentiment from Hello Lovely using a Calypso Coral Stampin’ Write marker and stamp onto Crisp Cantaloupe CS.  Stamp & sign in Crisp Cantaloupe ink and then punch circle out with 1 ¾” Circle punch. Adhere onto card front. (Can use Stamp-a-ma-jig to line up).
  6. Stamp the small arrow in Old Olive ink on Whisper White CS, then cut out the image using Paper Snips. Adhere to Circle on Card front.
  7. Hold the Whisper White  Baker’s Twine on the Coastal Cabana Classic Stampin’ Pad using a Stampin sponge, then pull the twine through the ink to add color.
  8. Pull twine through Button and tie a bow. Then adhere Very Vintage Button onto card front with Glue Dot.
  9. Tear off Epic Day This & That Designer Washi Tape and adhere it to the card and envelope.

10. Stamp sentiment inside.

11. Don’t forget to decorate your envelope.


Thanks Linda!  Grunge never looked so good!

Until next time….

Hugs and blessings – Jean

P.S. If you missed Linda’s last excellent project you can find it here.


Stamp Camp Revisited and a Guest Artist

Today’s post features a guest artist.  My Stampin’ Up partner and sideline Linda Miller.   Linda has been a Stampin’ Up demonstrator for over a decade and her talent shows through in all her projects.    Linda, myself and our wonderful upline Cheryl do monthly events together here in the Medford/Central Point area.  Lots of fun with local stampers who are also friends.  And best of all Linda herself comes as part of a team.   Linda’s Mom Jean comes and runs our regular potluck for us in between overseeing the Church garden.  Her additions to the potluck (this time of year featuring garden produce) and her oversight of the kitchen is a real labor of love.   Love of her daughter and daughter’s friends and love of stamping and cards.   I’ve been blessed to find myself another “other mom” in Jean.  And a sister of the heart in Linda (Cheryl too for that matter).   Wonderful how many hands make light work isn’t it?

Here’s Linda’s latest project from our last Stamp Camp:

A lovely fancy fold card that you see closed here:

Papillon Potpourri Zfold closed - Linda Miller

And open here at it’s full extension:

Papillon Potpourri Zfold - Linda Miller
A variation on a Z fold card.  The ribbon is a retired Basic Gray one but everything else is current.  And don’t you love the pearl accents?  Adds to the elegance of the card.   This is one card that is designed to make the heart sing!   Yep…a bad pun what with the musical notes on the designer series paper.  Simple and quick to make – always my favorite type of card.  You can find a tutorial for a somewhat similar Z fold here.

Supplies:

Stamps:  Papillon Potpourri, Fabulous Phrases

Ink: Basic Gray & Pumpkin Pie

Paper: Basic Gray & Very Vanilla Cardstock, Modern Medley Designer Series Paper (the music).

Other: Elegant Butterfly & Small Butterfly punches,  Basic Jewel Pearls, Adheseives, Ribbon

One note:  If you don’t have the Modern Medley DSP you can always use the Music Notes Wheel to create your very own musical score.  In fact several wheels would work in this design.

If you have any questions for Linda about her project you can contact her through her Demonstrator Business Website here.

Thanks again Linda for being a guest artist.

Hugs and blessings to you all and may you find your own heart taking wing and dancing to the music – Jean


More Cards in the Mail from Convention!

My mailbox runneth over….with more cards in the mail from Convention.  Yep…that’s two out of the 2,984 that created that amazing Guinness World Record for Stampin’ Up!  You can read more about that remarkable achievement here in my previous post.

The friends I’ve made since I took up stamping in 2006 have been amazing.   Close, creative and inspiring.

Karen Huber who sent me this very special & delightful card is one of them.   Karen and I met through Stampin’ Connection (a demonstrator online community site).   And the rest is history.   A fun one involving wacky watercoolers and more!

Blooming With Kindness - Karen Huber - watermarked

After a quick troll through the catalog here’s what I’ve found for Karen’s ingredients.

Stamps:  Blooming with Kindness, Papillon Potpourri

Paper: Afternoon Picnic Designer Series Paper, Very Vanilla, Basic Gray, Crushed Curry, Pear Pizzazz, Coastal Cabana & Wisteria Wonder Cardstocks

Ink: Basic Gray & Wisteria Wonder & Crushed Curry (inside)

Other: Big Shot, Floral Fusion Sizzlit die, Small Butterfly punch, Itty Bitty Punch Pack, Circle Scallop punches, Basic Jewel Rhinestones,  Regals Candy Dots, Basic Gray 1/4″ Stitched Grosgrain Ribbon, dimensionals and adhesive.

This is one happening card!   And a labor of love on Karen’s part.  I can see why this was a popular swap card that’s turning up on some pretty cool blogs all over the Stampin’ Up Ether.   Thanks Karen for making me part of a historic event!     Glad you survived Convention even though it involved hobbling on a broken foot!

Here’s another record setting event Karen and many of my Convention friends also took part in:

Convention 2013 Service Project

While it didn’t earn a plaque or other memento it was certainly memorable as 5800 demonstrators came together to build and fill over 2,000 kits for kids who spend their birthdays in a local Children’s Hospital.   That’s a personal record for Stampin’ Up and a wonderful way to fulfill the 25th Convention goal to Be the Difference!    Do you see that wall art from the Children’s ward?   That’s a Wish Tree Stampin’ Up provided with die cut pieces for kids and their families to add their wishes to the tree on the wall in the Children’s ward.   Here’s a few more pictures showing what it’s all about.

Stampin' Up Wishing Wall Tree at Children's Hospital in SLC

Wish medallions on the wishing tree

Wish medallions on the tree

Stampin Up's wish on the wishing tree

Don’t those wishes blow you away?  It certainly does me.  Also makes me proud to be a part of a company that cares and gives back for and from all of us.   Stampin’ Up works during the year to keep the kids craft cupbards filled as well as providing special things like the birthday kits.   Way to Be the Difference Stampin’ Up!

My wish for you and your families is a joy filled life.   And if you find yourself in hospital on a birthday…I hope you find a box with banners and other celebratory goodies waiting to help you make it a better day.   Of course NOT spending your birthday in a hospital would be even better right?

Hugs and blessings – Jean

Pleasant Poppies in a Layered Fold

I don’t know how you design your cards, especially for an event, but for me it often starts with a basic color and a stamp set I’m determined to use.  In this case the returning color Calypso Coral was high on my list ( I just can’t seem to get enough of that color ) and of course that also brought poppies to mind.

Of course then the whole process came to a screeching halt as I really wanted to do something special and rarely seen before and my brain and my mojo deserted me both at the same time.  It happens that way some days.  😀

Then I remembered that recently I had come across a very fun tutorial on the Splitcoast Stampers (SCS)  website.  The Window Layered Fold tutorial.   It was love at first site!  Truly it was.   And that phenomenon repeated itself when I shared the project below at a recent Stamp Camp.    Then again when Pleasant Poppies (a Stampin’ Up background stamp) is involved what’s not to love.

Here’s the card in its folded position.

To give you an idea of its true size the folded card fits in a standard A2 envelope.

Poppy Window fold - watermarked

Now check it out opened up!

Poppy Layered open - watermarked

Is that cool or what!  Cooler yet…it stands up all by itself with no supports needed.

Here’s a close up of the side details.

Poppy Left detail - watermarked

Poppy right detail - watermarked

One of the truly fun things is that you can vary the center die cut for your texts and it gives a very different look to your project depending on the die selected.   The card looks tricky but is actually quite simple, just follow the steps.  If you have the new Stampin’ Up Magnetic Platform for the Big Shot it’s even easier yet.   I’ve added pictures of other variations at the end of the post.

I’ll also note that this same basic design works with any of our larger dies.  The Squares, Circles, Ovals and really any framelit that fits around the mountain plateau created by the basic folds and has several sizes for mats and focal pieces.

I found my favorite stamp sets for the side lights were Sweet Essentials and Loving Thoughts.   Both sets have nice long verses whose text styles work with a number of word sets – plus the sets have a few short words to go with the long if you prefer the matchy matchy look.

As you can see I kept the basic card background pretty simple and let the poppies speak for themselves.   Of course if you were of a mind to you could add more textured layers and pieces and ribbon and any other embellishments that struck your fancy.

Supplies (for all cards in post):

Stamps: Pleasant Poppies, En Français, Sweet Essentials, Trust God, Loving Thoughts, Fabulous Phrases, Lacy & Lovely

Ink: Crumb Cake & Early Espresso ink pads, Calypso Coral, Tangerine Tango, Gumball Green & Daffodil Delight Markers

Paper: Naturals White, Daffodil Delight, Calypso Coral Cardstock.  Crumb Cake Envelope

Other: Big Shot, Window Frames Framelit, Apothecary Accents Framelits, Oval Framelits, dimensionals & other adhesive.

Sample above made use of Trust in God, Sweet Essentials, En Francais, Pleasant PoppiesLacy & Lovely, Oval Framelit (for text window)

*****

Of course you know I’ll hook you up with a step by step and also a Word Doc of the SCS tutorial – though I would suggest you check out the video too on the SCS site here:

Pleasant Poppies Layered Window Fold Card – August 2013 Blog Post  – Word Doc Directions

Layered Window Frame Tutorial – Word Doc of the basic tutorial from SCS

*****

Here’s a few others including what the back looks like undecorated.

Poppy Window Layerd Card backside - watermarked

Keeping it all in the Window Frame family.

Poppy friends closed - watermarked

Poppy Friends open - watermarked

Poppy Friends Right Detail - watermarked

Apothecary Accents Framelit front and center.

Poppy Hello closed - watermarked

Poppy Hello open - watermarked

You’ll notice this last set fell afoul of an ink pad at last weekends event. 😀  Ah well…luckily the bases are easy to replicate and I can probably lift the panels off and reattach to a new, cleaner base.

*****

Thanks for sharing my little window on the world today.  Yep…really bad pun.  {grin}

If you don’t have poppies in your garden you can always add them to your cards.

Hugs and blessings on a brand new summer day.   – Jean