Merry Christmas!

Merry Christmas from snowy Oregon

Merry Christmas from Snowy Oregon

The snow is falling in curtains, the deicing trucks are moving on the roads and of course it’s cold….so what better time for cocoa and Christmas carols to warm the heart, the spirit and the body!

Luckily I put together some cocoa packets, candy canes and treats to share with neighbors and of course…I had one left over to put under my own tree.  Yep…that’s what my late husband (who was a boy scout) would call planning ahead and being prepared.  {grin}

Here’s a peek in case you want to make your own.  They’re quick, easy and the perfect warm up to share with others.  All you need is some paper, an envelope punch board and the treats.  Of course if you want to glam it up then you’ll want a few other bits too!

Envelope Punch Board Cocoa Treat Packets

Envelope Punch Board Hot Chocolate Pouches - Jean Fitch

Supplies:

Stamps: Jingle all the Way, White Christmas, Cozy Christmas

Ink: Mossy Meadow

Paper: Mossy Meadow Cardstock, Home for Christmas Designer Series Paper, Red Foil

Other: Envelope Punch Board,  Itty Bitty Accents (star) punch pack, Big Shot, Seasonal Frame Thinlit dies (Holiday Catalog and now sale priced), Christmas Greetings Thinlits,  Fine Tip Glue Pen, Tear and Tape, Cocoa Packets, candy canes and Pearson’s Peppermint Patties.

Hot Chocolate Envelope – Envelope Punch Board Pouch
Paper: Designer Series Paper – 6-3/4” x 6-3/4” Start Score and Punch at 3-3/4”

Measure, score and punch once at 3-3/4” then rotate and line up previous score with guide then punch and score again all the way around. Fold on score lines and trim off upper flap. Score lightly so as not to tear DSP.

I CASE’d the idea from one of my favorite stampers Nicole Tugrul.  You can see her original creation here.

*******

It’s Christmas Eve here as I’m writing this and unfortunately I wasn’t able to make it to Midnight Mass this year.  But YouTube and the Internet make so many things available – Carols, Christmas programs, broadcast Mass from around the world and of course I have my cocoa.   How about you?   Are you warm and safe and feeling the joy of the season?   I hope so.

Peace and joy be yours on this very special night.

Jean Fitch in pink

Here’s one more share.

A picture I came across that melds perfectly with one of my favorite songs for this night.

merry-christmas-baby-jesus-sign

June Wacky Watercooler Blog Hop: Celebrating the New Annual Catalog

June 2015 Wacky Watercooler Hop Banner

Welcome to the blog hop.

Welcome to the new catalog!

Hopefully you’ve arrived from Stefanie’s wonderful Crafty Medic blog.  Stef is indeed one crafty medic.  She’s also one of our Canadian contributors.  Her blog is definitely one I turn to when I need to jump start my mojo.  She has some wonderful videos too!  As usual you can follow this hop in a circle going either direction.  Of course you can also return to the home hop site if you ever get lost along the way.

*******

When there is a special event we dress up right?  So today’s celebration of the new 2015-2016 Annual Catalog seemed the appropriate time to dress up with a vest and bow tie.  After all…Father’s Day is just around the corner too.   Thankfully these bow ties are made from paper with a punch.  If you’ve ever seen me try to tie a real bow tie you’ll understand my relief.  😀

Take Out Box Vest

Vest Take Out Box Top view - Wacky Watercooler June New Catalog Hop - Jean Fitch

Hard to tell it’s a box from the top isn’t it?  Here’s a side view:

Vest Take Out Box - side view - Wacky Watercooler June New Catalog Blog Hop - Jean Fitch

And here are all the pieces.  I left the inside sentiment blank so I can customize it when I’m ready to use it.

Vest Take Out Box in pieces - Wacky Watercooler June New Catalog Blog Hop - Jean Fitch

tip:  To make your own template:  First put the box together and then flip the box upside down with the top flaps folded out and draw around them on a piece of copy paper.  Then cut out, place on top of your designer paper, trace and cut   The perfect tool to use to fit your paper to the box. Easy peasy.

I’ll save the template pieces for future box decorations.  Did you spot the new product?  My favorite new paper stack…Pretty Petals.  Trust me…you’ll be buying lots of this stack!   And the Just Because sentiment is from the new stamp set Tin of Cards (this is one set you will find yourself using for just about everything!).  The tag ends used the new Triple Banner Punch.  The Note Tag and Bow Builder Punches are carryovers from the previous seasonal catalogs but new to the Annual Catalog.

*******

Card Vest

Vest Card Case - Wacky Watercooler New Catalog June Hop - Jean Fitch

Here’s all the pieces:

Vest Card in Pieces - Wacky Watercooler New Catalog June Hop - Jean Fitch

This card doesn’t unfold (unlike the take out box version).  The inner card just slips out and you can write on the front or the back.  You can also glue down or add a pocket for a gift card.

Can you spot the new products?  Greetings Thinlit die (yep…a favorite already), Go Wild paper Stack and the sorta new punches I noted above.  I love that the bow tie was created from the flip side of the vest paper.  Way to go Stampin’ Up on coordination yet again.

*******

Both versions of the vest have a pull out card where you can stamp or write your heartfelt sentiments.  And the Take Out Box also opens (without destroying the card) to hold a lovely treat for the man in your life (though of course some of us women also like vests, ties and treats too!).

Supplies:

Stamps: Tin of Cards

Ink: Memento Tuxedo Black, Soft Suede

Paper: Kraft 12×12, Basic Black, Pacific Point, Pretty Petals Stack, Go Wild Stack, copy paper for template for box

Punches: Note Tag, 7/8″ Scallop Circle, Itty Bitty Accents Pack (star), Bow Builder, Envelope Punch Board

Other: Big Shot, Greetings Thinlits, Silver Basic Metal Buttons, Take Out Boxes, Stampin’ Trimmer, Craft Knife, SNAIL or Tombow multipurpose adhesive glue.  Glue dots

Hopefully it’s clear which supplies apply to which version.  The box uses the blue theme from a Pretty Petals page and the card uses the neutrals from the Go Wild stack along with coordinating cardstock papers.  As I mentioned before I was jazzed that the flip side of the vest was perfect for the bow tie.  Meant I used up most of one 6×6 page for the entire card.   I don’t know about you…but I’m loving the new 6″x6″ paper stacks.  So many projects only need one page where before they needed close to two!   Perfect for some of the punch board projects too that start with that size!

The take out box version was inspired by our Demonstrator only, Stampin’ Success Magazine from May/June.   Took a bit of figuring how those wonderful Stampin’ Up Artists put it all together but it didn’t take long.  Of course other crafty demos quickly figured out how to turn this into a fun card as well.  I CASE’d my version (with a tweak or two)  from Sharon Armstrong, a sister demo.

Since I created these projects for a recent event as well as the hop I thought I’d simplify things for you by sharing the directions from the event as well as a link to a video that explained how the card version was created using the Envelope Punch Board.

Directions from Stamp Camp for both Vest projects: Sweater Vest Card or Box Directions by Jean Fitch

Video and post by Sharon: http://txstampinsharon.blogspot.com/2015/05/ics-blog-hop-celebrate-dad.html

That’s it for my share of the hop.  Time to move on over to Miss Buffy’s wonderful post sharing her always creative outlook and gorgeous projects fashioned from new and old products from the new catalog.

To follow the hop click on the link below:

next watercooler crock button

Home Button

Previous Button

Honey Bunny and a bunch of paper bunny friends.

Earth Day April 22

Happy Earth Day everyone!  Time for the planet to celebrate right?  So grab your tie dye and granny glasses or just a trash bag and head for the beach, the mountains or just your park down the road and give Mother Nature a hand in whatever way you can.   There are lots of links online to what’s happening in your own communities.   Using Google just enter Earth Day in (insert town and state) to find ways to help and ways to party.

Since bunnies are a creature of the earth I thought is was more than time to share a few more bunny box pictures and my own tip sheet.

Today is also my own honey bunnies birthday (would be his 60th if he wasn’t already in Heaven).  Do they celebrate birthdays in Heaven?  I’ve always wondered.

If you haven’t seen the other bunny boxes I’ve made and posted here is a refresher:

Jean's WCC21 - Bunny Box CASE  of Linda Parkerclick here to see the post

James Bunny Bond - Bunny Box - CASE of Linda Parker - Jean Fitch - watermarkclick here to see the post

 I just noticed that James must have been on a dangerous assignment (getting between me and the chocolate kisses possibly?) recently…one of his toe pads has gone walkabout.  Sigh…even a tuxedo is no guarantee of safety these days. 😀

I do have a close up of his sign so you can see the pretty All is Calm paper.  The lettering was done with the Rotary Alphabet stamp (it’s bigger than the sign for sure).  I cut a rectangle and rounded the corners then added the “stake”.  Pretty paper on the front and reinforced on the back with a strip of Basic Black cardstock.

Bunny Bond sign - watermark

Bunny Bond back of sign - watermark(Yeah…the placement could have been a bit better. :D)

Stay tuned for a bride for the tuxedo bunny…sans sign of course. I’m still trying to decide on the dress.  Isn’t that just like a bunny bride…slow to decide instead of hopping to it?

++++++++++++++

Here are a couple more fun bunnies.  At Easter time I made some for the neighbors and of course they said Happy Easter.  Now that Easter is past I’ve swapped out for Hello Spring!  Assuming Spring is planning on visiting for more than a day or two here and there.  No pressure Spring…I just want to say Hello.

Cabana Boy and Pink Chick bunny boxes

Cabana Boy and Pink Chick take 2

Does it look to you as if Cabana Boy stole a kiss (chocolate of course) from Pretty in Pink Chick?

The supplies and directions links from the earlier posts have the basics.  These two were done in Pretty in Pink (retired color) and Coastal Cabana (about to retire In Color).  I used the Sale-a-Bration Coastal Cabana ribbon and button and the flower centers for Cabana boy are Bermuda Bay.  Doesn’t it just seem as if those two names and colors are meant to be together?

Here’s a tip and tricks sheet with various links and more in the way of directions:

Bunny Boxes – A Linda Parker CASE with info & tips sheet

And here’s Linda Parker’s Video that gave me the idea for the CASE (copy and share everything):

That’s it for the bunnies.  Can’t wait to see what you create for yourself (I’d love a link to your creation).  I just know there are other famous bunnies waiting to come to life as a bunny box.

+++++++++++

As a reminder:

Retiring header with 50 percent off marking

Not only are the retiring products going fast Stampin’ Up has also added new items to the Clearance Rack.  Most from the 2014 Holiday Catalog.

Take a peek and don’t forget to use the hostess code: EAE3TYVU

To start your shopping click here.

Cool way to recycle right?   From the warehouse to your craft room and then using it all up to spread joy to others!

 +++++++++++

 Since the Watercooler Challenge gang just had a Watercolor (and silhouette) challenge last Sunday I thought it appropriate to close with a fun watercolor Earth Day image.

Earth Day watercolors

Hope your Earth day was a happy one.

Hugs and Blessings,

Jean Fitch in pink

Watercooler Challenge WCC21 – Happy Easter!

Happy Easter sunrise and ribbon

And welcome to the WaterCooler Challenge WCC21

For this challenge Susan Horr has provided us with a wonderful set of colors to play with and create projects.

WCC21 - Susan's color challenge

Join the rest of the design team over at the Challenge blog website here to see the rest of the teams designs and to add your own with the linky doodad.

Here’s my entry…can you see all five colors?  I couldn’t resist making a 3D Easter bunny project.

Jean's WCC21 - Bunny Box CASE  of Linda Parker

With the challenge going live on Easter Sunday I felt I had to create something fun and just a bit sweet (yeah I know…bad pun with all those chocolate kisses on view).  I’ll also admit I’ve gotten addicted to these bunny boxes.  I’ve made quite a few as gifts the last week or so.    I’ll share pics of those others next week.  Along with their stories and a handy cheat sheet for making the bunny boxes.

The basic box uses my favorite Envelope Punch Board tool.  The rest is all punches, glue dots and sticky strip.  Can you see the bitty touches of Calypso Coral and So Saffron?  The whiskers are Calypso Coral Baker’s Twine that is sadly now retired but the paper is still current and available to punch with the Itty Bitty Accents Punch.  Only two dots of So Saffron but Susan only gave us the colors and didn’t say how much of each we had to use.  LOL   This really is a paper and glue project with almost no ink and only a couple of stamps from the Crazy About You, a 2015 Occasions catalog stamp set.

If you’d like to make your own here’s the link to fellow demo Linda Parker’s excellent video tutorial.  She’s a demo in the United Kingdom.  As far as I can tell she’s the originator of this design.  Thank you Linda for sharing your most excellent project and generous free tutorial.

 Supplies:

Stamps: Crazy About You (Happy Easter) from the 2015 Occasions Catalog

Ink:  Bermuda Bay

Paper: Whisper White, Bermuda Bay, So Saffron, Pool Party, Sahara Sand, Basic Black, Calypso Coral Cardstocks.

Punches: Extra Large Oval (formerly Wide Oval), Large Oval, 2-1/2″ Circle, 1/2″ Circle, Scalloped Oval, 7/8″ Scalloped Circle, Owl Builder (small circles on feet), Cupcake Builder (smallest So Saffron circles), Itty Bitty Accent pak (heart and flower), Curvy Label

Other:  Envelope Punch Board, Calypso Coral Baker’s Twine (retired), Venetian Crochet Trim, Calypso Coral Subtles Designer Buttons, Glue dots, Sticky Strip, Two-Way Glue Pen

********************

I’m also submitting this project for the Friday Mashup Challenge – FM203 –  here.

This is the first time I’ve entered the Friday Mashup and I’m not entirely sure if it’s okay to add additional colors (besides neutrals) or not.  If so then this is both the color challenge and the Easter Critters challenge all mashed up.  If not then I guess it’s only the Easter Critters.  I was so excited to see that their colors matched mostly with our Watercooler Challenge colors.  Great minds think alike right?   Check out the Mashup I linked above and join in that challenge as well.

********************

One more WCC21 Entry

Since Easter is for me, primarily a religious celebration I thought I’d make a second card to add to the WCC21 Linky.

Jean's Modern Label Cross - WCC21

Supplies:

Stamps: Crazy About You (Happy Easter) from the 2015 Occasions Catalog

Ink:  Bermuda Bay

Paper: Whisper White, Bermuda Bay, So Saffron, Pool Party, Sahara Sand, Calypso Coral Cardstocks.  Best Day Ever Designer Series Paper (2015 Sale-a-Bration retired) Calypso Coral sheet.

Punches: Modern Label, Itty Bitty Accents Pak, Cupcake Builder (small circles)

Other:  Stampin’ Up! Paper Trimmer, Glue dots, Snail, Basic Jewels rhinestones, ruler, pencil

Quick and simple, easy to make and mail out to friends.  I think this one will be going out to a community of nun friends in my old stomping grounds of the Santa Ynez Valley.  They have a wonderful farm and a mixed community of nuns and laity living on the property.  All committed to a simple way of life and celebrating our Lord Jesus in the context of the Divine Mercy.   I hope they will approve of the simplicity of this card and the joyful colors of Susan’s color challenge.  Lucky for me the Catholic Church celebrates the feast of Easter for more than just a day…so when they get it next week…it won’t we late!  😀

The basic shape of the cross uses Brenda Quintana’s brilliant Modern Label Cross Tutorial.  Brenda is also known as Qbee and and she’s famous for Hershey Treat folded 3D projects of all kinds.  To me she is simply the queen of simple and fun and she freely shares so many of her wonderful projects.  Check her out.  I’ve got an entire Pinterest board dedicated to her brilliance!

I hope you’ll join the Watercooler color challenge and show us your own interpretation of the picture and link up to us.  Don’t forget to check the Watercooler Challenge Blog post here to see who was the winner of the last challenge submissions by linky artists.    Check the challenge site for rules on competing for future challenges.

Hugs and Happy Easter!

Jean Fitch in pink

The Wacky Watercooler December 2014 Blog Hop: Best of Edition

2014 Best of banner

Welcome everyone to the Wacky Watercooler December Blog Hop: Best of Edition where this month we’re featuring projects that highlight the Best of Stampin’ Up products past and present as well as a CASE of a sister hopper.

With luck you’ll be able to find any retired product used on the hop in the current Year End Closeout Sale currently found in the Online Store or through your own local demonstrator.   Of course supplies of products featured in the Year End Closeout Sale are limited to supplies on hand.

Our hop crew is an  international one of Stampin’ Up Demonstrators so don’t be surprised if you see a few different spellings and price guides along the way.  Links to Catalogs will vary by country as well.

If you are moving in hop order you’ve arrived from the very talented Kathe D’s  Kathe’s Adventures blog.  Just the name of Kathe’s blog gets my creative juices flowing.   She and I have shared a number of different hops and groups together and she never disappoints.    You’ll definitely want to go back and check her past posts after the hop.   If you are working in reverse order weren’t you dazzled by Gail’s creative projects?  Gail is another of my international friends.  As a Canadian Gail and I don’t quite share a border (I’m in Oregon) but we do share a love of stamping, cats and hanging around virtual watercoolers to chat!

How ever you are viewing the hop, we’ve built it in a circle so you can join and hop on and off at will.   If you get lost just click the hop banner or the home watercooler button to get back to our hop home site with the list of participants.    You may want to keep an eye on that site in between blog hops as we are trying to post members without blogs projects there somewhat regularly as well.

*****

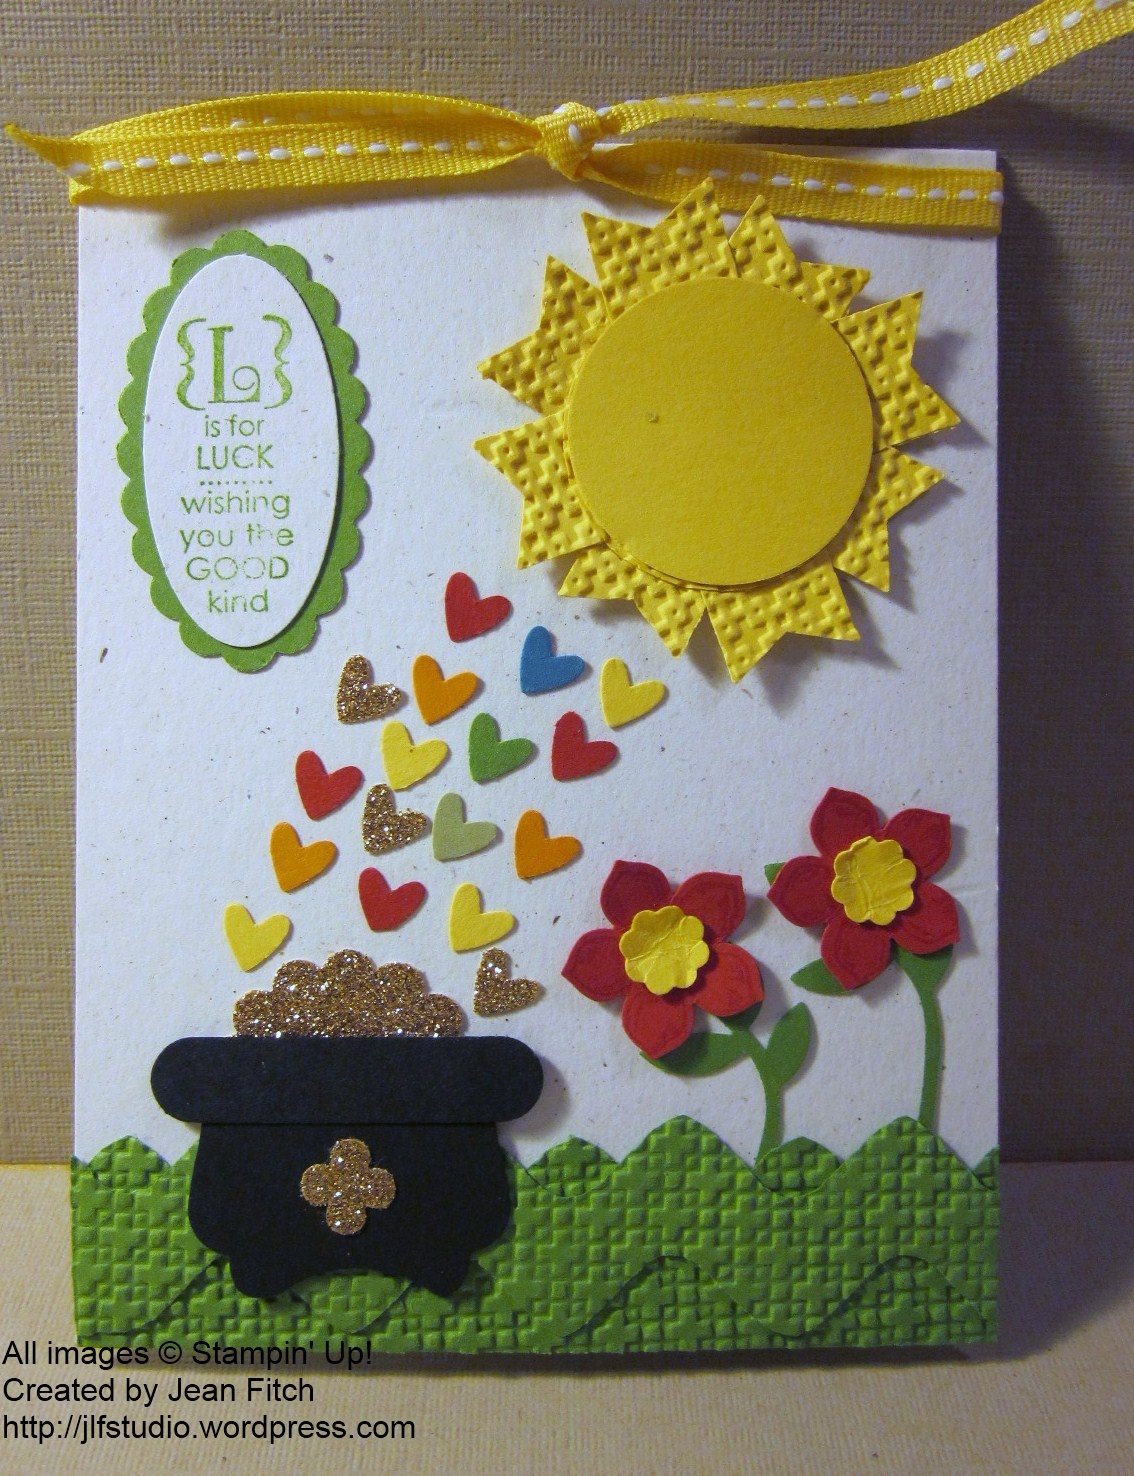
First up is my Best of…Kathe D.  As part of the Best of December Hop we drew a hop partner to CASE (Copy And Share Everything).  I was fortunate enough to get Kathe!   I love her clean and simple designs from past hops.  It was a tough choice but I realized I could use a few more past as well as present favorites by selecting this card of hers from last March’s hop.

flowered wood - Kathe Deck

If you know me…you know I love wood & flower themes and am a big fan of the Petite Petal Stamp set.   So…..here’s my interpretation using a retired favorite Woodgrain Background Stamp and going circular instead of oval.   I suppose it’s a bit of a stretch as a CASE goes but it does use flower, leaf and wood themes as well as her Wisteria Wonder principle color so I’m calling it good.  😀    Thanks Kathe for the walk down memory lane as I had a blast flipping through many of what I considered your best.   To see a few others I had considered check these links.  The sunburstThe weave card & Flower Shop card. And lastly Holiday Home.

 *****

CASEing  Kathe D

Woodgrain Wreath - Wacky Watercooler December Best of Hop

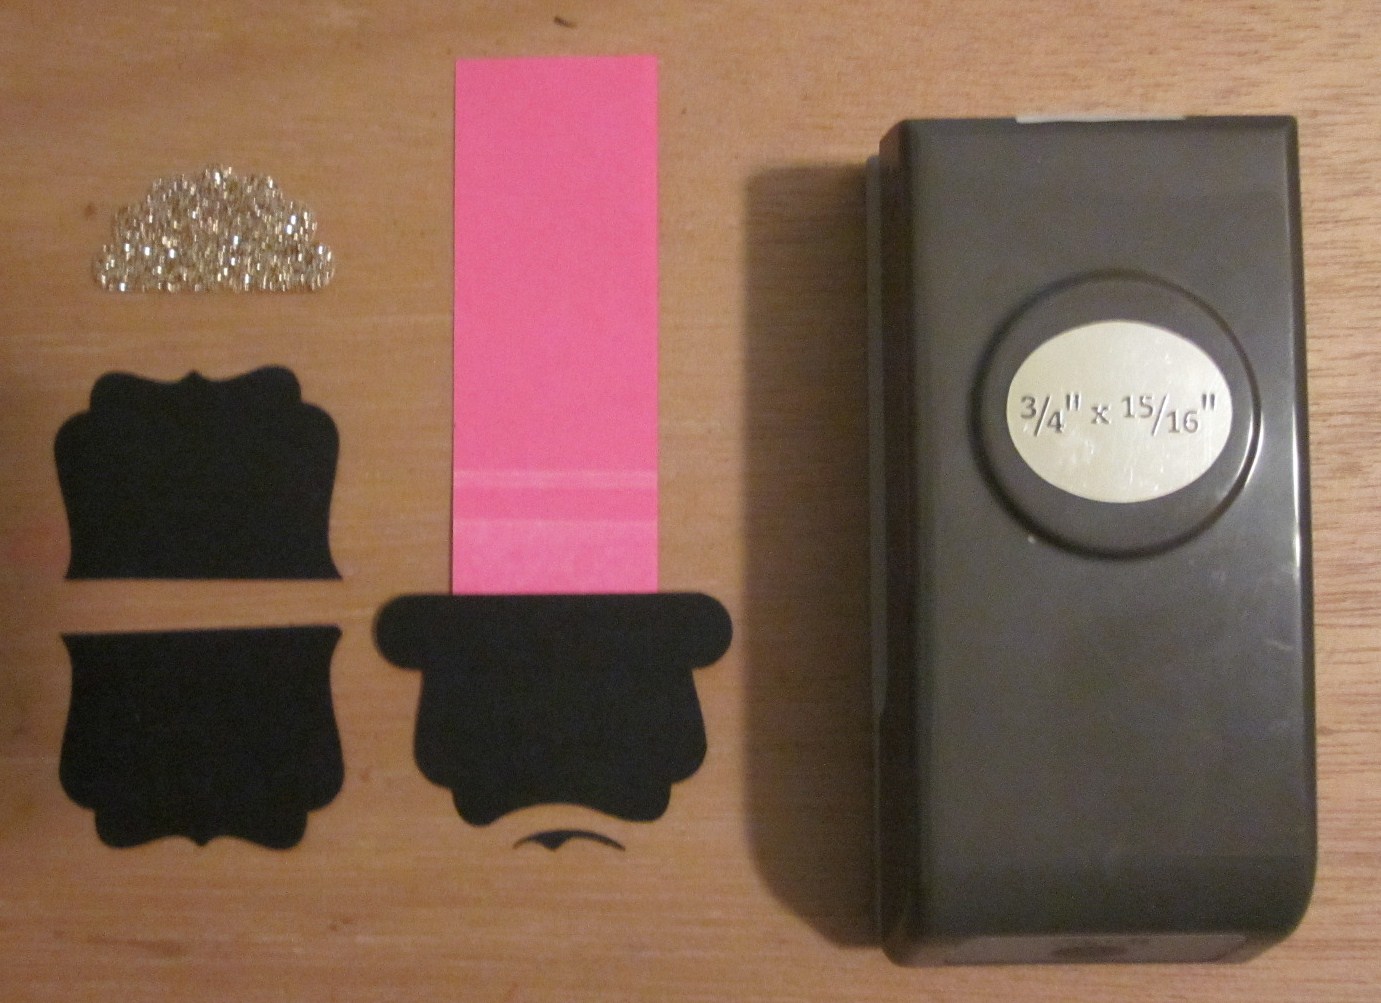
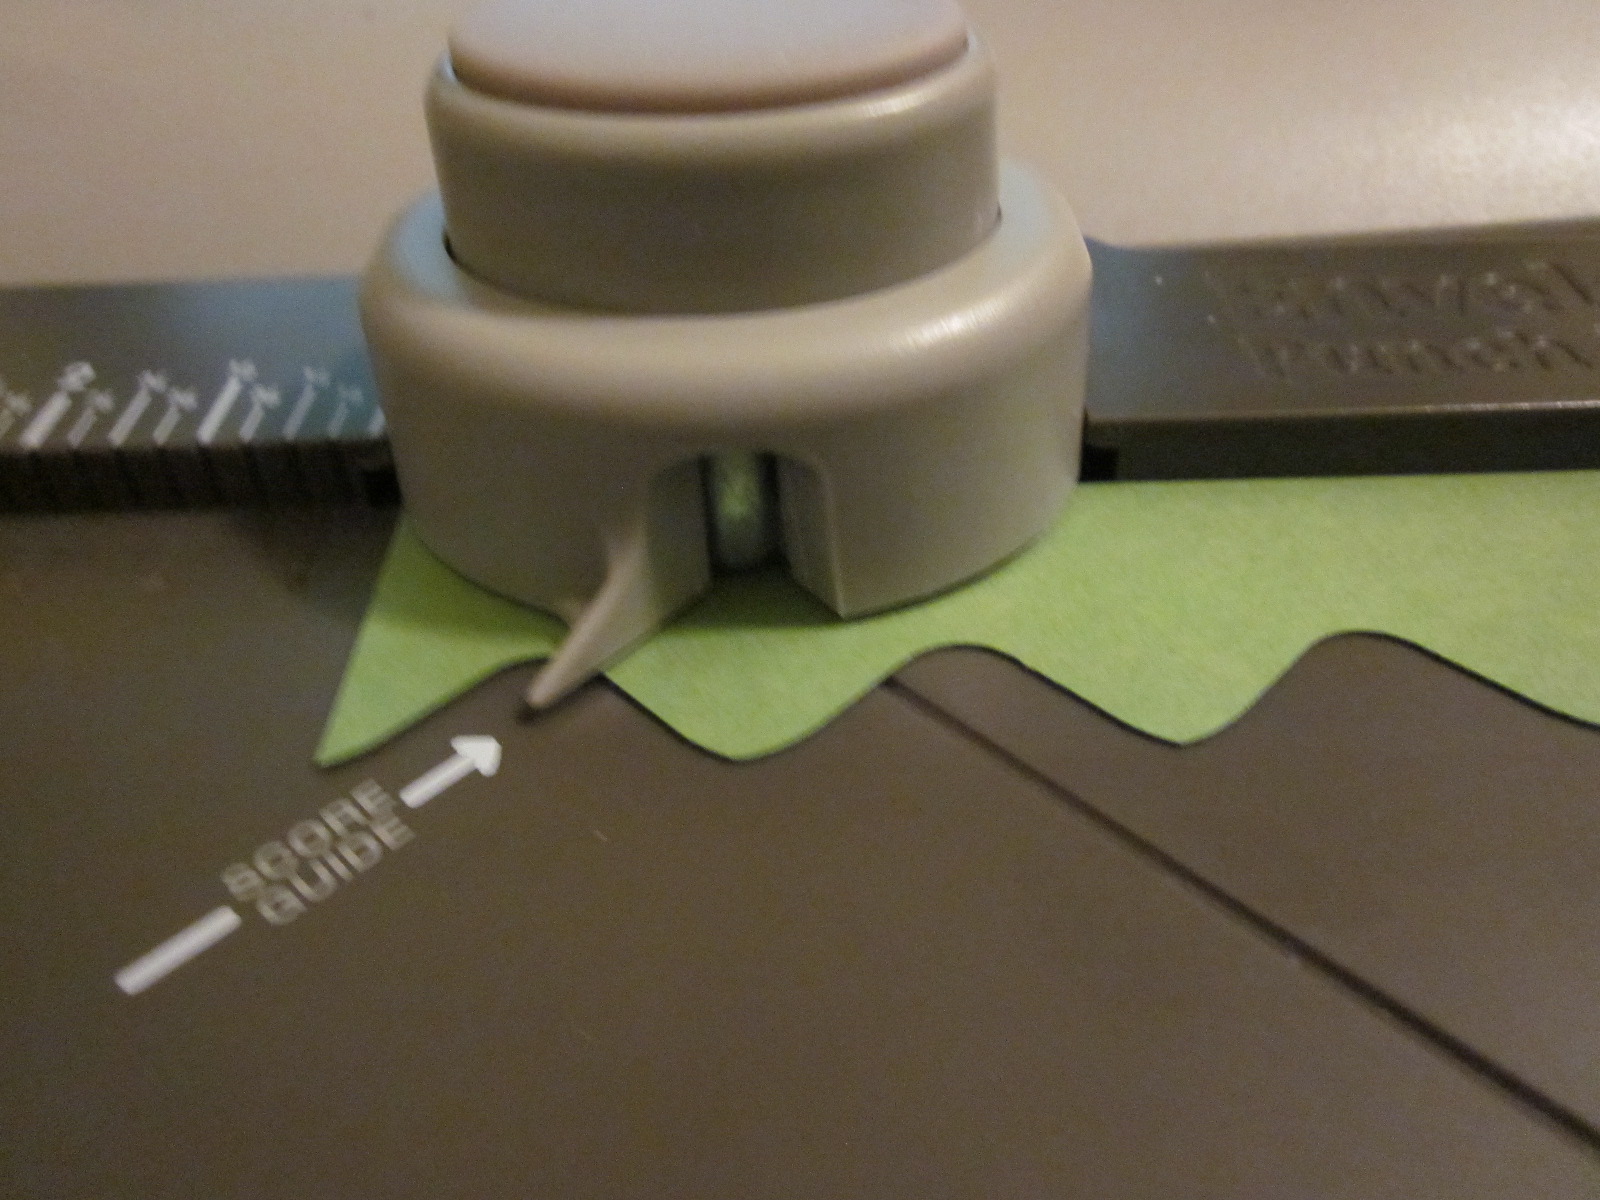
I love cards with peek through windows so my scallop circle die from the Circle Flip Card die collection was perfect for that purpose.  Of course it also helps if you remember to stamp the woodgrain background first so you don’t ink through the window!  If you forget…no worries…the large 2-1/2″ Circle punch will come to your rescue and clean up the interior.   It was a sad day for me when Stampin’ Up retired the Woodgrain background though thankfully they gave us a new Hardwood Background like Kathe used!  Sad too was the loss of the Itty Bity Punch Pack.  I know we have a newer version now but I used the old one pretty much every day so you know it’s seen a lot of love!

Supplies:

Stamps: Petite Petals, Trust God, Woodgrain Background (retired)

Ink: Early Espresso, Wisteria Wonder

Paper: Naturals Ivory, Garden Green, Very Vanilla & Daffodil Delight Cardstocks

Punches: Petite Petal, Bird Builder, 2-1/2″ Circle (interior sentiment), Itty Bitty Punch Pak

Other: Big Shot,  Scalloped Circle Framelit from the Circle Thinlit Card die collection, Glue dots and Multipurpose Liquid Tombow

Note: You can fancy up the card with pearls in the flower centers but I wanted this card to be easy to mail…and besides…it’s heading out to a woodworking guy…wasn’t quite sure how he would feel about pearls!

*****

As a big fan of Stampin’ Up dies and punches I was jazzed to get to bring some oldies but goodies out to play with as part of my Best of presentation.  Always a tricky proposition to declare a favorite don’t you think?  After all if I buy a stamp or die or punch you know I love it!  From En Francais my all time favorite background stamp to the Beautiful Butterflies and Lattice dies it’s so hard to choose.   It was nice to see this year that even Stampin’ Up felt compelled to bring back a Best of favorite stamp set.  Endless Wishes.   Last years phenomenon sell out set made it back into this years 2014 Holiday Catalog.  Bless you Stampin’ Up!  That being the case I knew I had to meld old and new into a fun Christmas Angel card using two retired dies and an angelic choirful of punches.  Beautiful Butterflies and Perfect Pennants are here to stay in my collection that’s for sure and unless they’ve sold out by now both are available in the Year End Closeout Sale.

Butterfly Die Angels

Angel - Endless Wishes punch art - Wacky Watercooler December Best of Hop

Supplies:

Stamps: Endless Wishes

Ink: Whisper White Craft Ink

Paper:  Soft Sky, Night of Navy, Whisper White, Blushing Bride, Early Espresso, & Brushed Gold Cardstocks.

Punches: Scallop Border, Scallop Oval, Large Oval, 7/8″ Scallop Circle, Word Window, 1-3/8″ Circle, 1″ Circle, Itty Bitty Punch Pack (retired),

Other: Big Shot, Perfect Pennants Bigz die (retired), Beautiful Butterflies Bigz die (retired), Fancy Fan embossing folder, Argyle embossing folder, Heat Tool, Silver Embossing powder, clear embossing powder, two way glue pen, Dazzling Diamonds

NOTE:  Check back next week for a punch chart and a framed project using this Angel idea and more tips on the construction.

 *****

Another great reason to list the Butterfly die as a best of….it makes stencils!   Stampin’ Up a while back shared this fun video and it inspired me to create this card last Spring (yep..I forgot to post it then) using my very own die cut stencil and a few fun stamp sets like En Francais and Happy Watercolor.  The bonus to this video tutorial…it also uses En Francais.   I used that too in my CASE of the video but unfortunately it don’t show up quite as well as I intended in the photo.

Beautiful butterflies die & En Francais & Happy Watercolor - Wacky Watercooler December Best of Hop

How about a quick hint for our upcoming Spring catalog…Beautiful Wings Embosslit (also used in the card above) will have a new die cutting butterfly product to keep it company.   Sh..Shh…..

*****

Christmas Cactus Box

Christmas Cactus Box - Wacky Watercooler December Best of Hop

Last up is my pick for Best of Newer Product from the Annual Catalog.  The Envelope Punch Board!  If you’ve been hopping with us before you know this very cool tool makes more than envelopes!   This project also highlights another of my favorite best of’s from the past.  Core’dinations Paper.  Especially the pack from last years In Colors.  I love that you can sand the paper to reveal another color!   This is also my Christmas tribute to my beloved Mother-in-Law Dorothy Fitch.   I still miss her presence in my life, so every Christmas I try to come up with something that reminds me of her many Christmas traditions.   This year it’s her annual Christmas Cactus that was the inspiration.   Now if only she was still here for me to present her gift in this fun filled box.

The “cactus” flower is made using the Blossom Punch.   Once I punched a few layers I placed them in the Fancy Fan embossing folder and then sanded lightly over the top.  And Voila!   The Fancy Fan image appeared.   Before putting the box itself together I stamped the surface with En Francais to add a bit of depth and texture to the look of the box.  I also made a slit in the top to close the box.  The decorated side panels were also sanded in the Fancy Fan folder and the ends were punched with…can you guess…yep…the heart punch.  Gives a bit of a curve to the ends.

Here’s a side view so you can see how it all went together:

Christmas Cactus box sideview - Wacky Watercooler December Best of Hop

If you’d like directions on how to make the box with the Envelope Punch Board you can find it here  & here.

Supplies:

Stamps: Mixed Bunch, En Francais Background (retired)

Ink: Versamark, Garden Green

Paper: Wild Wasabi,  Razpberry Ripple Cardstocks, Primrose Petals Core’dinations

Punches: Blossom, 1″ Circle, 1-1/4″ Scallop Circle, Heart

Other: Heat Tool, Silver Embossing Powder, Envelope Punch Board, Glue Dots and Dimensionals.

*****

 That’s it for my post for this December Best of Watercooler Hop.   Hop along now to see the wonderful and talented Gail and the rest of the “Best of” hop entries and look for our Wacky Watercooler crew every month as we create more new hops for your viewing and crafting pleasure in the new year.   Click the appropriate watercooler buttons to find your way.   And if you would like to view past hops…check out our hop home page and scroll to see links to other hops and hoppers.   Always a creative treat!

Hugs & Holiday Love – Jean

Home Buttonnext watercooler crock buttonPrevious Button

Happy St. Patrick’s Day!

St. Patrick's Day banner

Whether you celebrate it in the religious manner

with Mass and sermons on the Trinity

St. Patrick

or

 your thoughts turn to gold & rainbows

pot o goldToday is the day everyone is Irish

and wears a bit of the green.

green sheep

*****

Here’s how we celebrated at our March  Stamp Camp.

And check further down in the post to see how you can celebrate with

Free Shipping today!

Lucky Day Card - March 2014 Stamp Camp - watermarked

Once again the Envelope Punch Board was front and center creating the grass and my many punches did the rest.  I’ve been hooked on all the sun’s everyone is creating with the new Banner punch from Sale-a-Bration (luckily you still have a couple of weeks to take advantage of getting it for free!) so had to try my hand at one.

I counted them up and in addition to the Envelope Punch Board which probably qualifies as a punch in and of itself I used 12 other punches to create this card!  I think that’s a record for me.  It sure added to the weight of the boxes being transported to the church hall for this event.  Filled the center of the table too.

Here’s the supply list.

Supplies:

Stamps:Occasions Alphabet, Petite Petals, Teeny Tiny Wishes & Trust God (inside).  Assortment of retired St. Patrick’s Day stamps.

Ink: Gumball Green, Real Red (optional Black Journaling pen/marker for making a sun face.)

Paper: Gumball Green (1”x 4-1/4”), Real Red, Daffodil Delight, Naturals White, Basic Black Cardstock & Champagne Glimmer Paper.  Little hearts: Real Red, Daffodil Delight, Pear Pizzazz, Gumball Green, Island Indigo, Pumpkin Pie

Punches: 1-3/8” Circle, Petite Petals, 1-1/4” Scallop Circle, Decorative Label, Owl Builder, Word Window, Banner (from SAB), Bird Builder, Scallop Oval, Small Oval, Large Oval, Itty Bitty Punch Pack.

Other: Envelope Punch Board, Big Shot, Square Lattice embossing folder, Daffodil Delight ¼” stitched grosgrain ribbon, two way glue pen, tweezers, adhesives.

And here are the directions I shared with my stamp camp attendees:

Lucky Day Card Directions with picture

And a few tips on creating the various elements (no worries…these pictures are also in the directions):

Line up the 8 banner punched pieces on the back of the sun circle in two sets of overlapping squares.   Then run through the Big Shot with the Square Lattice folder and add another circle on top.

sun piecessun pieces

For the Pot O’ Gold I punched a Decorative Label piece then put the half piece on a post it note for better control and using the small oval punch I snipped just a hint out of the middle to get rid of the point and preserve the “legs” for the pot.  Added a word window punch and a half a scalloped circle of glimmer paper and there’s the pot.

Pot o' Gold

For the grass I created a base piece and a rick rack piece.  Embossed with the Square Lattice and overlaid the two pieces at the base of the card.

Create your two grass strips with the two 1”x 4-1/4” Gumball Green strips + the Envelope Punch Board. Strip 1: Place the strip first with the edge of the paper lined up with the tip of the score guide. Punch.

First punch lined up with the score guide

Slide strip over to the 1-1/2” mark, punch. Slide strip to the 2-1/2” mark, punch. Continue sliding down 1 more inch and punching till you reach the end of the strip.

Strip 2: Create the same as Strip 1 then flip over and center each “mountain” then punch, continue sliding and aligning and punching till you have a full rick rack looking strip.

Punching between the hills

Base & rick rack pieces to form grass

Place both completed strips in the Square Lattice embossing folder the longways and run through the Big Shot. Over lap both strips so you have a series of peaks and valleys between the two strips, adhere strips together and then adhere “grass” piece to card base. Trim edges if necessary.

overlapping base and rick rack

Cool trick isn’t it.  Creating rick rack with the Envelope Punch Board.   It does take a bit of flipping around to get the right orientation so the peaks show between the valleys but it’s a fun puzzle.    Of course if you have the Tasteful Trim die it might be a bit quicker but I love that with the Envelope Punch Board I’m not limited to the length of the rick rack pieces I create.   Oh…and the “mountain” base piece also works for a sponging mask to create hills.  Especially if you vary the measurements you use to punch the base.

Hope you’ve enjoyed this fun project.  I can’t tell you how many movies I watched while punching enough “owl” hearts for 12 people to create this card.  Fun!

Please note:   In honor of St. Patrick’s Day I am offering FREE shipping on any Stampin’ Up! orders over $25 placed today March 17th 2014!

And don’t forget to pick up more FREE product during the last two weeks of Sale-a-bration.  I’d be happy to be your demonstrator.  When you click on the online store button in the sidebar select me as your demo and place your order.    I especially recommend the Envelope Punch Board.  It really is a wonder!   You can see what else it can do on my Pinterest board here.

You have a couple options for ordering:

  • Visit the online store, select me as your demonstrator in your profile and place your order~ I will refund your shipping after the order is placed or
  • Email me at  jlfstudio@live.com  and let me know what you want to order – include your phone number and email ~ I will then contact you to make arrangements for payment minus shipping.
  • Don’t forget to place your order (minimum $25) or send your email before Midnight – March 17, 2014 to get your free shipping.  😀

*****

To celebrate my own Irish roots let me leave you with this traditional blessing and a few YouTube videos with blessings and Celtic music to enjoy the day.

Irish Blessing card 2-500x500

Hugs & blessings – Jean