More Flowers not Branches

Today, once again, I’m stamping flowers and not branches with my current favorite set Thoughtful Branches.   And once again…I love the beautiful sentiments that work for every occasion.  This time around I’ve used the beautiful Thank You sentiment from the set.

It seems that everyone in the SU stamping world has gone hydrangea crazy with this set so I thought I’d jump on board as well using some of my favorite colors in a soft but elegant color combo.


Hydrangea with Thoughtful Branches - Jean Fitch

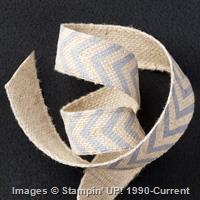
This design also gave me a chance to once again use my favorite Baker’s Twine.  I love the black and white variety of the twine.  Added a bit of pop I thought.  The little black dress of bows if you will.  Always appropriate…always coordinates with other colors.  Of course black also works well with pearls.  Hm…next time I create this design I’ll have to play with bitty pearls on the flower section.

I love how easy this card is to make.  Even with the die cutting it took under 10 minutes to create and doing multiples is extremely easy.  Especially if you have the Big Shot Die Brush and the new Big Shot Platform that makes cutting intricate dies a joy!

Yet another design that’s perfect for Spring, Summer or varied Occasions cards.  From Mother’s Day to Wedding to Sympathy.  You can vary the flower and color layer colors for different effects.   Another card too that would lend itself to a bit of metallic embossing on the top floral die cut and the sentiment.

Supplies:

Stamps:  Thoughtful Branches

Inks: Elegant Eggplant, Wisteria Wonder Classic Ink &  Memento Tuxedo Black

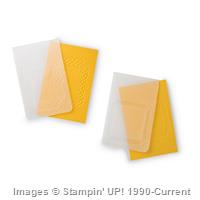
Paper: Elegant Eggplant, Mint Macaron, Wisteria Wonder & Whisper White Cardstocks

Punches: none

Tools & Adhesives:  Big Shot, New Big Shot Platform, Big Shot Die Brush,  Bone Folder, Basic Black Baker’s Twine (variegated variety), Dimensionals, SNAIL

Directions:

  1. Mint Macaron cardbase – 5-1/2″ x 8-1/2″.  Score at 4-1/4″.  Fold and crease with bone folder.
  2. Adhere Elegant Eggplant layer (4″ x 5-1/4″) to Mint Macaron cardbase.
  3. On focal Whisper White layer (3-1/2″ x 4-3/4″) stamp chosen sentiment in either Elegant Eggplant or Memento Tuxedo Black on the lower right hand side of paper.  Adhere to layered cardbase.
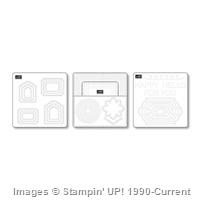
  4. Die cut the Stem section in Mint Macaron.
  5. Using Wisteria Wonder or Elegant Eggplant ink stamp the flower petal hydrangea image on Wisteria Wonder cardstock and die cut .
  6. Die cut the hydrangea flower image in Elegant Eggplant cardstock.
  7. Crumple the Wisteria Wonder flower top.
  8. Adhere the Mint Macaron stem piece to the focal layer after checking the placement with die cut flower pieces.
  9. Adhere the Elegant Eggplant flower die cut with SNAIL to the focal layer.
  10. Crumple again and using cut up dimensionals (or the new adhesive strip pieces) adhere the stamped Wisteria Wonder flower offset on top of the Elegant Eggplant flower.
  11.  Combine three lengths of Basic Black Baker’s twine and tie a bunny ear bow.  Adhere to card layered front and trim as needed.
  12. Decorate interior of card and envelope as desired.

*****************

That’s it for this sample design.  See previous days for other recent ideas for this fun stamp and die set.

Check back before September 1 for more Thoughtful Branches ideas.

Hugs and happy creating!

Jean Fitch in pink


Here’s a closer look of all that’s included in the Thoughtful Branches Bundle.

Don’t forget…last day to purchase this wonderful set is August 31.

Thoughtful Branches Image


To see the purchase details and a larger view of the images click the link below.

Thoughtful Branches Flyer – purchase details

Thinking Flowers not Branches

Today I’m thinking about flowers and not branches with my new favorite set Thoughtful Branches.   While I love all the trees I can create with this wonderful set of stamps and dies I also love the simple flowers that can also be created.  And once again…I love the beautiful sentiments that work for every occasion.

Thinking Flowers - Thoughtful Branches - Jean Fitch - 03

Not being a botanist or florist I’ve no idea if these are lupine or lilacs or just what.  All I know is they are fun to create!  {grin}

The same images that created the snowbanks in my white on white card yesterday also work for stems when turned sideways.  And a dense grouping of the leaf image covers a multitude of sins.   I think I ended up with the odd petal patterns because I double stamped the image that also creates a series of leaves for the trees more than once.  Either way…it’s fun.  This design also gave me a chance to use my favorite Baker’s Twine.  I love the black and white variety of the twine.  Adds to the light and casual feel of the card.

I love how easy this card is to make.  With all the layering pieces cut and prepped it takes about 5 minutes to create and doing multiples is extremely easy.  Perfect for Spring, Summer or varied Occasions cards.  From Mother’s Day to Sympathy.  You can vary the flower and color layer colors for different effects.   You could even emboss in gold, silver or copper on a dark color of cardstock for a very elegant effect as well.

Supplies:

Stamps:  Thoughtful Branches

Inks: Pear Pizzazz, Wisteria Wonder,  Memento Tuxedo Black

Paper: Wisteria Wonder, Whisper White Thick cardstocks

Punches: none

Tools & Adhesives:  Bone Folder, Basic Black Baker’s Twine (variegated variety), SNAIL

Directions:

  1. Whisper White cardbase – 5-1/2″ x 8-1/2″.  Score at 4-1/4″.  Fold and crease with bone folder.
  2. Adhere Wisteria Wonder layer (4″ x 5-1/4″) to white cardbase.
  3. On focal Whisper White layer (3-3/4″ x 5″) stamp chosen sentiment in Memento Tuxedo Black on the right hand side of paper.
  4. Using Pear Pizzazz ink stamp the wavy line image 3 times on the left hand  side of the paper.
  5. Using Wisteria Wonder ink stamp the flower petal image (cone type dot image) over ends of stems.
  6. Using Pear Pizzazz ink stamp the leaves at the base of stems.
  7.  Combine two lengths of Basic Black Baker’s twine and wrap around the focal image piece and tie a bow.  Adhere to card layered front.
  8. Decorate interior of card and envelope as desired.

*****************

That’s it for this sample design.  See previous days for other recent ideas for this fun stamp and die set.

Check back before September 1 for more Thoughtful Branches ideas.

Hugs and happy creating!

Jean Fitch in pink

Thoughtful Branches – Winter White (with a pop of red :D )

Thoughtful Branches – Winter White

Here’s another entry in my Thoughtful Branches set of samples I mentioned in yesterdays post.

WWC82 - Tree Theme Challenge - Thoughtful Branches - Jean Fitch - 03

Supplies:

Stamps:  Thoughtful Branches

Inks: Sahara Sand, Watermelon Wonder Classic Inks and Versamark

Paper: Whisper White both Thick and Thin Cardstocks.

Punches: none

Tools & Adhesives: Big Shot, Beautiful Branches Thinlit dies, Magnetic Platform, Precision Base Plate, Big Shot Die Brush (love, love, love this tool!),  Heat Tool, Whisper White Embossing Powder,  Dimensionals, SNAIL

For my readers that are fellow demonstrators you’ll probably recognize this design as one originating with the Stampin’ Up office artists and the set of class projects they provided.   What you might not recognize is the set of directions I created.  {grin}   Mine are much more specific and not intermingled with the other two projects in the set based on what I found worked for a group setting.   Feel free to download and use from the link below. 😀

Thoughtful Branches Winter White Directions – Jean Fitch

For my non demo readers enjoy and let me know if you have questions or need clarifications.   Ideas as well as directions can always be improved right?  😀

As a side note….I tried heat embossing the sentiment in copper.   The class I shared with project with agreed…the Sahara Sand was better by far.  Softer and more in keeping with the overall white feel.  The copper was just way to harsh.  A well…not every experiment works. Sigh.

Oh…and FYI.  Another experiment.  I tried Real Red for the birds but agreed with SU after the experiment that Watermelon Wonder was a much better choice.   Of course it still being summer you might try blue or pastel shades of birds as well.    For some reason I have this card fixed in my head as a winter scene so I loved the red of the watermelon shade.   I rather think that at least a few family and friends will be receiving Christmas versions (i.e. a change in sentiment) of this same design.   Thanks Stampin’ Up for sharing the creativity!


Tip to save your Precision Base Plate and still get a good cut:

Alter the layering of your cutting sandwich when using the Precision Base Plate.  You’ll save a great deal of wear and tear on your PBP and still get the same great cutting action.   When paired with the new Basic Platform that comes in two pieces it works especially well since the new platform has a stiffer and more solid center section.  This method works with all three platforms.  For best results I would run the sandwich through and then back at least once and then use the die brush.  Easy Peasy and no tears!

Here’s the details on the sandwich:

Place the tree die between the two stamped birds and cut it out using the Precision Base
Plate on top (in place of the usual clear cutting pad) and a clear cutting pad below on the
new Big Shot Platform.  Sandwich looks like this from the top and moving down:

Precision Base Plate (with the cutting surface facing down)
Thinlit Die (remember…we don’t use the Precision Base Plate with Framelits)
Paper
Clear Acrylic Cutting Plate
Platform (either the older Multipurpose Platform fully closed, the new basic platform with
both pieces together or the Magnetic Platform)
Big Shot Deck


That’s it for this sample design.

With the promotion period winding down I’m working like mad to see just how many different designs I can complete before August 31.   Of course….since this is a keeper set for me I daresay you’ll keep seeing it being used in the future as well.  Check back another day for more ideas.

Hugs and happy creating!

Jean Fitch in pink

Here’s a closer look of all that’s included in the Thoughtful Branches Bundle.

Don’t forget…last day to purchase this wonderful set is August 31.

Thoughtful Branches Image


To see the purchase details and a larger view of the images click the link below.

Thoughtful Branches Flyer – purchase details

Save

Watercooler Wednesday Challenge – WWC82 – Trees and More Trees

WWC82 – Libby’s Tree Theme Challenge

WWC82 - Libby's Tree Theme Challenge

Welcome to this weeks Watercooler Wednesday Challenge.

This week Miss Libby has given us a very fun (and reasonably easy :D) challenge.  One that is perfect for yours truly who lives surrounded by trees and more trees in a mountain valley in the Pacific Northwest.   Looking out my window I see the 40+ pine and fir trees on my own one acre (not to mention a couple of colorful ash trees) and lifting my eyes a bit higher the mountains and hills surrounding my valley are covered with more trees of all types (mostly of the evergreen variety).    The perfect view in my humble opinion!    So thanks Miss Libby for adding trees to my stamping desk this week.  I love it!

Of course with August being the promotional month for the new, limited edition, “Thoughtful Branches” stamp and die set my choice for what to work with was an easy one.   Heck…I only needed the stamps since I decided to keep it very simple.   If you haven’t gotten your hands on this bundle run don’t walk to your nearest demo…or the online store.  Trust me when I say…this bundle is a keeper.    I’ve been enjoying creating design after design (as well as CASEing the many wonderful designs out there on the ‘net) with this set to share with local stampers who come to my Stamp Camp days.   I’ll be sharing many of those in the next few days as August winds down.   So many possibilities so little time!   If you want to see more Pinterest ideas for this set check out my board here.  You’ll find the card there by Cindy Schuster that gave me the idea for my CASE too.  I changed up a few details and colors and made it my own.

**********

Trees and More Trees

Watercooler Wednesday Challenge - WWC82 - Tree Theme Challenge - Thoughtful Branches - Jean Fitch(as always click the picture to see a larger image)

Supplies:

Stamps:  Thoughtful Branches

Inks: Garden Green, Mint Macaron, Smoky Slate

Paper: Mint Macaron, Tip Top Taupe, Whisper White Cardstocks

Punches: 2-1/2″ Circle or use one of the circles from the Layered Circle die collection

Tools & Adhesives:  5/8″ Burlap Ribbon, Dimensionals, SNAIL


Here’s a closer look of all that’s included in the Thoughtful Branches Bundle.  Don’t forget…last day to purchase this wonderful set is August 31.

Thoughtful Branches Image

To see the purchase details and a larger view of the images click the link below.

Thoughtful Branches Flyer – purchase details


Tip: Leave spaces between the trees as you work your way down from the top to the bottom of the focal layer.  And…vary the heights of your trees as you stamp the rows for a somewhat more natural look. 

Given the colors I used this design isn’t intended to look all that natural.   After all…what tree trunk is really Mint Macaron right?   The beauty of this set is that the trunk and the leaves/needles are separate images so if you want you can go with a more natural trunk/branch color and then play with the leaves/needles.  If you aren’t too perfectionist this is a very quick card.


DIRECTIONS & Tips:

Tip Top Taupe cardbase is the usual 5-1/2″ x 8-1/2″ folded and creased in the middle.  The Whisper White focal layer is 4″ x 5-1/4″.   I stamped the top layer first in Smoky Slate then filled in the between spaces with a slightly lower row of Mint Macaron trees.  Finally I stamped a selection of Garden Green trees to fill in spaces as needed.

The sentiment is also from Thoughtful Branches (love the sentiments in that set as well as the font SU selected) and was stamped in Garden Green on a Mint Macaron scrap of cardstock.  I punched it out with a 2-1/2″ circle punch (ret.) though I could also have used a circle die of the same or similar size from the Layered Circle die set.  If you want to step it up a bit you could also then die cut a scalloped circle from that same die set in Tip Top Taupe or Smokey Slate to mat behind the sentiment.  I chose to leave it plain so as to leave more of the trees visible.  Add a looped piece of burlap ribbon with glue dots and then set the sentiment up on dimensionals and you’re done!   Easy Peasy and a quick 5 minutes to make the card.

Tip: To create a matched set of cards you can vary the the color of the card base between the three colors of the inked trees.  You could also heat emboss the trees in each of our three metallic embossing powders (gold, silver & copper).

*********

That’s it for this challenge.  To see the rest of the design teams contributions to Libby’s tree theme challenge head on over to the Challenge blog website here.   That’s also where you can add your own creation with the linky doodad.  When you add your own design and there are more than three entries, one of you will be a challenge winner or runner up and have the option to place our badges on your own site.  Of course…you’ll also win bragging rights!

Check here to see the winner of last weeks challenge.  And here to see all of last weeks other linky and Artist Team entries.  Check the challenge site for rules on competing for future challenges.

I really hope you will add your own tree creations this week.  I love the inspiration I find in your shared creations.

I hope you’ll also join us next Wednesday for yet another Watercooler Wednesday Challenge.

Jean Fitch in pink


Save

Save

Save

Save

Save

Save

Save

Save

Watercooler Wednesday Challenge – WWC82 – Trees and More Trees

WWC82 – Libby’s Tree Theme Challenge

WWC82 - Libby's Tree Theme Challenge

Welcome to this weeks Watercooler Wednesday Challenge.


**********

Trees and More Trees

Watercooler Wednesday Challenge - WWC82 - Tree Theme Challenge - Thoughtful Branches - Jean Fitch

(as always click the picture to see a larger image)

Supplies:

Stamps:  Thoughtful Branches

Inks: Garden Green, Mint Macaron, Smoky Slate

Paper: Mint Macaron, Tip Top Taupe, Whisper White Cardstocks

Punches: 2-1/2″ Circle or use one of the Layered Circle Framelits

Tools & Adhesives:  5/8″ Burlap Ribbon, Dimensionals, SNAIL


*********

That’s it for this challenge.  To see the rest of the design teams contributions to Heidi’s CAS with water theme challenge head on over to the Challenge blog website here.   That’s also where you can add your own creation with the linky doodad.  When you add your own design and there are more than three entries, one of you will be a challenge winner or runner up and have the option to place our badges on your own site.  Of course…you’ll also win bragging rights!

Check here to see the winner of last weeks challenge.  And here to see all of last weeks other linky and Artist Team entries.  Check the challenge site for rules on competing for future challenges.

I hope you will add your own creations this week.  I love the inspiration I find in your shared creations.

I hope you’ll join us next Wednesday for yet another Watercooler Wednesday Challenge.

Jean Fitch in pink


Save

Save

Save

Save

Save

Save

WCC30 – A Cup of Cheer in 3D

  WCC30 Susan’s 3D Challenge

Welcome to a new Challenge.

This time around we are doing 3D!


WCC - Susan's 3D Project

 **************

Whatever trips your trigger as a friend of mine likes to say…if it has several sides or depth to it…you’re in.   And we hope you will join us in submitting your very own 3D creation here.

Here’s my simple 3D treat holder:

WCC30 - Susan's 3D Challenge - Jean Fitch

And a side view so you can see how it all fits together.

WCC30 - A Cup of Cheer - Side View - Jean Fitch

Do you remember this little treat or card holder?  People have been making them for over a decade (possibly more).   Perfect for little gift cards just under 3″ wide and about 3″ – 4″ tall.    Or in this case a little package of teas and sweets…perfect for someone recovering from a cold or flu or other malady.

I’ll let you in on a secret that I discovered years ago…the tea in the picture is Moroccan Mint tea from STASH.  That tea is a wonder drug all on it’s own.  Whether for morning sickness or the upset stomach and dizziness you get from chemotherapy this stuff is magic!   And I can guarantee you that it tastes just like the mint tea that I had in Morocco back in 1975.   The only brand I’ve found that does.  I’m not sure if it’s the lemongrass or the blend of various mint teas or the combination but this stuff is powerful…and very good tasting.   Fun to suck on a peppermint too and hold it in your teeth while you drink the tea through it.   Just don’t let the mint go down the wrong way.  Yeah…been there…done that.

And yeah…I should probably add the disclaimer that I’m not a doctor and take my suggestion with a grain of sense and salt.  It may not work for everyone as I’ve described but I’ve given it to many, many people for whom it did work and used it myself.   And no…I don’t work for STASH or get a commission.  LOL

Are you wondering yet where the stamps and several of the papers came from?   My latest (July) Paper Pumpkin is the source.  Three wonderful sentiments, the cup, tea bags, steam and the plants that you’ll be able to use when the kit contents are gone.    Have you tried that monthly pumpkin delight yet?  Trust me…you will want to.   Especially…because…drum roll please…you can get two months right now for 50% off!

Contact your demonstrator (I’m available if you don’t have one already Click the highlighted text to sign up :D) and ask them about the 50% off offer.   It’s available until September 10th.   Want the August Kit…sign up by August 10th…get going…what are you waiting for…today is the 9th!!!

Here are a few other views of the inside with it open and treats removed.

 Click on the images to see a larger view


WCC30 - A Cup of Cheer interior

WCC30 - Cup of Cheer - inside box

Supplies:

Stamps: My Paper Pumpkin July 2015 Kit – Thanks a Latte

Ink:  Early Espresso, Cucumber Crush

Paper: Pool Party, Paper Pumpkin Kit papers and stickers

Punches: Large Oval

Other:  Clip from kit, 1/8″ Gold Ribbon, Whisper White Organza Ribbon, Small Cellophane bag,  tea bags, Stampin’ Trimmer, Dimensionals, SNAIL

It’s a fairly simple construction that you can adapt to any size.   In this case a 3″ x 11″ strip of cardstock that is scored at 4-1/2″ and 6-1/2″.  Use the large oval punch to create the handles near the top.   The small box is 4″ x 5″ and scored at 1″ all the way around on all sides.  Cut along the score line up to the other score line on two sides at both ends.  Fold and crease along score lines and adhere tabs as needed to form the box.   Adhere bottom of box to the inside score area of the long cover piece.  Decorate…tie some ribbon to hold the handles in and fill with your desired contents.

Thanks a Latte Treat Packet


************************

Please join the rest of the design team over at the Challenge blog website here to see the rest of the teams designs and to add your own with the linky doodad.  When you add your own design and there are more than three entries, one of you will be a challenge winner and have the option to place the winner’s badge on your own site.  Of course…you’ll also win bragging rights!

That’s it for this challenge.   You can see the winner for the linky added projects for the last challenge here.  It was a hard choice as all the entries were wonderful.  If you haven’t looked already…take a look here.  You’ll be inspired.   I also hope this time you’ll join in the fun and grab a friend or two as well and get creating!  Check the challenge site for rules on competing for this and future challenges.

Hugs and Blessings to all my friends and readers.

Jean Fitch in pink


Weekly Deals – 3 more days!

Weekly Deals 

3 days remaining for this set of

super products

before they fade away.

Order in my online store

– before midnight on Monday –

by clicking on an image below.


Honey Bunny and a bunch of paper bunny friends.

Earth Day April 22

Happy Earth Day everyone!  Time for the planet to celebrate right?  So grab your tie dye and granny glasses or just a trash bag and head for the beach, the mountains or just your park down the road and give Mother Nature a hand in whatever way you can.   There are lots of links online to what’s happening in your own communities.   Using Google just enter Earth Day in (insert town and state) to find ways to help and ways to party.

Since bunnies are a creature of the earth I thought is was more than time to share a few more bunny box pictures and my own tip sheet.

Today is also my own honey bunnies birthday (would be his 60th if he wasn’t already in Heaven).  Do they celebrate birthdays in Heaven?  I’ve always wondered.

If you haven’t seen the other bunny boxes I’ve made and posted here is a refresher:

Jean's WCC21 - Bunny Box CASE  of Linda Parkerclick here to see the post

James Bunny Bond - Bunny Box - CASE of Linda Parker - Jean Fitch - watermarkclick here to see the post

 I just noticed that James must have been on a dangerous assignment (getting between me and the chocolate kisses possibly?) recently…one of his toe pads has gone walkabout.  Sigh…even a tuxedo is no guarantee of safety these days. 😀

I do have a close up of his sign so you can see the pretty All is Calm paper.  The lettering was done with the Rotary Alphabet stamp (it’s bigger than the sign for sure).  I cut a rectangle and rounded the corners then added the “stake”.  Pretty paper on the front and reinforced on the back with a strip of Basic Black cardstock.

Bunny Bond sign - watermark

Bunny Bond back of sign - watermark(Yeah…the placement could have been a bit better. :D)

Stay tuned for a bride for the tuxedo bunny…sans sign of course. I’m still trying to decide on the dress.  Isn’t that just like a bunny bride…slow to decide instead of hopping to it?

++++++++++++++

Here are a couple more fun bunnies.  At Easter time I made some for the neighbors and of course they said Happy Easter.  Now that Easter is past I’ve swapped out for Hello Spring!  Assuming Spring is planning on visiting for more than a day or two here and there.  No pressure Spring…I just want to say Hello.

Cabana Boy and Pink Chick bunny boxes

Cabana Boy and Pink Chick take 2

Does it look to you as if Cabana Boy stole a kiss (chocolate of course) from Pretty in Pink Chick?

The supplies and directions links from the earlier posts have the basics.  These two were done in Pretty in Pink (retired color) and Coastal Cabana (about to retire In Color).  I used the Sale-a-Bration Coastal Cabana ribbon and button and the flower centers for Cabana boy are Bermuda Bay.  Doesn’t it just seem as if those two names and colors are meant to be together?

Here’s a tip and tricks sheet with various links and more in the way of directions:

Bunny Boxes – A Linda Parker CASE with info & tips sheet

And here’s Linda Parker’s Video that gave me the idea for the CASE (copy and share everything):

That’s it for the bunnies.  Can’t wait to see what you create for yourself (I’d love a link to your creation).  I just know there are other famous bunnies waiting to come to life as a bunny box.

+++++++++++

As a reminder:

Retiring header with 50 percent off marking

Not only are the retiring products going fast Stampin’ Up has also added new items to the Clearance Rack.  Most from the 2014 Holiday Catalog.

Take a peek and don’t forget to use the hostess code: EAE3TYVU

To start your shopping click here.

Cool way to recycle right?   From the warehouse to your craft room and then using it all up to spread joy to others!

 +++++++++++

 Since the Watercooler Challenge gang just had a Watercolor (and silhouette) challenge last Sunday I thought it appropriate to close with a fun watercolor Earth Day image.

Earth Day watercolors

Hope your Earth day was a happy one.

Hugs and Blessings,

Jean Fitch in pink

Revised: Stampin’ Up’s Retiring Product List is now up. On your mark, get set…SHOP NOW! (before it’s all gone)

Retiring product banner

Stampin’ Up’s Retiring Product List is now up. On your mark, get set…SHOP NOW! (before it’s all gone)

To make your shopping easier…not to mention marking your catalog I’ve converted the standard list to one by page number.  so now you can have it both ways…whichever works for you.

One other note.  Many items are going fast but at least the stamps will last a wee bit longer.  Stampin’ Up will continue making some of your favorite retiring stamps until May 26th.    The accessories (non stamp items) however are disappearing as I type!

Note:  I’ve revised the Page number sorting documents below to correct some errors that crept in in the original documents.

Revised – US_retiredList_ENG – Page # sorting – PDF format – revised with error corrections

Revised – US_retiredList_ENG – Page # sorting – EXCEL format (.xls) – revised with error corrections

And now…an alphabetical by category listing by request:

Revised – US_retiredList_ENG – alphabetical sort – PDF format

Revised – US_retiredList_ENG – alphabetical sort – EXEL format

http://su-media.s3.amazonaws.com/media/lastChance/2015_NA_RetiredList/US_retiredList_ENG.pdf   – PDF format (Stampin’ UP original documents – uncorrected)

SU revised – US_retiredList_ENG – EXCEL format (.xls) (Stampin’ UP original documents – still some minor errors)

For easy viewing with pictures of the products,

check out my online store.

Easy to see and easy to shop.

Edited to Add: Wednesday April 22, Stampin’ Up will be adding new items to the Clearance Rack as well.  Woo Hoo!   Gotta love sale prices right?

I’ve got my order in…how about you?

Feel free to call, email or use my online store

I’ve opened a Hostess Code for orders: EAE3TYVU

If your order is $150 or more please don’t use the code as you’ll qualify for hostess dollars for your own order.

Here’s a fun video Stampin’ Up! put together to showcase some fun projects and a supply list with retired product used in their creation.


Happy shopping,

Blessings of Peace and Joy be yours ♥

Dear Friends,

Last night was the last night of Hanukkah – the Festival of Lights – and today is the first day of Christmas – for many of us Christians the first day of an entire season.  So many images of light and joy are dancing through my thoughts these last few days as I celebrate these gifts from a loving Creator so I thought I’d pop in here to wish you all joy and peace and the blessing of light in your lives.

For me all holy days (well really all days since most are holy in one way or another)  are about Joy and on Christmas more than most.  One of my favorite blogs (The Velveteen Rabbi) gave me two Christmas gifts today.  One a link to a blog ( Telling Secrets ) I’ve never read before (but will be reading now) and who’s post about Joy and Christmas and life in between confirmed my own thoughts on the subject and reminded me what it is to breathe.

And second a poem that says so much and reminds us to carry Christmas with us throughout the year.   Thought I’d share that with you too.

by Reverend Howard Thurman

When the song of the angels is stilled,
When the star in the sky is gone,
When the kings and princes are home,
When the shepherds are back with their flock,
The work of Christmas begins:
To find the lost,
To heal the broken,
To feed the hungry,
To release the prisoner,
To rebuild the nations,
To bring peace among people,
To make music in the heart.

**********************************************

I thought I’d also share a bit of creativity with you as an added gift.   My dear friend,  fellow Llama and Wacky Watercooler member Patti Leeke shared her lovely picture of a star wreath with me awhile back and today seems a great day to share that with all of you as well.  Not least of which is because the Many Merry Stars Simply Created Kit that is the foundation of the wreath is on sale until January 5th or while supplies last.

Think of star shine, creativity and love and you have a picture of both Patti and her wonderful wreath.   Thanks Patti for sharing!  Now if only one of Patti’s New Years resolution was to start a blog!

Patti’s Many Merry Stars Wreath

Patti's Star Wreath 1

Patti's Star Wreath 2

Patti’s loving spouse Jim (Hi Jim and Merry Christmas) made the wooden wreath form (fancy name for a circle shaped ring) for Patti.  The rest of the supplies are mostly from the Many Merry  Stars Simply Created Kit with a few extras current and retired that Patti found in her studio.  Here’s the list based on what I can see:

Many Merry Stars Simply Created Kit, Tree Punch (2014 Holiday), Designer Rosette XL Bigz Die, Gift Bow Punch (2015 Occasions), Paper Doily Sizzlit Die (retired), Itty Bitty Accent punch pak (stars), Wonderful Wreath stamps and die set (2014 Holiday), Glimmer Paper (various colors), Snowflake Punch (retired), Small Circle Punch – not sure what size.

**********************************************

That’s it for the blog today…back to the merry mayhem that is Christmas in the country…good food, good friends to share with, neighbors chickens, dogs, music and celebratory gun shots (theirs not mine and not recommended at all)  and a tangible joy that knows no bounds.

Merry Christmas to you all!

Jean Fitch in pink