Watercooler Wednesday Challenge – WWC100 – Whoo Hoo We’re Celebrating Our 100th Challenge this Week!!

Posted: 16 Nov 2016 05:00 AM PST

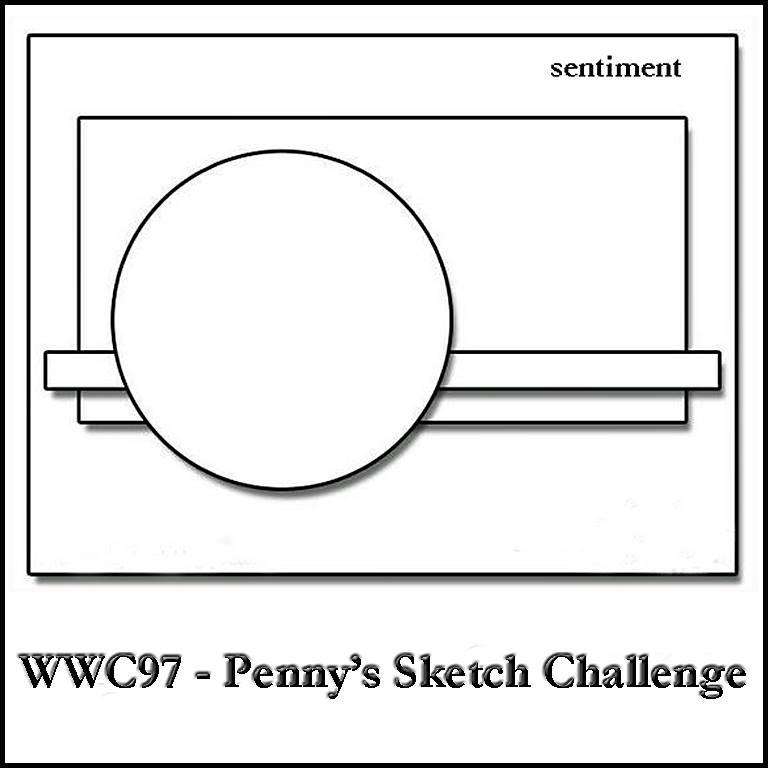
WWC100 – Anything Goes Celebration Theme Challenge

wwc100-celebration-anything-goes

Welcome to the celebration on this weeks Watercooler Wednesday Challenge.

Whoo Hoo We’re Celebrating Our 100th Challenge this Week!!   So of course….Anything Goes!

Can you believe we’re on our 100th challenge?  And to top it off we have a special guest designer to share in the celebration.   I hope you’ll give Bronwyn a warm Watercooler Wednesday welcome on this special return visit.  And here’s a heads up…if you add a linky creation this week you’ll be in the running for the winners right to a free tutorial from her blog site.
Celebrating this special milestone to me means expressing thankfulness and gratitude for the wonderful group of women I’ve been creating with for most of those 100 challenges.  I was warmly welcomed from the day I joined and week after week we share our joys, sorrows and a bit of general hilarity.   These women are truly a blessing to me.  A few have come and gone from the design team over the last couple of years but they are all still here in my heart.  You can see the list of artists past and present in the right hand column of the Challenge Blog.   Today, especially, I have to  send a shout out to the Founder of the Challenge, Miss Terri Antoniw.  Bless you Terri for the brilliant idea and many thanks to Heidi (with support from Miss Marsha) who picked up the baton from Terri and have gotten us to this amazing milemarker.  Leadership and hard work (herding artists is about a easy as herding cats) have gotten us here and will keep us going in the future.

Something else we’re celebrating today.  The start of Sale-a-Bration!   Do you think Stampin’ Up counted the dates of our challenges when they set up the starting date for SAB so we could double up on the celebration?   You never know.  They do like surprises and they love to make their demos happy.

**********

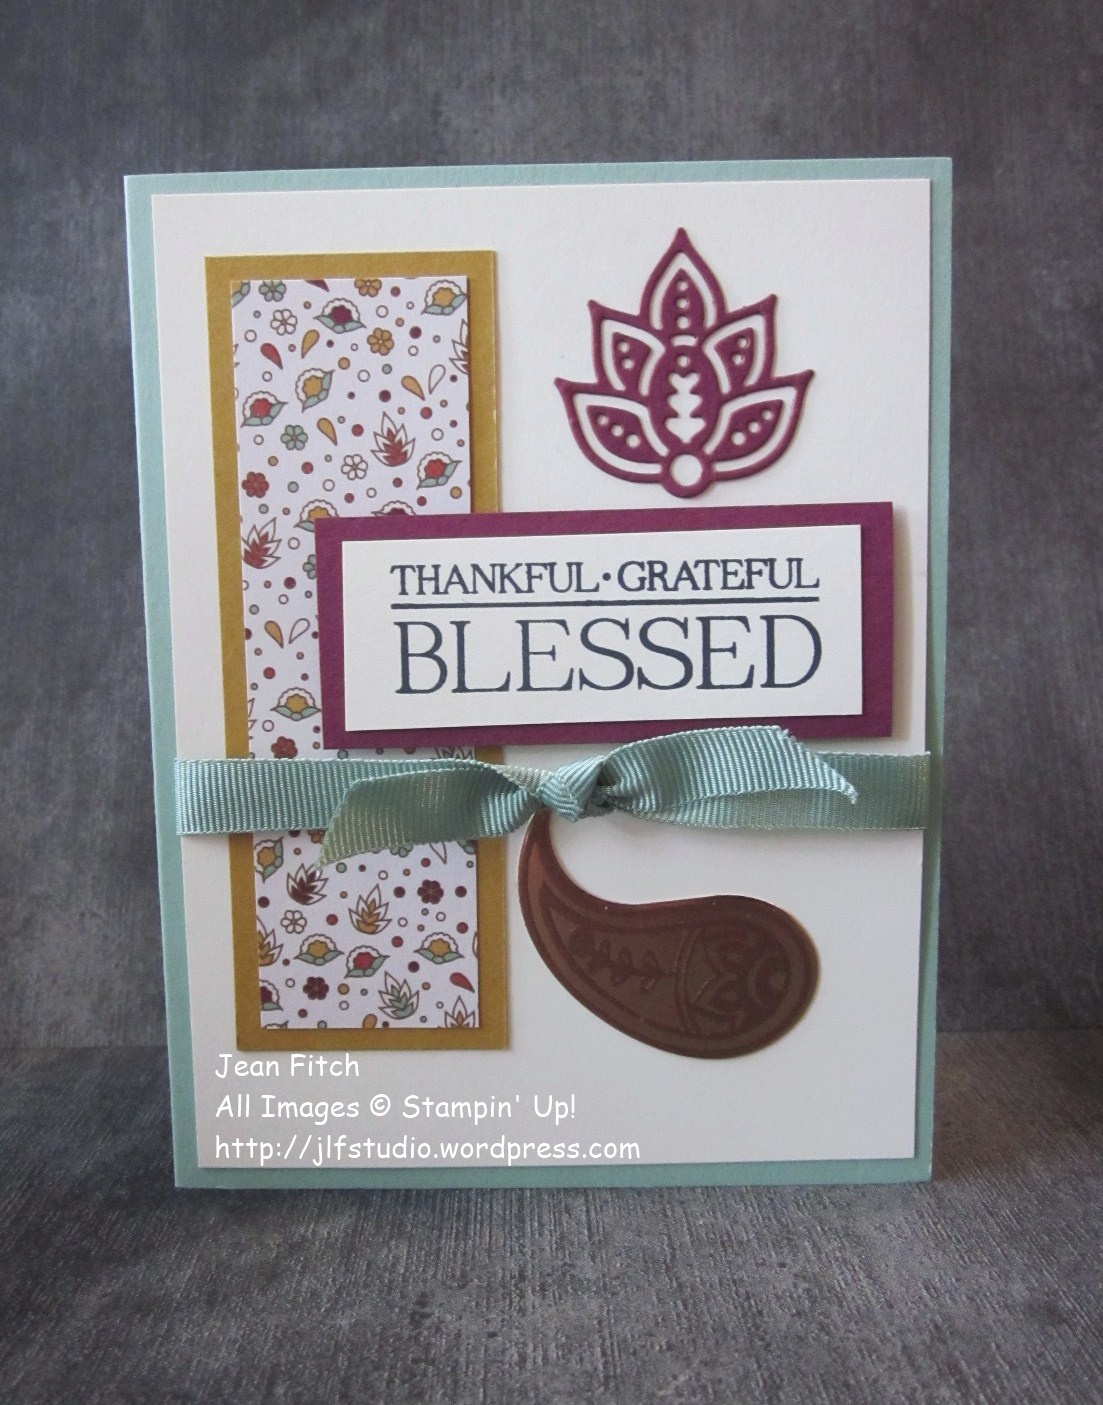
Paisley & Posies Thankfulness Card

(as always click the picture to see a larger image)

wwc100-anything-goes-celebration-paisley-thankfulness-Jean-Fitch

Thinking of you all as I stomp through 15″ of snow covering my drive area and property.  The new boots are getting a workout that’s for sure.  Well really I’m mostly staying inside today and trying to stay warm while praying we don’t lose power.  I’m well and truly snowed in with drifts over 3 ‘ here and there.  Very thankful I stocked up on groceries.  Including hot apple cider!

So what does a gal do when she wants to express feelings of thankfulness, gratitude and blessing all in one card?  She grabs the Paisleys & Posies suite of products of course.   Introduced in this years Holiday Catalog (that sadly retired as of today), I fell in love with the entire product suite immediately.  It pairs perfectly with the new copper products and the Paisley Suite’s ribbons, paper, stamps and dies.  Sadly with the catalog now retired some of those products are no longer available but I’m happy to say that the stamp set, dies and the copper products are all still current.  At least until June anyway.  And here in the States,  the Paisley & Posies dies and stamps purchased together will earn you a free Sale-a-Bration item.  You can check it out here in the online store.

My design today is a general CASE (copy and share everything) with a twist, of a card created by Sherrie Gross that I found out in blogland.  Since the set is a paisley one I really wanted to add an actually paisley element using the copper foil paper.  If you look at the close up detail shot below you’ll see that I copper embossed one of the stamp images and then die cut with one of the open paisley dies.  It’s a subtle detail that shows up better in person.  I also softened up the look with color changes.  I don’t know about you but I’ll seriously miss Mint Macaron when it goes away come June.   Which reminds me…if you love that In Color as much as I do you may want to stock up on the ink and paper versions you love ASAP.  Along about the end of January we start seeing reinkers, ink pads and papers disappear from the storefront.   Besides…it’s Sale-a-Bration time starting today which means you earn a freebie stamp or paper or other SAB item with every $50 you spend so it’s the perfect time to stock up on staples as well as new items from the Occasions Catalog.

wwc100-anything-goes-celebration-paisley-thankfulness-detail-jean-fitch

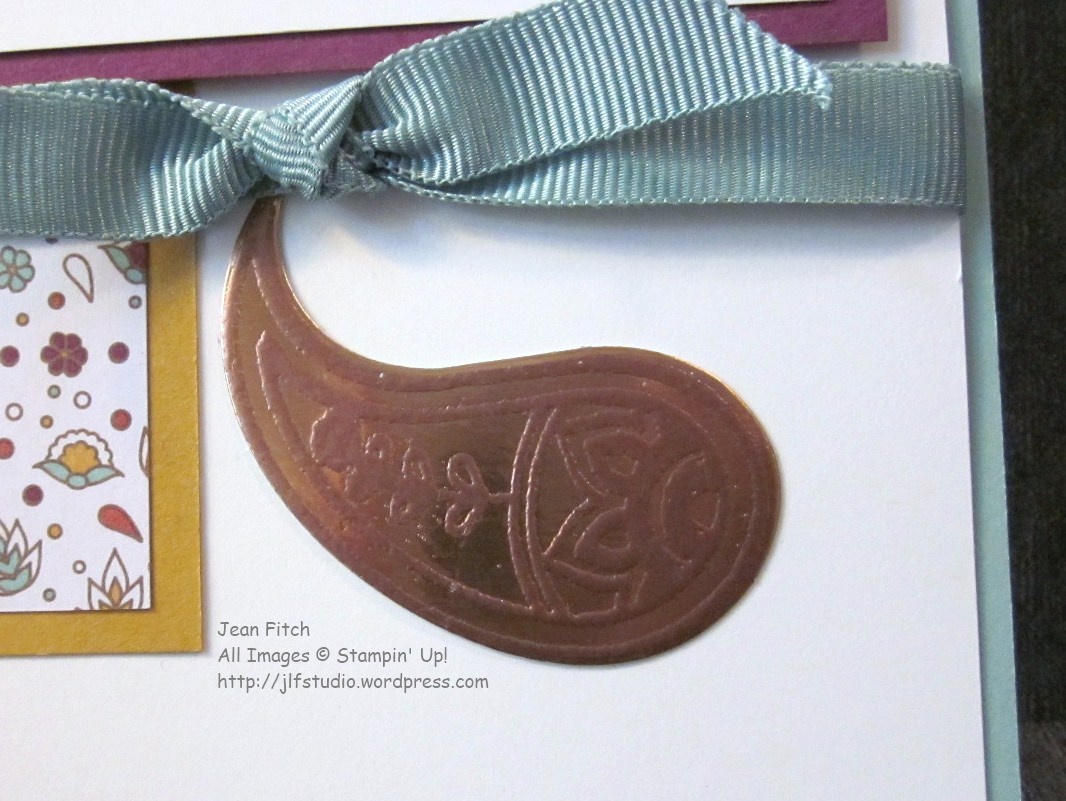
Tip:  Did you know that you can heat emboss with Copper Embossing Powder on top of Copper Foil paper?  Yep…you can!  But do it’ carefully.  And I would suggest applying the heat from the back of the copper foil paper.


wwc100-anything-goes-celebration-paisley-thankfulness-interior-jean-fitch

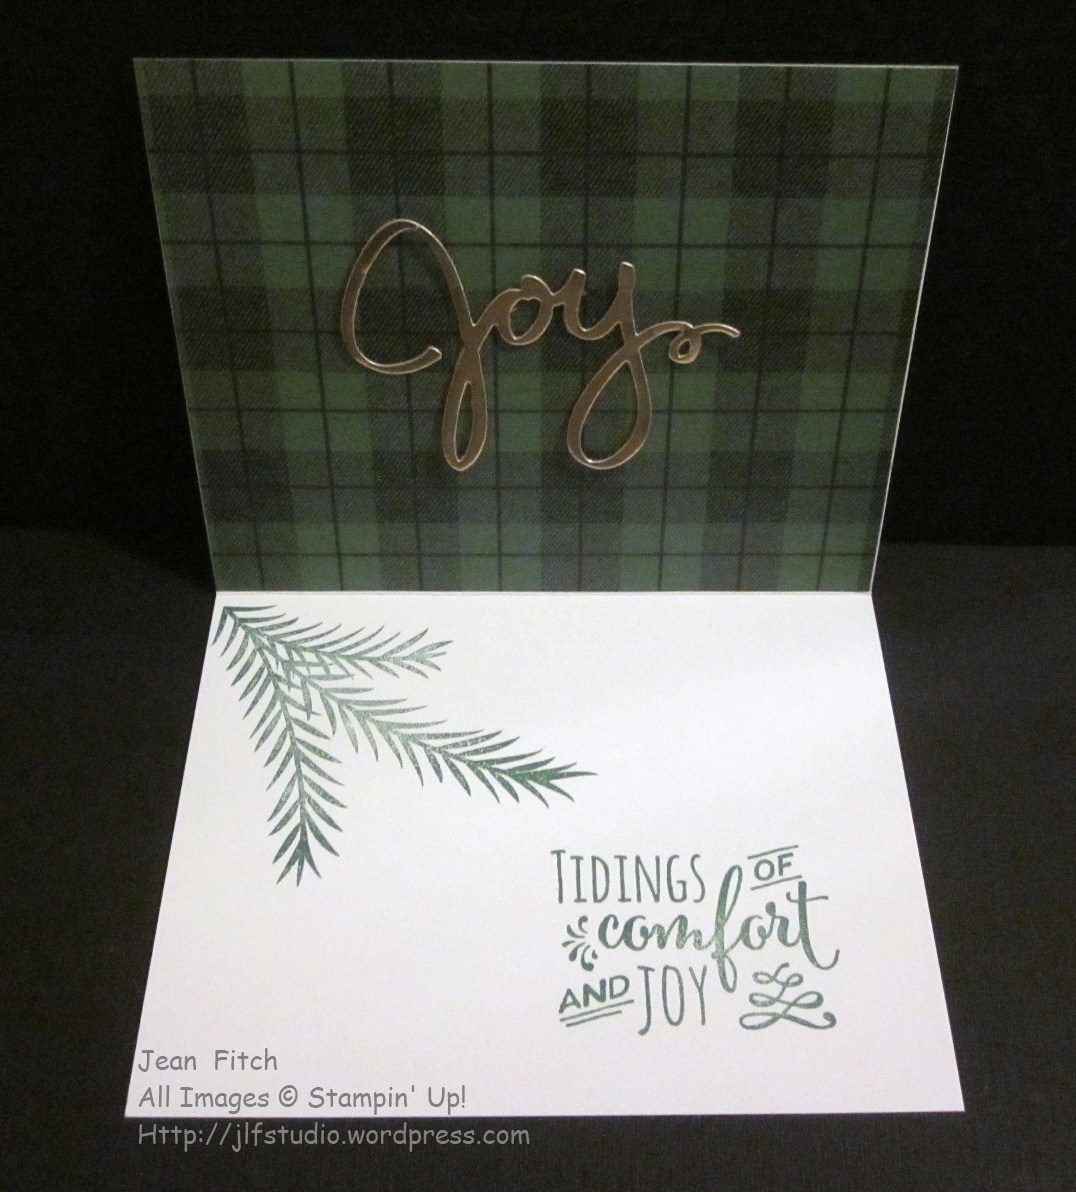
Tip:  Here’s a tip for the inside of the card.  If you are making more than one it’s simpler to create a collage of the sentiments and the small decorative image on one larger block.  Then you can ink and stamp all in one motion.

Supplies:

Stamps:  Paisleys & Posies

Inks:  Memento Tuxedo Black or Archival Basic Black, Versamark Ink

Paper: Delightful Dijon, Mint Macaron, Rich Razzleberry, Very Vanilla Cardstock; Petals & Paisleys Specialty Designer Series Paper (ret.) and Copper Foil Paper

Tools & Adhesives: Big Shot, Paisley Framelits, Heat Tool, Copper Embossing Powder, 3/8″ Ribbon Trio Pack (ret.), Dimensionals, Tombow or Fine Tip Glue Pen, SNAIL or Fast Fuse.


For the directions, measurements & tips to recreate this project you can download the following PDF that I created to share with my class.

WWC100 – Paisleys & Posies Thankfulness card PDF Directions – Jean Fitch

*********

That’s it for this milestone challenge celebration.  To see the rest of the design teams contributions to the Celebration Challenge head on over to the Challenge blog website here.   That’s also where you can add your own creation with the linky doodad.  When you add your own design and there are more than three entries, one of you will be a challenge winner or runner up and have the option to place our badges on your own site.  Of course…you’ll also win bragging rights!  And this week you’ll also win a free tutorial from our generous guest designer Bronwyn Eastley.

Check here to see the winner of last weeks challenge.  And here to see all of last weeks other linky and Artist Team entries.  Check the challenge site for rules on competing for future challenges.

I hope you will add your own creations this week to the linky.  I love the inspiration I find in your shared creations.  And I’m looking forward to your making our next 100 challenges truly great with your participation!    Thank you for reading and hopefully enjoying our last 100 challenges.

Stay warm and stay safe wherever you are.  If you have a furbaby to hug, today’s the perfect day to share a little warmth.

Jean Fitch in pink

Save

Save

Save

Save

Save

Watercooler Wednesday Challenge – WWC97 – A Sketch Challenge Washi Tape & Wreath Card

WWC97 – Penny’s Sketch Challenge

wwc97-pennys-sketch-challenge

Welcome to this weeks Watercooler Wednesday Challenge.

Many thanks Miss Penny for a sketch challenge that allowed me to continue my Warmth and Cheer Washi Tape and paper addiction!

I just can’t seem to stop using those lovely products.  Didn’t hurt either that the Stampin’ Up End of Year Close Out Sale is featuring those and other wonderful products I used on the card too.  Lots of stocking up opportunities before it’s all gone!

With several inches of snow predicted this week (somewhere between 3-6 inches in my little mountain valley) I just had to use a white background and then warm it up with holiday colors.   As usual I couldn’t resist flipping the sketch and adding a few different elements.  After all…just because there is a layer required doesn’t mean you can’t layer that layer with lots and lots of a favorite washi tape right?  And can you guess the trick I pulled so I’d have a full clean and white wreath center to play with?   Oh…and did you notice my word for this year is JOY?  That seems to be showing up everywhere as I design my projects, though I’m having to get a tad creative for single versions since Stampin’ Up doesn’t have quite as many versions of that word that a yearlong use may require. Hint…hint…if you’re reading this SU.

**********

Washi Tape and Wreath Card

Otherwise known as a further sign of my addiction!

(as always click the picture to see a larger image)

Watercooler Wednesday Challenge - WWC97 - Penny's Sketch Challenge - Washi Tape & Wreath Card, an original creation by Jean Fitch. Warmth & Cheer Washi Tape and Designer Series Paper Stack. See the post for additional supply list and directions.

Watercooler Wednesday Challenge - WWC97 - Washi Tape and Wreath card interior - Jean Fitch

Inside view

I’ll let you in on a little secret.   The Designer Series Paper piece is covering up lots and lots of ink!   What started out as the front of the card ended up with some green smudgy thumb prints by mistake that ruined the nice Clean and Simple look I had going on.   Luckily creativity and some gorgeous paper came to the rescue.  I flipped the card so that I had a clean front to redo and a challenge to clean up on the interior.  As it happened I love what that led too.  A lovely plaid flannel look that provided the perfect background for a bit of golden joy and a nice offset for the pine bough and sentiment just below it.  I was so taken with how this design turned out that it just made my line up for the additional Christmas cards I still need to send out.

Supplies:

Stamps:  Santa’s Sleigh, Labeler Alphabet, Christmas Pines (inside)

Inks:  Garden Green

Paper: Thick Whisper White Cardstock, Warmth & Cheer Designer Series Paper Stack, Gold Foil

Tools & Adhesives: Warmth & Cheer Washi Tape, Big Shot, Wonderful Wreath Framelits, Baker’s Twine Trio Pack (Holiday Catalog),  Dimensionals, Glue Dots, Fast Fuse, Bone Folder


DIRECTIONS & Tips:

Tip:  To keep the area inside the wreath clean and white for decorating or leaving plain take your inside of the wreath framelit and line it up with the inside of the wreath on top of your washi tape cardstock layer and run through the Big Shot again.  Without that step you end up with a bit of a messy looking partial bit of washi tape peeking through the center of the wreath.

Cardbase:  Basic cardbase of Thick Whisper White Cardstock cut to 5-1/2″ x 8-1/2″ and scored at 4-1/4″ then folded and creased with a bone folder.

Washi Tape Covered Layer:  2″ x 4-1/2″ Thick Whisper White – Cover with alternating rows of washi tape from the Warmth & Cheer collection that’s currently on sale (Yay! I 💘 saving money.).

1) Using the Wonderful Wreath Framelit dies cut a wreath and bow using your desired designer paper from the Warmth & Cheer Paper Stack.  (Love that this is also currently on sale!)

2) Fit the inside ring die from the wreath back onto the wreath and place over the washi tape panel where you want the wreath to sit then run through the Big Shot.  You may want to use a bit of washi tape to hole it all in place even if you use the magnetic platform so it doesn’t move on you while transferring to the cutting platform.

3) Wrap the Garden Green Baker’s Twine twice around the washi tape panel and tie a bow to one side.  Using Garden Green ink stamp the sentiment from Santa’s Sleigh stamp set on the card front once you have the placement of the washi tape layer estimated.  You might want to use some pencil tick marks to show the placement of the layer.

4) Adhere the washi tape panel above the stamped sentiment with Fast Fuse (or other adhesive).  Attach the Wreath with dimensionals making sure to line up the die cut area on the panel with the die cut line on the wreath.  Attach die cut bow with a glue dot.  If you want you can embellish the bow with a small punched or die cut glimmer paper star or rhinestones.

5) Carefully line up the J, O, Y from the Labeler Alphabet on a very small block and then carefully stamp on the white area inside of the wreath using Garden Green ink.  If you don’t trust your stamping you can stamp on a scrap and then cut out and glue down the individual letters.  Also…if you make a boo boo when inking directly you can place a white circle of clean paper and try again or go with the cut outs.

For the inside of my card I used a sentiment from Christmas Pines as well as the pine bough image.  I also cut a 4-1/4″ x 5-1/2″ piece of the Warmth & Cheer DSP  to cover my inking boo boos then added a die cut of the word JOY from the same die set that was cut from gold foil paper.  I applied the Joy die cut with rolled up glue dots.  I removed the glue dots with a finger nail and then rolled the dots up into  narrow enough pieces to place behind several sections of the die cut.  You could also use the Fine Tip Glue Pen or Tombow Liquid Glue placed in small dots.

*********

That’s it for this challenge.  To see the rest of the design teams contributions to Penny’s Sketch Challenge head on over to the Challenge blog website here.   That’s also where you can add your own creation with the linky doodad.  When you add your own design and there are more than three entries, one of you will be a challenge winner or runner up and have the option to place our badges on your own site.  Of course…you’ll also win bragging rights!

Check here to see the winner of last weeks challenge.  And here to see all of last weeks other linky and Artist Team entries.  Check the challenge site for rules on competing for future challenges.

I hope you will add your own creations this week to the linky.  I love the inspiration I find in your shared creations.

I hope you’ll also join us next Wednesday for yet another Watercooler Wednesday Challenge.

Jean Fitch in pink


Save

Save

Save

Save

Save

Save

Save

Save

Save

Save

Save

Save

Save

Save

Save

Save

Save

Save

Watercooler Wednesday Challenge – WWC95 – A More Masculine Cup of Cheer

WWC95 – Libby’s Masculine Anything Goes Challenge

wwc95-libbys-masculine-challenge-anything-goes

Welcome to this weeks Watercooler Wednesday Challenge.

Many thanks Miss Libby for giving us an Anything Goes challenge with a masculine theme this week.   It allowed me to grab the “boo-boo” card I originally created for our Simply Stamping challenge (remember I said that challenge took me 3 tries :D).   This is the card I originally had in mind to celebrate my late husband’s (and his brothers) love of flannel, sweaters and green cups filled with tea, coffee or hot chocolate).

When I first met my Fitch Family they had a lovely tradition of gathering for “a cup of cheer” as in cups of tea (or coffee in Alan’s case) with family gatherings of every type (a quick cuppa, family dinner or a major holiday).   I felt instantly at home as my own mom and I used to have daily “tea parties” for much the same purpose.  A time to catch up and have that cup that cheers and time together that warms the soul.

If you don’t yet have that tradition in your own family you might want to consider starting it this holiday season.  Makes for lovely memories and closer relationships.  I think of my far flung family with every cup of cheer I treat myself to these days.

**********

A More Masculine (and Green) Cup of Cheer

(as always click the picture to see a larger image)

Watercooler Wednesday Challenge - WWC95 -a-cup-of-cheer-Jean Fitch-July 2015 Paper Pumpkin and 2016 Holiday Catalog

Watercooler Wednesday Challenge - WWC95 -a-masculine -cup-of-cheer-interior-Jean Fitch-july-2015-paper-pumpkin-2016-holiday-catalogInside view

As you can see I’ve dug into my past Paper Pumpkin supplies once again.  Boy are those kits handy!   The July 2015 Thanks a Latte kit is the one I used yet again (to see the other recent one click here).  I love those stamps and wish we had a  Big Shot die to cut those cups!   Of course I’ve also kept my project current by including the Holly Berry Happiness stamp set and the Warmth and Cheer Washi Tape from the 2016 Holiday Catalog as well.

If you have that Pumpkin Kit are you wondering where the “green” cup came from?  I used one of the white die cut cups from the Pumpkin kit and applied Garden Green ink using one of our new foam brayers.  Quite a handy tool don’t you think?  The rest is paper, ink and washi tape.  An easy 10 minute or less card.  Especially easy since I used a Stampin’ Up Notecards & Envelopes set for the base.  Now all I have to do is address and send to remind someone in my family that I’m thinking of them.

Supplies:

Stamps:  Thanks a Latte (July 2015 Paper Pumpkin stamp set), Holly Berry Happiness.

Inks:  Cherry Cobbler, Garden Green, Smoky Slate

Paper: Whisper White Cardstock, Notecards and Envelopes set.

Tools & Adhesives: Warmth & Cheer Washi Tape, Foam Brayer,  Dimensionals, Bone Folder and a Clear Acrylic block or two.

Note:  the gold star I included in the inside of the card was a leftover gold foil Santa’s Sleigh star die cut from an earlier project.  Don’t you love using the bits and pieces that litter your desk?

Watercooler Wednesday Challenge - WWC95 -a-masculine -cup-of-cheer-angled-Jean Fitch-july-2015-paper-pumpkin

DIRECTIONS & Tips:

Tip:  If you are running out of pre-die cut cups you can trace one of the cups on a spare sheet of Whisper White paper and then fussycut with your Paper Snips.

Cardbase:  One ready made note card and envelope from the set of 20 that Stampin’ Up sells.

Focal Layer:  3″ x 4-1/2″ Whisper White – I’d suggest you use the Thick Whisper White so the dimensionals don’t show through.

1) Wrap the bottom of the focal layer with 4 strips of washi tape from the Warmth & Cheer collection.

2) Use the foam brayer to color your white cup cut out with Garden Green ink.  It will take quite a few layers of ink to get it as dark as I did.  Roll the brayer in several directions to get even coverage and no lines.   While the cup is drying use the Cherry Cobbler ink and place the sentiment from the pumpkin kit in the upper right corner.   Then check where you want the cup placement and stamp the steam at the top of the proposed cup area in Smoky Slate and then attach the cup with two dimensionals.

3) Attach the focal layer with dimensionals to the front of the card.  Add whatever you want to the inside of the card and decorate the envelope as well.

For the inside of my card I used a sentiment from Holly Berry Happiness, the cup and steam and sentiment from the Paper Pumpkin and another strip of washi tape as well as a leftover gold star sitting on my desk.

Another reminder from the earlier post.  These notecards & envelopes can be mailed with standard first class postage.  At least here in the States they can.  Not so sure about international mailing regulations.

*********

That’s it for this challenge.  To see the rest of the design teams contributions to Libby’s Masculine Anything Goes Challenge head on over to the Challenge blog website here.   That’s also where you can add your own creation with the linky doodad.  When you add your own design and there are more than three entries, one of you will be a challenge winner or runner up and have the option to place our badges on your own site.  Of course…you’ll also win bragging rights!

Check here to see the winner of last weeks challenge.  And here to see all of last weeks other linky and Artist Team entries.  Check the challenge site for rules on competing for future challenges.

I hope you will add your own creations this week to the linky.  I love the inspiration I find in your shared creations.

I hope you’ll also join us next Wednesday for yet another Watercooler Wednesday Challenge.

Jean Fitch in pink


Save

Save

Save

Save

Save

Save

Save

Save

Save

Save

Save

Save

Save

Save

Save

Save

Save

Wacky Watercooler November 2016 Blog Hop: All About Christmas!

2016-november-banner

Welcome to our “All Out” Christmas Blog Hop

Hello and Welcome to the “All Out” Christmas Celebration Wacky Watercooler Blog Hop.  If you are looking for inspiration for Christmas you’ve come to the right place.

As usual you can follow this hop in a circle going either direction.  Of course you can also return to the home hop site if you ever get lost along the way.   That site will also, with a bit of scrolling back lead you to any and all of our past hops that you might still find inspiring.

Now that you’re here I hope you’ve arrived from  Gail’s blog.   Gail is a dear friend I first met in the Watercooler.  She’s also one of our many (and talented) Canadian stampers.    I hope you found her projects as inspiring as I always do.  I always enjoy Gails original take on life and on stamping.  She’s so often the heart of our Watercooler stamping group.  A fun presence that reminds us all how much joy there is in life.

*******

Today all the stops are out and we’ve a wide open field for any kind of project!  So…what do you think I did?  Cards of course.  {grin}   Over the next few weeks I’ve got projects of all kinds on tap to show you but as we approach the end of November I’m working madly to finish as many cards as I can so I’ll meet my first week of December mail out deadline.   That’s my annual deadline…just don’t ask me when they really get mailed.  LOL

Here’s my first Christmas offering.   A

The secret ingredient is Washi Tape…and gold.   Love that rustic/formal combo.   Over the weekend I’ll be sharing a page of directions as well as a pictorial tutorial to show you exactly how it’s done.  It’s really quite easy.

Santa Sleigh Tree with Washi Tape

(click the image for a larger view)

santas-sleigh-with-washi-tape-jean-fitch-copy

Inside

santas-sleigh-washi-tape-inside-jean-fitch-copy

Supplies:

Stamps: Santa’s Sleigh, Star of Light (the three stars)

Ink: Versamark, Garden Green

Paper:  Crumb Cake, Early Espresso Cardstock & Gold Foil

Other: Big Shot, Santa’s Sleigh Thinlits, Baker’s Twine Trio (Holiday Catalog), Warmth & Cheer Washi Tape, Gold Embossing Powder, Heat Tool, Dimensionals, Glue Dots, SNAIL

***********

Next up is a fun Gift Card Holder in a bag.   For this project I got my new Stitched Frame Framelits out to play.  I’ve done the new rectangle from a square in this same design but wouldn’t you know…I gave that version away!  Arghhh…just before the hop.   So…check back again and I’ll have that for you too as well as directions on how to make the rectangle.  In the meantime…here’s the simpler version.

Note:  The Blooms & Wishes stamp set that I used is 25% off through the end of November so if you want to CASE it’s the perfect time to purchase the ingredients.

Stitched Frame Framelit Gift Card Bag

stitched-gift-card-bag-jean-fitchPlain without insert


christmas-stitched-frame-gift-card-holderChristmas with insert that holds a gift card

flower-stitched-gift-card-holder-detail-november-2016-watercooler-hop-jean-fitch-copyDetail of the stitched frame piece

stitched-gift-card-pocketBackside of the insert with the gift card pocket

stitched-gift-card-bag-2-jean-fitchAlternate version

Supplies:

Stamps: Blooms & Wishes, Merry Medley (background Stamp)

Ink: Soft Suede, Watermelon Wonder, Wild Wasabi

Paper: Soft Sky, Whisper White, Glassine Bags

Other:  Bone Folder, Linen Thread, Baker’s Twine Trio (Holiday Catalog), Rhinestone Jewels, Paper Snips,  SNAIL, Glue Dots, Dimensionals.

I’ll have directions for this one as well over the weekend.

***************************

Last but not least here’s my final project.  It just isn’t Christmas without a star right?  So using the Star of Light stamps and dies I’ve created a couple of “Star of Bethlehem” type card designs.

Star of Light 1 & 2

star-of-light-1-jean-fitchSilver embossed version – stamped behind the window

star-of-light-2-jean-fitchSilver foil die cut version

Supplies:

Stamps: Star of Light

Ink: Night of Navy, Versamark

Paper: Soft Sky, Whisper White, Silver Foil

Other: Big Shot, Evening Star Thinlits, Bone Folder, Silver Metallic Thread, White Seam Binding,  SNAIL, Glue Dots, Dimensionals.

***************************

I encourage you to play with the products that I’ve showcased today.  Especially if you are still working on getting your own cards ready to send out.  As you can see, the products I’ve used will coordinate with products you may already have or can find in the Stampin’ Up Holiday and Annual Catalogs.

*******

That’s it for my share of the hop.  Time to move on over to my friend  Christine’s blog.   Christine is another original who is crafty in so many ways and areas and that joy of creativity always shines through.  I know you’ll be inspired in so many ways.  Enjoy the rest of the hop and I hope to see you back here soon.

To follow the hop click on the link below:

next watercooler crock button

Home Button

Previous Button

Save

Save

Save

Save

Save

Save

Save

Save

Save

Save


Save

Save

Save

Save

Save

Save

Save

Save

Save

Save

Save

Save

Save

Save

Watercooler Wednesday Challenge – WWC94 – A Redwork Cup of Cheer

Posted: 16 Nov 2016 05:00 AM PST

WWC94 – Heidi’s Simply Stamping Challenge

Featuring Coffee or Tea

wwc94-heidis-simply-stamping-challenge-featuring-coffee-or-tea-image

Welcome to this weeksWatercooler Wednesday Challenge.

Heidi’s gone tricky on us this week.   She’s leading off with a Simply Stamping Challenge (remember that one?  Lots of white space (or whatever color you are using), no embellishments, no die cuts…just stamping so paper and ink only…well okay…you can do one layer but that’s it).  AND…she’s added a coffee or tea theme.  You may have to dig into your stash for that one since this is stamping only and no punch art allowed.  LOL

I messed up on this one because I focused on the coffee and tea angle.  And yep…I came up with a punch art version…then moved on to a washi tape and die cut version (can you tell the whole simply stamping part was eluding me?).  Sadly it took me until my third try to catch on…STAMPS ONLY!!    Just a heads up for all you loyal followers who use the linky.   And no…I’m not blaming Heidi at all for my nervous breakdown.  Nope, nada, never.  Well okay…maybe just a little.  {grin}

On the upside…Heidi’s lovely challenge reminded me to go back to my roots.   When I was a munchkin my mom taught me about redwork stitching.  The type of embroidery where you use only red thread and generally the patterns are a bit retro and mostly outlines since redwork was something popular many, many moons ago.  Here’s a link to a basic description and a free pattern if you want to give it a try in the none ink world.

**********

Cup of Cheer

(as always click the picture to see a larger image)

Watercooler Wednesday Challenge - WWC94 - Jean Fitch - Thanks a Latte July 2015 Paper Pumpkin - Holly Berry Happiness - Stitched with Cheer

As you can see I’ve dug into my past Paper Pumpkin supplies.  The July 2015 Thanks a Latte kit to be exact.  I love those stamps!   Of course I’ve also kept it current by including a few sets from the 2016 Holiday Catalog as well.  Since this is a “redwork” design I thought it quite appropriate to grab a stamp from the Stitched with Cheer set from the Holiday Catalog.  Love those little Sparkles.  I also thought the sentiment from Holly Berry Happiness fit quite well with a tea cup filled with cheer.  I can see the joyous wishes and a prayer rising with the steam can’t you?

Supplies:

Stamps:  Thanks a Latte (July 2015 Paper Pumpkin stamp set), Holly Berry Happiness, Stitched with Cheer.

Inks:  Cherry Cobbler

Paper: Whisper White Cardstock, Notecards and Envelopes set.

Tools & Adhesives: Dimensionals and Bone Folder and Clear Acrylic block or two.


DIRECTIONS & Tips:

Cardbase:  One ready made note card and envelope from the set of 20 that Stampin’ Up sells.

Focal Layer:  3″ x 4-1/2″ Whisper White – I’d suggest you use the Thick Whisper White so the dimensionals don’t show through.

1) Stamp your sentiment from Holly Berry Happiness at the bottom of the focal layer piece.  Stamp your cup, then your Cup of Cheer sentiment inside the cup (boy aren’t you glad the Paper Pumpkin stamps are clear photopolymer right about now?).  Stamp the steam image as close to the cup line as you can get.

2) Stamp the sprinkle/star image from Stitched with Cheer randomly around the steam at the top of the card.

3) Attach the focal layer with dimensionals to the front of the card.  Add whatever you want to the inside of the card and decorate the envelope as well.

Don’t you love how easy the Note Cards & Envelopes set make cardmaking?  The cards are scored so all you have to do is fold and set the crease with your bone folder (or a ruler if you are out in the boonies without tools).   While a bit smaller than the usual card size (notecards are 3-1/2″ x 5″) these cool notecards can still be mailed with the usual first class stamp.  So no worries on mailing.   They are also quite the money saver as well.  A set of 20 cards and envelopes are in the package and come out to about 32¢ per card and envelope pairing.  Cheaper than the 47¢ postage to mail them!   With the extra layer and and the ink as well as the postage this card still comes in under $1 (including the postage).   Not bad and cheaper than an actual cup of coffee or tea to brighten a friends a day.   Of course…if you want to include a Starbucks or Dutch Bros gift card I’m betting your friend won’t say no. {grin}

*********

That’s it for this challenge.  To see the rest of the design teams contributions to Heidi’s Simply Stamping Challenge head on over to the Challenge blog website here.   That’s also where you can add your own creation with the linky doodad.  When you add your own design and there are more than three entries, one of you will be a challenge winner or runner up and have the option to place our badges on your own site.  Of course…you’ll also win bragging rights!

Check here to see the winner of last weeks challenge.  Andhere to see all of last weeks other linky and Artist Team entries.  Check the challenge site for rules on competing for future challenges.

I hope you will add your own creations this week to the linky.  I love the inspiration I find in your shared creations.

I hope you’ll also join us next Wednesday for yet another Watercooler Wednesday Challenge.

Jean Fitch in pink


Watercooler Wednesday Challenge – WWC93 – Noel Bells or should that be Noel’s Bells?

WWC93 – Deb’s Color Challenge

wwc93-debs-color-challenge

Welcome to this weeks Watercooler Wednesday Challenge.

Deb has given us a cool set of colors to work with this week.  I have to admit I had a hard time moving past those very cool and modern splotches and it took some time for my mind to wrap itself around a project idea.  In part because of the colors and the splotches I kept thinking retro of some kind and masculine.  Christmas never entered my head until I started seeing some of the rest of the teams ideas.  Then I hit my head and said…of course…red and green and a couple of neutrals.  Totally traditional and perfect for Christmas.  Of course by that time I was down the modern rabbit hole so…ta..da..here’s my mix of retro modern with a hint of traditional for a Christmas card perfect for a guy.

**********

Noel Bells

(or should that be Noel’s Bells?)

(as always click the picture to see a larger image)

Watercooler Wednesday Challenge - WWC93 - Deb's Color Challenge - Noel's Bells - Jean Fitch

I really wish you could see this card in real life.  Or that my photography set up was better.  The dark vividness of the Real Red against the black mat and the stark white of the cardbase is really something.  Then add the pop of green from the Old Olive and until you get to the Soft Suede bells this card has color that pops.    It was quite a fun project.  I found myself thinking modern graphic arts mixed with California Mission styles.  Quite a combo.  I’d love to know what you think.

Supplies:

Stamps:  Merry Medley, Seasonal Bells

Inks:  Memento Tuxedo Black, Soft Suede

Paper: Thick Whisper White, Real Red, Old Olive, Soft Suede, Basic Black Cardstock

Punches: Bell Punch

Tools & Adhesives:  Big Shot, Pretty Pines Thinlit Dies, Christmas Stockings Thinlit Dies, Simply Score Tool, Bone Folder, Tombow Liquid Glue, Dimensionals, Glue Dots & SNAIL.


DIRECTIONS & Tips:

Tip: When inking the Merry Medley background stamp place the stamp on it’s block face up on the table and ink by dabbing the pad onto the stamp.  This lets you see where you might need extra ink for a well inked image.

Tip: If you would like a wonderful set of greetings (about 14 I think) you can cut the background stamp into the individual sentiments that make up the whole stamp.  Of course if you want the whole stamp back together again just keep track of a picture of the whole stamp to serve as a map for the complete block.

Cardbase:  Thick Whisper White – 5-1/2″ x 8-1/2″  Score at 4-1/4″

Black Mat Layer: 4″ x 5-1/4″

Red Focal Layer: 3-3/4″ x 5″

1) Place your background stamp face up on the table and ink with Memento Tuxedo Black or Basic Black Archival ink.  Decide where you want the placement of the Real Red Layer to best feature the sentiments you want to see.  Adhere the red layer to the Basic Black mat layer.

2) Die cut the boughs and mistletoe from the Pretty Pines dies with Old Olive scraps of paper.

3) Stamp and punch two bells using your favorite bell image (I like the one that resembles mission bells) and Soft Suede ink on Soft Suede paper.

4) Assemble your boughs and bells and adhere to the focal layer.  I glued the greenery directly to the paper using small dots of Tombow Liquid Glue.  I let the glue set up a bit before attaching to the paper.   Attach one bell with glue dots and the second with a couple of Dimensionals for varying height.  If you want you can pierce the tops of the bells and thread some Linen thread or a very thin ribbon through and tie a bow or knot.   My linen thread has gone walk about so I skipped that step.  I was afraid thin black baker’s twine would look too funereal.

5) Add your focal piece to the white card base with dimensionals and voila!  You’re ready to decorate the interior and envelope and then mail!

*********

Want to join in the challenge but can’t quite think what to do? Check out page 30 of the Holiday Catalog and find the Merry Medley sample at the bottom of the page.  It’s perfect.  Just swap out the black sentiment for a Soft Suede one and you are all set.

*********

That’s it for this challenge.  To see the rest of the design teams contributions to Deb’s Color Challenge head on over to the Challenge blog website here.   That’s also where you can add your own creation with the linky doodad.  When you add your own design and there are more than three entries, one of you will be a challenge winner or runner up and have the option to place our badges on your own site.  Of course…you’ll also win bragging rights!

Check here to see the winner of last weeks challenge.  And here to see all of last weeks other linky and Artist Team entries.  Check the challenge site for rules on competing for future challenges.

I hope you will add your own creations this week to the linky.  I love the inspiration I find in your shared creations.

I hope you’ll also join us next Wednesday for yet another Watercooler Wednesday Challenge.

Jean Fitch in pink


Save

Save

Save

Save

Save

Save

Save

Save

Save

Save

Save

Save

Save

Save

Save

Watercooler Wednesday Challenge – WWC92 – Star of Wonder

WWC92 – Jean’s Sketch Challenge

wwc92-jeans-sketch-challenge-image

Welcome to this weeks Watercooler Wednesday Challenge.  I had fun coming up with the sketch for this weeks challenge.  Hopefully you’ll see from the Design Teams projects that you don’t have to follow the colors in the sketch.  I used the color solely to differentiate the separate layers.

Whether you use the sketch rightside up or turn it around for a different angle (as many of the design team members did) I hope you’ll find it fun and easy. I have to admit that the basic blockiness of the forms appealed to me.  Squares and rectangles make me happy.  Circles tend to confuse me and make me nervous.  I seem to like those hard discernible edges and corners.  After all…as a kid I always looked forward to seeing what was coming around a corner.  Still do for that matter.  It’s exciting!   LOL

Something else you might try.  You aren’t limited to rectangle shapes of paper.  If you want, your layers could be die cuts or other shapes.  It’s the layering that’s important.  Size is also totally up to you.   After I had my card finished I realized I could have used a set of stars for my overlapping layers.   That would have been cool don’t you think?   Hm…something to try another time just to see if it works.    I did try the Lots of Labels and Banner die cut shapes but they just didn’t seem to work for me.   I hope some of you out there will let your imaginations take flight and see what you can come up with for this week’s sketch challenge.


**********

Star of Wonder

(as always click the picture to see a larger image)

Watercooler Wednesday Challenge - WWC92 - Jean's Sketch Challange - Jean Fitch - Star of Light die & Serene Scenery

Card Interior

Watercooler Wednesday Challenge - WWC92 - Jean Fitch - Inside of card - Serene Scenery DSP & Peace this Christmas

Once I knew what the basic theme I wanted was, it all fell together pretty quickly.  I chose to apply a bit of the ombre technique, with gradations or shades of a color tone for my layering.  I drew the colors from the piece of Serene Scenery paper that I knew I wanted to use and that would also complement the die cut silver star that was already sitting on my desk from a class I taught several weeks ago.   Having a starting point always helps don’t you think?   I also went with one of the layer colors for the sentiment die cut.

One of the things I love about the star is the almost crackle feel it has to it’s look.  At least in person anyway.  I discovered that look when I experimented with which side of the foil paper I placed the Starlight embossing die when cutting.  To get this look I placed the die on the white backside of the foil paper.   You end up with a more subtle embossing and because the cutting plates I use are very chewed up some of that transferred to the foil as well.  It also took down the perfect shiny mirror look of the silver foil too.

So what do you think.  Does this card have a bit of a beach feel to it or a star at early evening?  Perhaps I’m being swayed by the Island, Bay & Pool in the color names?    Or thinking Hawaii when choosing the papers?   However you view it…may you experience the peaceful feeling in your own lives that I intended in this cards creation.

Here are the details in case you want to recreate your own version.

Supplies:

Stamps:  Peace This Christmas (interior sentiment)

Inks:  Island Indigo

Paper: Bermuda Bay, Island Indigo, Pool Party Thick Whisper White Cardstock; Serene Scenery Designer Paper Stack & Silver Foil Paper

Punches: None

Tools & Adhesives:  Big Shot, Starlight Thinlit Dies, Christmas Greetings Thinlit Dies, Basic Jewel Rhinestones, Simply Score Tool, Bone Folder, Dimensionals, SNAIL or Fast Fuse.


DIRECTIONS:

A very simple card really.  Cut paper.   Die cut two pieces and glue!  A no stamp card except for the interior sentiment and you could handwrite that if you wish.  {grin}

Cardbase:  Thick Whisper White – 5-1/2″ x 8-1/2″  Score at 4-1/4″  Fold and crease with a bone folder.

Layers:  Island Indigo 2-1/2″ x 5-1/4″,  Bermuda Bay 2-1/2″ x 5″, Pool Party 2-1/2″ x 4-3/4″,  Serene Scenery DSP  2-1/2″ 4-1/2″  Basically all the color layers are 2-1/2″ wide and the height decreases by a 1/4″ with each layer.

1)  Cut layers as indicated above.  Adhere them one by one offsetting equally as you move to the right.

2) Die cut a large star from the Starlight Thinlit Collection.  I used the one that embosses lines…but…I placed the die on the back of the foil paper (white side up) instead of the silver facing up.  This gave a more cracked glass look to it.  A tad more subtle.   Adhere to the Serene Scenery Designer Series Paper Layer with Dimensionals.  Add a rhinestone to the center.

3) Using Island Indigo Cardstock die cut the word Peace using the Christmas Greetings die set.  Of course any world would work if you want this to have a different flavor.  Adhere the word to the right hand edge of the card.  That finishes the exterior.

Optional ideas: Stamp some small star images from the matching Star of Light stamp set (perhaps heat embossing them in silver) across the Serene Scenery piece or along the visible white edges.   Or scatter a few more small rhinestones around the card face.

To finish the inside I adhered a small leftover strip of the Serene Scenery paper along the spine and stamped one of my favorite greetings from this year’s Annual Catalog Christmas section.

*********

That’s it for this challenge.  To see the rest of the design teams contributions to my sketch challenge head on over to the Challenge blog website here.   That’s also where you can add your own creation with the linky doodad.  When you add your own design and there are more than three entries, one of you will be a challenge winner or runner up and have the option to place our badges on your own site.  Of course…you’ll also win bragging rights!

Check here to see the winner of last weeks challenge.  And here to see all of last weeks other linky and Artist Team entries.  Check the challenge site for rules on competing for future challenges.

I hope you will add your own creations this week to the linky.  I love the inspiration I find in your shared creations and would love to see what you make of my sketch.

I hope you’ll also join us next Wednesday for yet another Watercooler Wednesday Challenge.

Jean Fitch in pink


Save

Save

Save

Save

Save

Save

Save

Save

Save

Save

Save

Save

Watercooler Wednesday Challenge – WWC91 – Masculine Anything Goes

WWC91 – Marsha’s Masculine Anything Goes Challenge

wwc91-marshas-masculine-challenge-anything-goes

Welcome to this weeks Watercooler Wednesday Challenge.

This week Marsha has set us free to do an Anything Goes Challenge.  Well…as long as it has a masculine theme that is.  I truly love the freedom of an Anything Goes challenge whatever the theme.  So many possibilities.  So why didn’t I make a box or some such?  Well…I had this cable stitch folder sitting there and some Garden Green and Cherry Cobbler paper sitting there and some fun memories.  So of course…what came out was a card.

The embossing of the Cable Knit folder reminds me of hand knit sweaters.    A bit like one I knit many years ago for my late husband Steve.  Well…to be truthful it had no cables but it was green anyway.  😀    We shopped for the wool and the pattern while we were in Ashland, Oregon visiting my folks (have you ever taken a husband into a yarn shop ladies?  Interesting).  It was my first attempt at a sweater with reindeer and pine trees knit into the sweater itself and not hand stitched with a needle.  Intarsia they call that style of knitting pictures and shapes into a larger piece.  Very tricky for the newish sweater knitter that I was at the time but such a boost when it actually worked out.   Of course at that time we lived in Southern California so you can guess just how much wear that sweater got (mostly when we visited Oregon again or went cross country skiing).  LOL    Note to self…don’t shop for sweater materials when you are cold and in a state that stays cold a good part of the year… especially when you live elsewhere that’s mostly warm!

Now that the memory has surfaced again I’ll have to see if I can find the sweater and curl up with it during the very cold winter that’s being predicted for my area.

**********

A Cable Knit Warm Greeting

(as always click the picture to see a larger image)

Watercooler Wednesday Challenge - WWC91 - Cable Knit meets Christmas Pines - Jean Fitch

Supplies:

Stamps:  Tin of Cards

Inks:  Garden Green

Paper: Cherry Cobbler, Crumb Cake, Early Espresso, Garden Green, Very Vanilla

Punches: None

Tools & Adhesives:  Big Shot, Pretty Pines Thinlit dies, Layering Squares Framelit Dies, Cable Knit Dynamic Embossing Folder, Big Shot Die Brush, Simply Score Tool, Bone Folder, Dimensionals, Fast Fuse and Tombow Liquid Glue.


DIRECTIONS & Tips:

Tip The new Dynamic Folders require a different sandwich when you run them through the big folder.  Here’s a PDF from Sizzix with a reminder on how to use this new type of folder:

dynamic-folder-embossing-tips-tricks  – PDF (click to download)

Since I did this card for last Saturday’s Stamp Camp as well as the Challenge luckily I have a PDF of the directions for this as well.

cable-knit-warm-greetings-card-blog-instructions-version  – PDF (click to download)

*********

That’s it for this challenge.  To see the rest of the design teams contributions to Marsha’s Masculine Anything Goes Challenge head on over to the Challenge blog website here.   That’s also where you can add your own creation with the linky doodad.  When you add your own design and there are more than three entries, one of you will be a challenge winner or runner up and have the option to place our badges on your own site.  Of course…you’ll also win bragging rights!

Check here to see the winner of last weeks challenge.  And here to see all of last weeks other linky and Artist Team entries.  Check the challenge site for rules on competing for future challenges.

I hope you will add your own creations this week to the linky.  I love the inspiration I find in your shared creations.

And…I hope you’ll  join us next Wednesday for yet another Watercooler Wednesday Challenge.  Hint…next weeks sketch challenge is mine.  All mine.  {grin}

Jean Fitch in pink


Save

Save

Save

Save

Save

Save

Save

Save

Save

Save

Save

Save

Save

Save

Watercooler Wednesday Challenge – WWC90 – Black on White Simplicity

WWC90 – Libby’s Black on White Simply Stamping Challenge

wwc90-libbys-simply-stamping-challenge - Black on White

Welcome to this weeks Watercooler Wednesday Challenge.

This week Libby is keeping it truly simple with this fun challenge. Can’t get much simpler than black ink on white paper.  Of course…I just had to add a bit of white on black too with my doodles!

I tried to think how far back black ink on white paper might go but figured it had something to do with the first person to use a charcoal stick from the fire in the rain and thus a form of black ink.   Hm…probably close to cave man days.   Of course…they didn’t exactly have the white paper now did they?

As per my usual I did a Google and found a variety of answers from China to Egypt to use of ink from a cuttle fish.   From the descriptions I’m very thankful that Stampin’ Up has so many black ink options that come in easy to use ink pads.   They make cool stamps to use with the ink too.  {grin}

**********

Black on White Blessing

(as always click the picture to see a larger image)

Watercooler Wednesday Challenge - WWC90 - Libby's Black on White Simply Stamping - Jean Fitch - Paisleys & Posies, Fall Fest (ret)

Care to guess what I used for the white on black inking?

Think current…not retired.

I love that the project mirrored pretty closely what I saw in my mind.  I had thought about creating a frame around the main collage image with other stamps from the Paisleys & Posies set but decided in the spirit of the challenge to keep it truly simple.   I also loved that the sentiment and the pumpkin images could be placed together on one block.  Should make producing multiples quick and easy.   I think I’ll be reproducing this card for many of my friends at the Wellness Clinic I’ve been going to.  Although…I may play with single colors besides black just for the fun of it.  After all…Stampin’ Up has so many fun colors to work with don’t you think?  Maybe I should order an extra Chalk Marker?

One of the things I love about very simple cards like this…the emphasis for me is on the handwritten note I place inside.   A nice counterpoint to the stamped images on the front.

Another suggestion if you are planning on multiple copies of the design.  Use the Notecard and Envelope sets Stampin’ Up sells.  You get 20 card and envelope sets in the pack for a very reasonable price (about 31¢ a set here in the States).

Supplies:

Stamps:  Paisleys & Posies, Fall Fest (retired)

Inks:  Memento Tuxedo Black, White Chalk Marker (I intended to use my retired white gel pen but after 7 years wouldn’t you know…it only had 4 dots left in it!  Sigh.  I’m so thankful I had the current Chalk Marker on hand.)

Paper: Thick Whisper White

Punches: None

Tools & Adhesives:  Simply Score Tool, Bone Folder, Dimensionals


DIRECTIONS & Tips:

Can’t get any simpler than this card really.  Unless you stamp directly on the card base.

Tip for getting a more white look from the Chalk Marker.  Go over a couple of times where you’ve made your marks.   And let the ink dry from your stamped image and in between the applications of chalk.

Tip for fixing a bold image that didn’t quite ink in all spots completely.   To get the best bold image you can ink the stamp upside down.  Place the stamp face up and then apply the ink pad.  That way you can see how fully inked the image is.  Then…place the stamp on the paper and let it sit there for just a bit longer than usual.  Allow the ink to sink into the paper.  If there are still a few spots that are less covered than you would like you can use a blender pen and the ink from the ink pad to fill in as needed.  Use light strokes so it melds with the stamped ink.

Cardbase:  Thick Whisper White – 5-1/2″ x 8-1/2″  Score at 4-1/4″

Focal Layer: Thick Whisper White – 5″ x 3-3/4″

1) Place your pumpkin and sentiment image as a collage on one black then stamp with Memento Black Ink onto the center of the focal layer.    Stamp the small flower from Paisleys & Posies to either side of the sentiment.  If you are truly a perfectionist you can use the Stamp a Ma Jig for perfect placement.  For the rest of us…the old Eyeball Mark 1 works reasonably well.  LOL

2) Using a white gel pen or Chalk Marker doodle images in the black pumpkin sections.  If you want a more “Zentangle” look try using the pumpkin image from Jar of Haunts and one of the Project Life pens.

3) Pop the focal layer up on the card base with dimensionals.  Voila!  You are done!

*********

That’s it for this challenge.  To see the rest of the design teams contributions to Libby’s Black on White theme challenge head on over to the Challenge blog website here.   That’s also where you can add your own creation with the linky doodad.  When you add your own design and there are more than three entries, one of you will be a challenge winner or runner up and have the option to place our badges on your own site.  Of course…you’ll also win bragging rights!

Check here to see the winner of last weeks challenge.  And here to see all of last weeks other linky and Artist Team entries.  Check the challenge site for rules on competing for future challenges.

I hope you will add your own creations this week to the linky.  I love the inspiration I find in your shared creations.

I hope you’ll also join us next Wednesday for yet another Watercooler Wednesday Challenge.

Jean Fitch in pink


Save

Save

Save

Save

Save

Save

Save

Save

Save

Save

Save

Save

Watercooler Wednesday Challenge – WWC87 – One Good Thing on Top of Another

WWC87 – Kath’s Masculine Themed

Anything Goes Challenge

wwc87-kaths-masculine-anything-goes-challenge

Welcome to this weeks Watercooler Wednesday Challenge.

This week Kath has given us a fun challenge.  Make a guy thing (card, box or whatever)…anyway you want.   This was a challenge that once again is perfect for yours truly who lives surrounded by trees and deer (the traditional guy themes) and two male cats in a mountain valley in the Pacific Northwest and you can’t get more guy themed than that right?   Well of course cars or trucks might also be needed (we have those too) but hey…maybe he’s a guy who bikes to work like my doctor and his assistant instead of driving?  And of course guys read books, listen to music and all kinds of other “normal” things so really…almost any type thing might provide inspiration for a guy themed project.

Here was my take based on the local inspiration of my many pine trees and the idea of a plaid deer.  Why plaid you ask?  Heaven only knows…but it’s what came to mind (hush Patti on comments about my mind.  :D).

**********

One on Top of Another

(as always click the picture to see a larger image)

Watercooler Wednesday Challenge - WWC87 - Kaths maculine anything goes challenge- Jean Fitch-Santa's Sleigh stamps and dies

This is what I call a 3D-ish project.  It’s not a box, it’s not a bag or other treat type holder but it does pop off the card just a bit.  It’s also one that started out with one design feature in mind…a plaid deer and possibly a plain one to share the page. The rest just evolved as I went.  After I stamped and die cut the plaid deer I also did one in Crumb Cake.  To preserve and not waste paper I stamped and cut right in the corner.  I put aside the Crumb Cake leftovers and it lit on top of a white piece of paper.  Aha!   The deer had stepped right off the paper…or so it seemed.  So I had an evolution of the deer theme going.  From plain white (the best kind to hide in a snow storm) to crumb cake with features stamped to the fancy dan plaid deer who perhaps sees that as his version of camouflage?  Of course the copper wreath was a given as I’m so addicted to copper these days and as metals go…that seemed a more masculine type of metal.  Besides…that plaid deer has a bit of attitude going so why not a laurel wreath of sorts like the Romans did for the star of the parade.

I have to admit…the card was finished before I reread the saying and realized it could also apply to my Brother in Law who is a bow hunter and always gets his limit of deer or elk to feed his family, as well as the holiday season I intended it for.  I wonder if SU thought about that possibility.  Of course…I’m not sure they thought of layered deer or even plaid deer.  And I had stamped the sentiment before I realized that the deer themselves were on top of one another.   So sometimes humorous congruence happens when you least expect it.

So it appears my card might work for many different types of men.  Those who wear plaid, those who hang out in slightly dissimilar groups, those with attitude and those who hunt.   Or for the male deer with attitude who may decide to hunt the men!

For me…I’m picturing those proud deer stepping out in the moonlight under the pines as the snow begins to fall.  It’s truly beautiful when you see it in person…with or without the plaid.

Supplies:

Stamps:  Santa’s Sleigh, snow dots are from one of the various sets on my table…I’m not sure which one.

Inks: Garden Green, Memento Tuxedo Black, Black StazOn

Paper: Crumb Cake, Garden Green, Whisper White Cardstock (thick and thin) ; Warmth and Cheer 6″ x 6″ Designer Series Paper Stack, Copper Foil Paper

Punches: None

Tools & Adhesives:  Big Shot, Santa’s Sleigh Thinlits, Pine Bough Embossing Folder, Paper Snips,  Q-tips,  Dimensionals, SNAIL


DIRECTIONS & Tips:

Cardbase:  Thick Whisper White – 5-1/2″ x 8-1/2″  Score at 4-1/4″

Stamp with Memento Black Ink  the deer image from Santa’s Sleigh on the plaid sheet from Warmth & Cheer DSP and die cut.

Wreath:  Using Black StazOn ink stamp the wreath image from Santa’s Sleigh on a scrap of Copper Foil.  Die cut and carefully slip over the plaid deer’s head.

Crumb Cake Layer: 4″ x 5-1/4″  Stamp with Memento Black Ink and die cut the deer in the bottom left hand corner.  Then emboss the Crumb Cake layer piece in the Pine Bough embossing folder.

Stamp the falling snow in Whisper White Craft Ink with whatever snow or dot image you have.  If you want the snow to stand out a bit more cover the ink with white embossing powder and heat with your heat tool.

Using a Q-Tip gently rub Garden Green ink across the raised/embossed pine boughs.  This may take repeated layering of the ink to get the depth of color you prefer.  Adhere the Crumb Cake layer to the Whisper White Cardbase making sure to add adhesive all along the edges including around the die cut deer area.  Layer the Crumb Cake deer using glue dots onto the layer piece in the right hand corner.   Using dimensionals adhere the plaid deer with his wreath over top of the two other deer.

Sentiment flag:   Stamp the sentiment from Santa’s Sleigh on a scrap of Whisper White and flag/banner cut the ends.  My scrap was 1/2″ x 2-3/4″.   Cut a Garden Green piece 3/4″ x 3-1/2″.  Notch the far end top and bottom as evenly as you can using paper snips.  If you are truly a perfectionist you can make a measured dot for the top of the triangle cut and measure the sides as well.  As you can see…I just winged it.  Isn’t that what most guys would do?   Wrap copper metallic thread as many times as seems good to you.  I started with a glue dot on the back to hold the starting end and then ended by pressing the final end into that same glue dot.   Add a notch in the left end of the mat.  Adhere your Whisper White sentiment piece and banner cut the Garden Green ends.  I decided to blunt cut my ends a bit to match the more blunt left side end.   Attach the matted piece with two dimensionals.   Stand back and admire your creation, decorate the interior  and then send to a guy who likes plaid…or at least will grin at the idea!


Tip: I used a Q-tip to give myself more control when applying the color to the raised portions of pine boughs.  I found when I used a sponge or sponge dauber that I ended up with halos of green around the boughs.  Not what I was going for if I could avoid it.   AND…I used a pair of paper snips to make my notches to wrap my copper thread around for another pop of metallic shine.

*********

That’s it for this challenge.  To see the rest of the design teams contributions to Kath’s masculine theme challenge head on over to the Challenge blog website here.   That’s also where you can add your own creation with the linky doodad.  When you add your own design and there are more than three entries, one of you will be a challenge winner or runner up and have the option to place our badges on your own site.  Of course…you’ll also win bragging rights!

Check here to see the winner of last weeks challenge.  And here to see all of last weeks other linky and Artist Team entries.  Check the challenge site for rules on competing for future challenges.

I hope you will add your own creations this week to the linky.  I love the inspiration I find in your shared creations.

I hope you’ll also join us next Wednesday for yet another Watercooler Wednesday Challenge.

Jean Fitch in pink


Save

Save

Save

Save

Save

Save

Save

Save

Save

Save

Save

Save