


Whether you celebrate it in the religious manner
with Mass and sermons on the Trinity

or
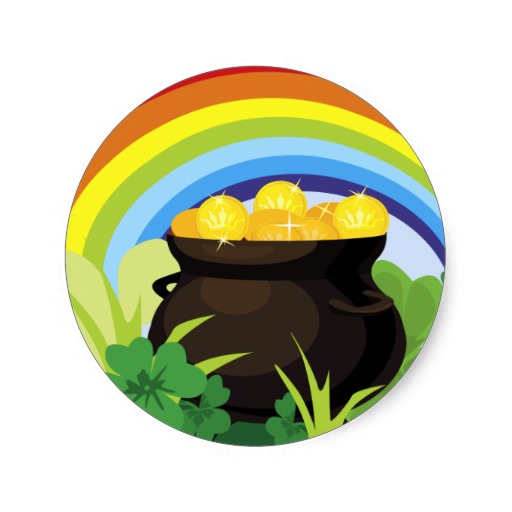
your thoughts turn to gold & rainbows
 Today is the day everyone is Irish
and wears a bit of the green.
*****
Here’s how we celebrated at our March Stamp Camp.
And check further down in the post to see how you can celebrate with
Free Shipping today!
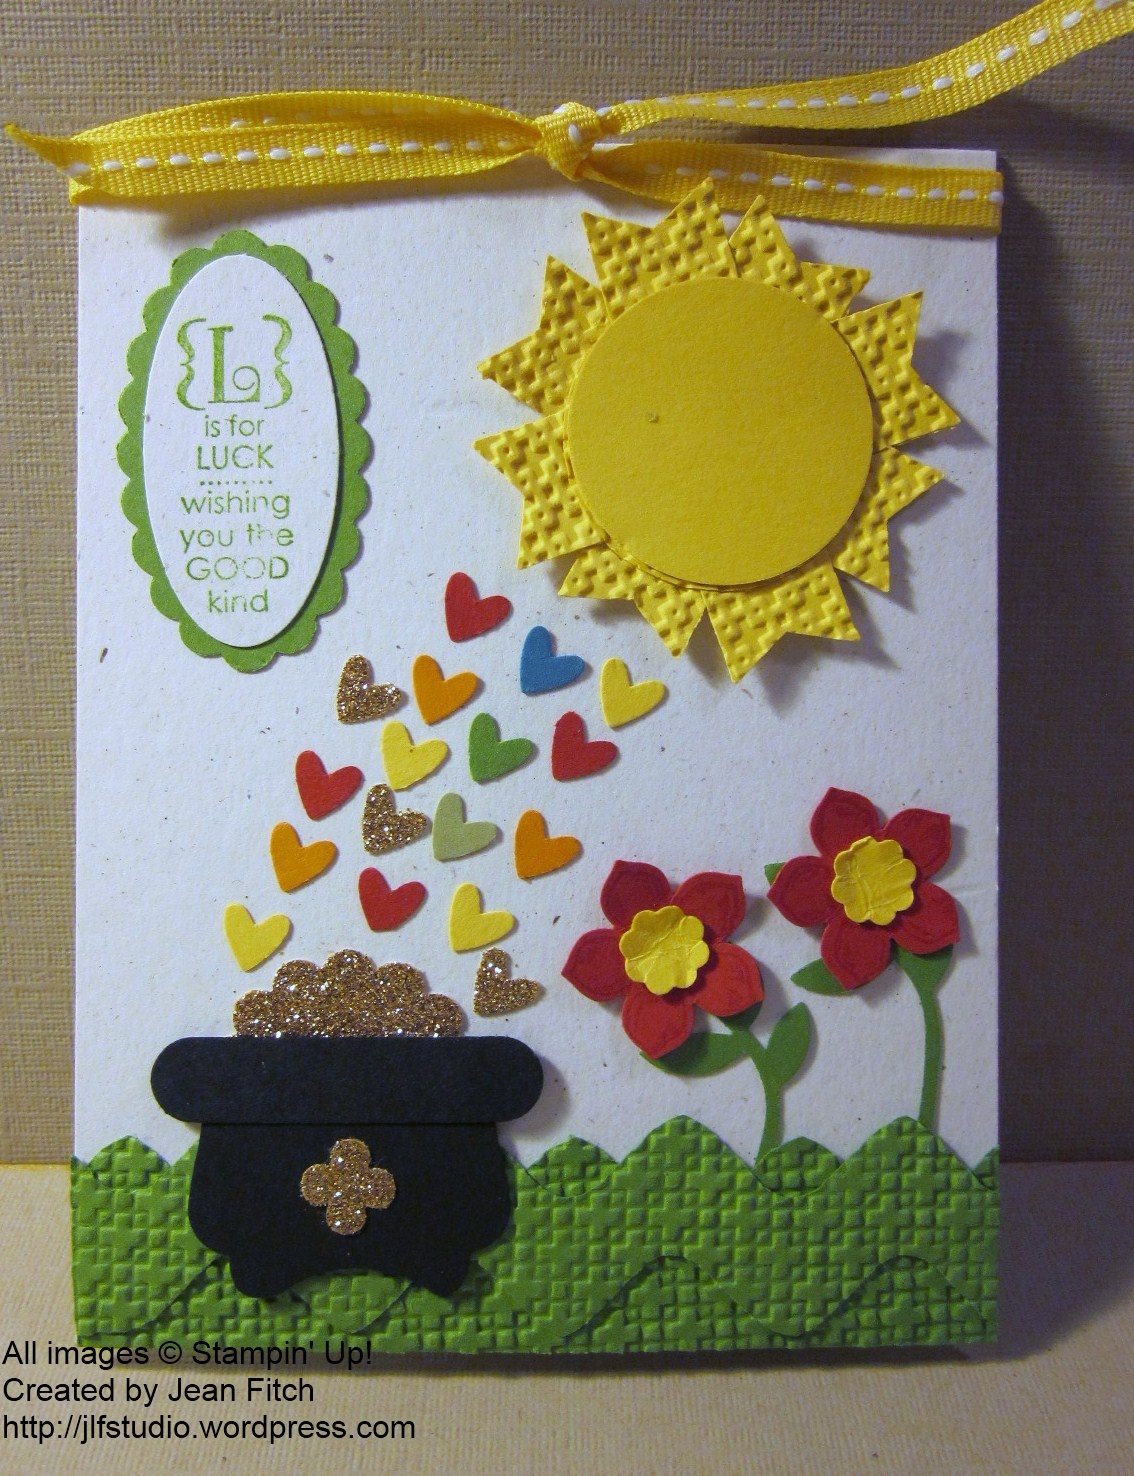
Once again the Envelope Punch Board was front and center creating the grass and my many punches did the rest. I’ve been hooked on all the sun’s everyone is creating with the new Banner punch from Sale-a-Bration (luckily you still have a couple of weeks to take advantage of getting it for free!) so had to try my hand at one.
I counted them up and in addition to the Envelope Punch Board which probably qualifies as a punch in and of itself I used 12 other punches to create this card! I think that’s a record for me. It sure added to the weight of the boxes being transported to the church hall for this event. Filled the center of the table too.
Here’s the supply list.
Supplies:
Stamps:Occasions Alphabet, Petite Petals, Teeny Tiny Wishes & Trust God (inside). Assortment of retired St. Patrick’s Day stamps.
Ink: Gumball Green, Real Red (optional Black Journaling pen/marker for making a sun face.)
Paper: Gumball Green (1”x 4-1/4”), Real Red, Daffodil Delight, Naturals White, Basic Black Cardstock & Champagne Glimmer Paper. Little hearts: Real Red, Daffodil Delight, Pear Pizzazz, Gumball Green, Island Indigo, Pumpkin Pie
Punches: 1-3/8” Circle, Petite Petals, 1-1/4” Scallop Circle, Decorative Label, Owl Builder, Word Window, Banner (from SAB), Bird Builder, Scallop Oval, Small Oval, Large Oval, Itty Bitty Punch Pack.
Other: Envelope Punch Board, Big Shot, Square Lattice embossing folder, Daffodil Delight ¼” stitched grosgrain ribbon, two way glue pen, tweezers, adhesives.
And here are the directions I shared with my stamp camp attendees:
Lucky Day Card Directions with picture
And a few tips on creating the various elements (no worries…these pictures are also in the directions):
Line up the 8 banner punched pieces on the back of the sun circle in two sets of overlapping squares. Then run through the Big Shot with the Square Lattice folder and add another circle on top.

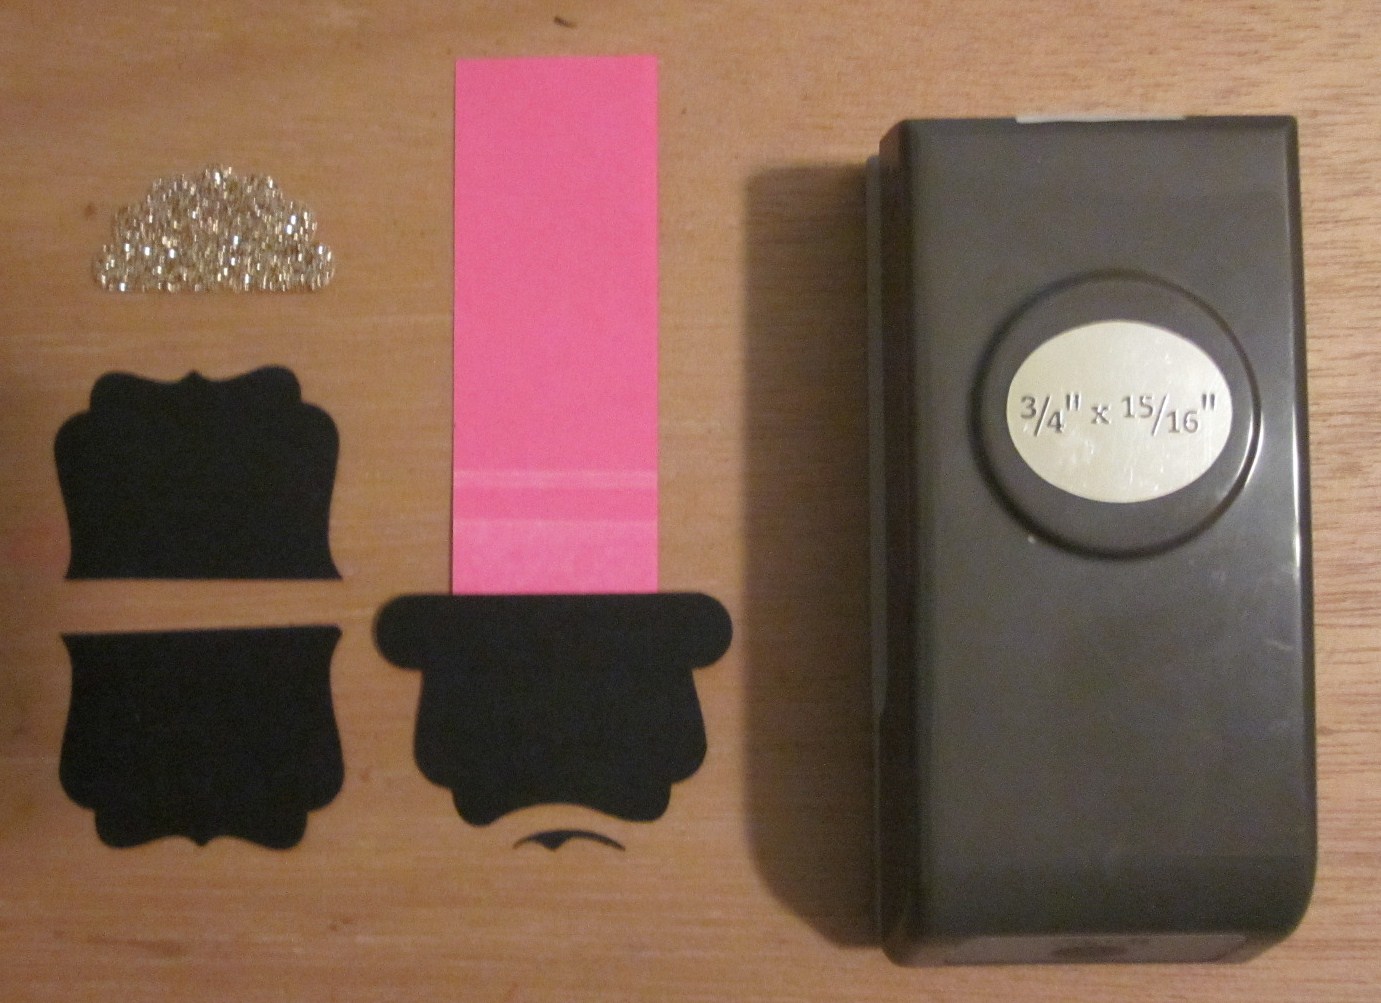
For the Pot O’ Gold I punched a Decorative Label piece then put the half piece on a post it note for better control and using the small oval punch I snipped just a hint out of the middle to get rid of the point and preserve the “legs” for the pot. Added a word window punch and a half a scalloped circle of glimmer paper and there’s the pot.
For the grass I created a base piece and a rick rack piece. Embossed with the Square Lattice and overlaid the two pieces at the base of the card.
Create your two grass strips with the two 1”x 4-1/4” Gumball Green strips + the Envelope Punch Board. Strip 1: Place the strip first with the edge of the paper lined up with the tip of the score guide. Punch.

Slide strip over to the 1-1/2” mark, punch. Slide strip to the 2-1/2” mark, punch. Continue sliding down 1 more inch and punching till you reach the end of the strip.
Strip 2: Create the same as Strip 1 then flip over and center each “mountain” then punch, continue sliding and aligning and punching till you have a full rick rack looking strip.
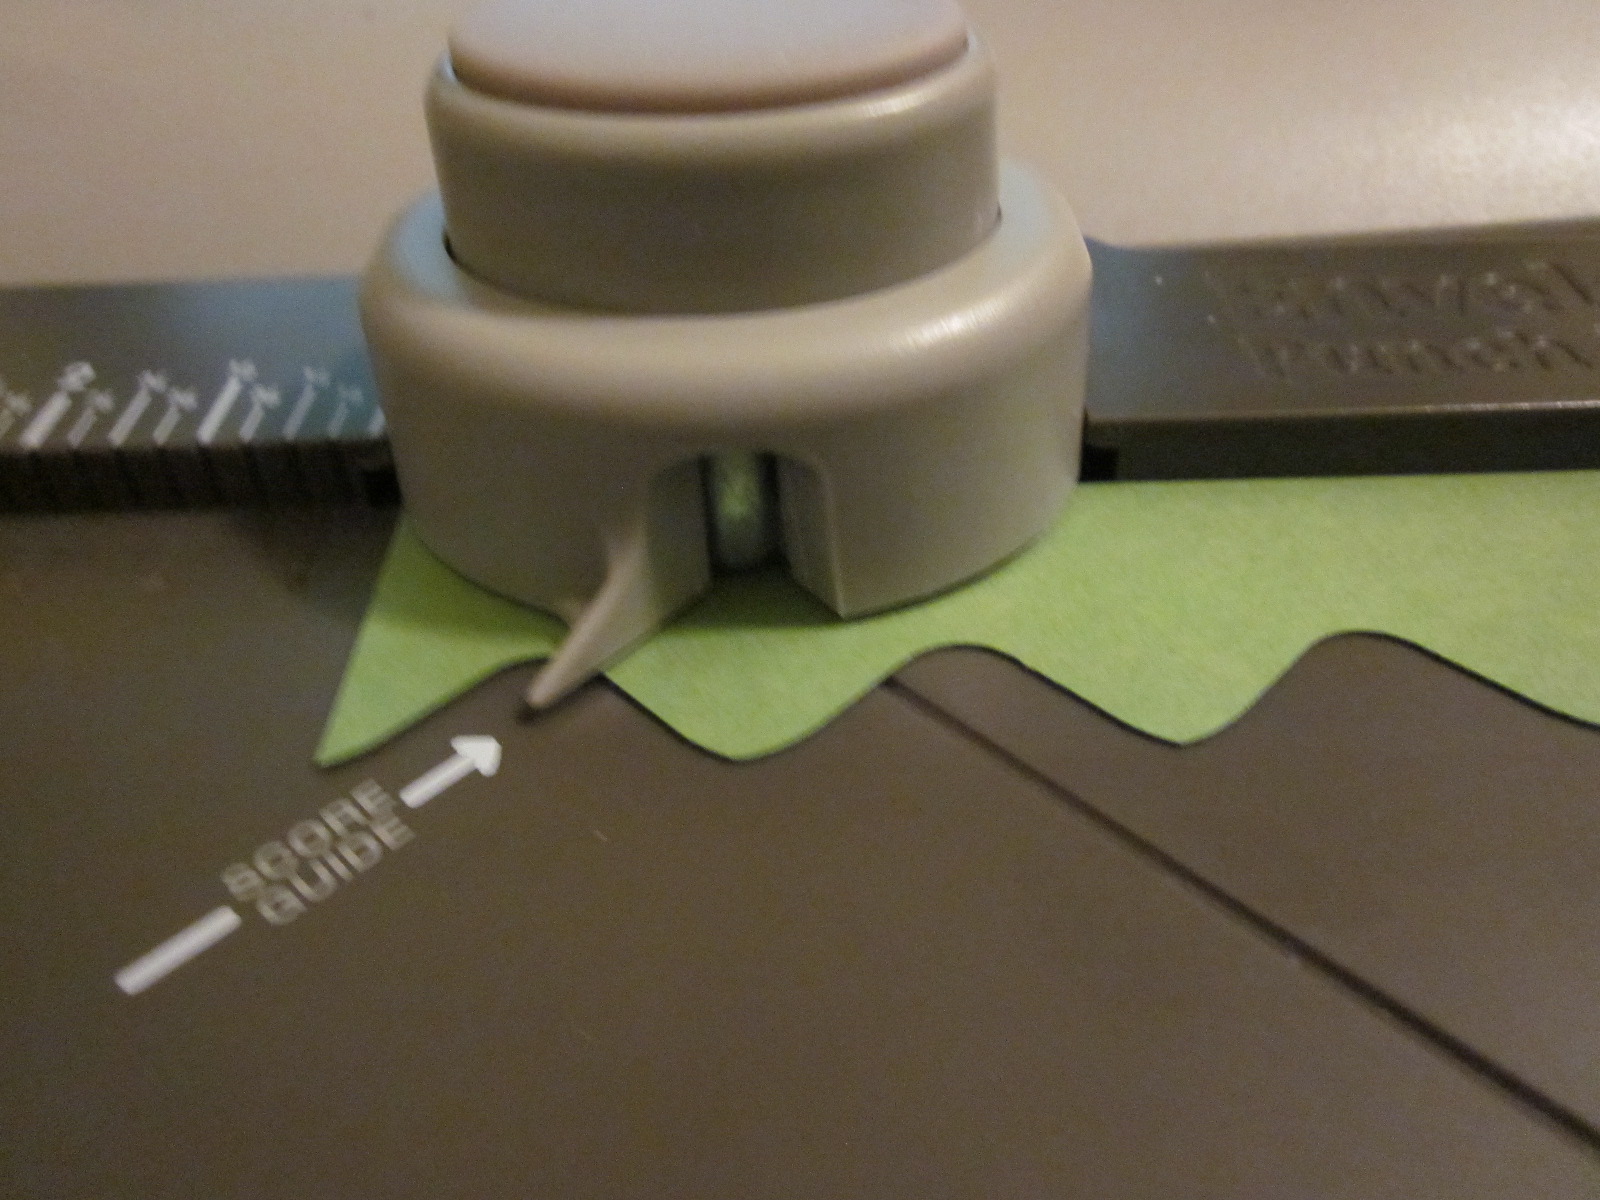

Place both completed strips in the Square Lattice embossing folder the longways and run through the Big Shot. Over lap both strips so you have a series of peaks and valleys between the two strips, adhere strips together and then adhere “grass” piece to card base. Trim edges if necessary.

Cool trick isn’t it. Creating rick rack with the Envelope Punch Board. It does take a bit of flipping around to get the right orientation so the peaks show between the valleys but it’s a fun puzzle. Of course if you have the Tasteful Trim die it might be a bit quicker but I love that with the Envelope Punch Board I’m not limited to the length of the rick rack pieces I create. Oh…and the “mountain” base piece also works for a sponging mask to create hills. Especially if you vary the measurements you use to punch the base.
Hope you’ve enjoyed this fun project. I can’t tell you how many movies I watched while punching enough “owl” hearts for 12 people to create this card. Fun!
Please note: In honor of St. Patrick’s Day I am offering FREE shipping on any Stampin’ Up! orders over $25 placed today March 17th 2014!
And don’t forget to pick up more FREE product during the last two weeks of Sale-a-bration. I’d be happy to be your demonstrator. When you click on the online store button in the sidebar select me as your demo and place your order. I especially recommend the Envelope Punch Board. It really is a wonder! You can see what else it can do on my Pinterest board here.
You have a couple options for ordering:
- Visit the online store, select me as your demonstrator in your profile and place your order~ I will refund your shipping after the order is placed or
- Email me at jlfstudio@live.com and let me know what you want to order – include your phone number and email ~ I will then contact you to make arrangements for payment minus shipping.
- Don’t forget to place your order (minimum $25) or send your email before Midnight – March 17, 2014 to get your free shipping. 😀
*****
To celebrate my own Irish roots let me leave you with this traditional blessing and a few YouTube videos with blessings and Celtic music to enjoy the day.

Hugs & blessings – Jean
Filed under: 2013-2014 Annual Catalog, 2014 Sale-a-Bration, Big Shot, Cards, Envelope Punch Board, Event Cards, Punch Cards, Punches, tips & ideas, Tool Tips, video | Tagged: 2013-2014 Annual Catalog, 2014 Sale-a-Bration, Big Shot, Cards, Envelope Punch Board, Event Cards, Holiday Projects, Punch Projects, Punches, tips & ideas, video |


Very cool pot of gold. Thanks for sharing how you made the green grass. Love that punch board!
Fun card! Love how you used the envelope punch board to create the grass and rick rack… very clever!
Love the way you made the rick rack with the punch board! Sharing this with my friends at splitcoaststampers!