Hi All,
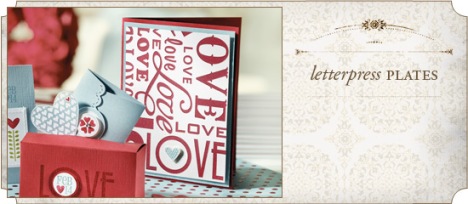
Courtesy of my friend and SU partner Linda….Letterpress is in the house and the playtime has been something fierce!! Linda was kind enough to loan me 3 of the 4 current Letterpress plates from the Holiday Mini so I could figure out all the ins and outs for our local group of demonstrators. Poor Miss Wicketcat has been sadly ignored the last few weeks and I’m going nuts trying to figure out where to start in sharing all that I’ve learned. I’m also putting a flyer together with some of the salient points as well as links to very cool projects and tutorials. And given all the cool pieces I experimented with this post may have to extend over the next several days. The scans of pieces alone will fill columns and columns. So to get started…..
***
Turns out there is booklearning or what I’ve learned from:
1) Other demo’s experiments,
2) What Stampin’ Up says about the plates in text and video,
3) Letterpress info in general on the web and then….
there’s….WHAT I’VE LEARNED FOR MYSELF!! Yep yelling all the way on that last one.
My infinite thanks goes out to my pal Di Gibbs for saving my sanity with her recommendation about using Versamark with the letterpress plates. As much fun as ink can be I’ve decided Versamark is the sane and safe method especially for sharing with large groups at events. After my experiments with Craft Ink I shudder to think about using it in a large group. Trust me on this one ladies….can you say MESSY!!
So what have I learned????
Letterpress is very, very cool and can be on occasion frustrating until you get the hang of them. It’s definitely more of an Art, than a Science as Ben Franklin, if he was still around, would probably have warned me.
What is Letterpress and why would Ben Franklin know about it?
Basically letterpress is the typesetting and printing you think of when you think of Ben Franklin and other printers and the early colonial broadsheets with type being composed on sticks with the type backwards (thus the saying mind your p’s and q’s), inserted into forms and locked down, rolled with ink, then paper being placed and an impression made from pressure applied that not only transferred the ink but also placed an indented (debossed) impression into the paper. Generally, Gutenberg is listed as the creator of this technique though he may only be the most famous example (the Gutenberg Bible is considered a premier example of his work and the first major work printed with moveable type). You might even say that a typewriter creates a letterpress document of a sort though it’s a different process with the keys striking the paper though the end result does leave both ink and an impressed or debossed form of the type in the paper.
Letterpressing can include images as well as text. We actually approximate the process when we brayer an Impressions folder with ink, insert paper and run through the Big Shot or when you ink one of our textures plates then add paper and pressure from the Big Shot. What many are calling faux letterpress since we aren’t using moveable foundry cast type and images. Wood Cuts and other printing type techniques that also leaves an inked impression in the paper also fit the bill.
Basically a debossed image (impression with depth into the paper) that also transfers ink qualifies in the modern sense to be called letterpress. Just like the word sounds…letters pressed into paper = letterpress.
Basic notes:
Set the Multipurpose Platform for the Big Shot on Tab 1. The letterpress plate goes directly on the Multipurpose Platform (MPP) with no cutting pad under it. The basic sandwich is MPP, Letterpress Plate, Paper, new unmarked cutting pad.
My preferred sandwich: MPP set to Tab 1, Letterpress Plate, Paper, Cushioning or backing paper (Same size as or slightly larger than the piece you are using), Clear plate (henceforward known as the “embossing plate”.
Which brings me to a very important point….Use a dedicated perfectly clean unscratched cutting pad as your dedicated “embossing plate”. Mark the plate with a sharpie or other label making device then, and this is important, store it separately from the letterpress plates (loose in a box those plates will scratch the heck out of a pristine cutting pad) and anything else. My brilliant friend Cheryl came up with a padded envelope that is now protecting my precious new “embossing” plate. A file folder cut down to size will also work but the padded envelope is aces!
Stampin’ Up recommends using Dotto to adhere your inking piece to the “embossing clear plate” but if you do that you can’t sandwich in an additional piece if needed. And exact placement becomes something of an issue so I choose to go “commando” with no Dotto and take my chances that no wind would “lift or shift the skirt”!
Not all Letterpress plates are created equal. The smaller ones seem to be made out of a slightly different material than the larger Lots of Love plate. And the larger plate may possibly hold onto the ink stain no matter what you use to try to clean it off. So whatever you do…don’t use Stazon inks that will never come off! I found even the waterbased Classic inks left some staining and in some cases it continued to impress that stain onto the paper even after I would have sworn it couldn’t actually be there. Not a problem when working on darker papers but a bit of an issue with the lighter and whites. The smaller plates also seem to be slightly thinner and pass through the Big Shot a bit more easily.
Cleaning the plates. A green scrubby (okay they come in other colors too but I mean the kind that more or less mimics our scrubber cleaner for stamps) and Dawn dishsoap seemed the best. That lets you get into the crevices of the plates reasonably well. I did try our Mist Cleaner and that works more or less okay and I tried Stazon Cleaner but that leaves a residue you have to wash off anyway so dish soap and a scrubby seemed to work the best. Pat dry as much as possible with a towel then let air dry. This should tell you that using multiple colors all in one go is going to be a pain unless you are selectively inking with markers or spots! Luckily the plates are pretty cheap so if you are a demonstrator, having more than one might not be outside the ball park if you want multiple colors at a single event.
In the interest of full disclosure: Much as I love Stampin’ Up video tutorials….when it comes to Letterpress they make it look way easier than it is in real life. Granted they probably got lots and lots of practice before filming the first video and chances are that more than one retake was done! I’ve still got a way to go before producing the results Shannon achieved with the Craft inks. Not complaining just being honest about the learning curve.
My initial efforts with the various combinations were mixed though they did get better and I have to say I don’t feel a need to invest in lots of Craft inks since the Classic Inks worked quite well. They don’t have quite the same depth of the Craft and there are some fun things you can do with the craft since it stays wetter longer. But I found that distinction mostly with the watercolor paper. When using regular Cardstock the benefit of the Craft was less noticeable.
***
(click on images for close up view)
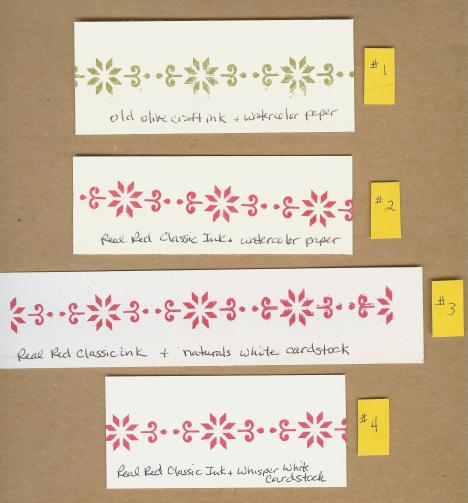
Paper: While the product guide recommends using only Watercolor Paper you can in fact use ANY Stampin’ Up paper as long as you take an extra step or two in doing so. While Watercolor Paper works well it turns out that at least in my less than humble opinion I think the Naturals papers are the way to go for a light background paper. Basically the same look as the Watercolor Paper and way less cost! Bigger sizes possible too if you want to stay all SU in your paper choices.
Lots of Love Letterpress Plate
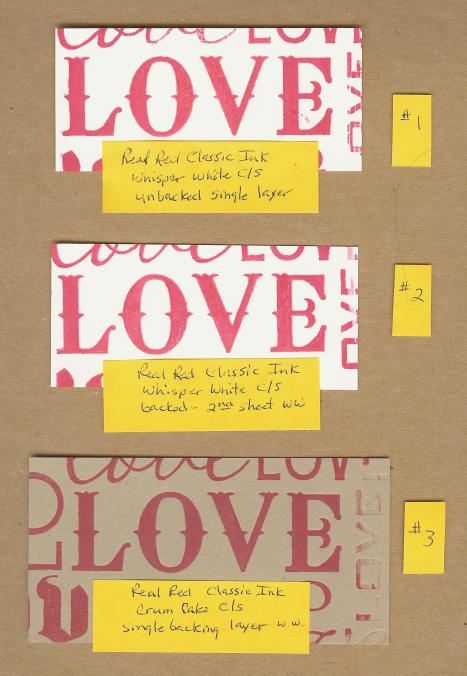
For a deeper impression with regular cardstocks use a backing piece of cardstock paper on top of your imprinting paper. And no you don’t necessarily need a clean backing piece every time. This allows a depth of paper that imitates in part the thickness of the watercolor paper and gives the letterpress plates something more to work with as it cushions the actual piece you want to use in your project. One of my happy discoveries was embossing the full front of a folded Base Card. Place your folded card onto the plate and voila you have your backing paper built in! And the cool thing is that the embossing transfers not only to the inside of the card but also leaves a shiny almost satin inked look on the back of the card as well. Very cool. You can see this effect in my Letterpress Valentine in Black card shown in an earlier post here.
After quite a few experiments I did come to the conclusion that Very Vanilla and Whisper White cardstocks gave the least favorable results and I doubt I’ll be using those much in future. Even with a backing sheet the impression isn’t very deep and the inks don’t impress well into the ultra smooth surface.
Northern Trim Letterpress Plate
Sorry that my scanner doesn’t show the depth of image very well. I have some links in the lower section to others letterpress posts that show that better.
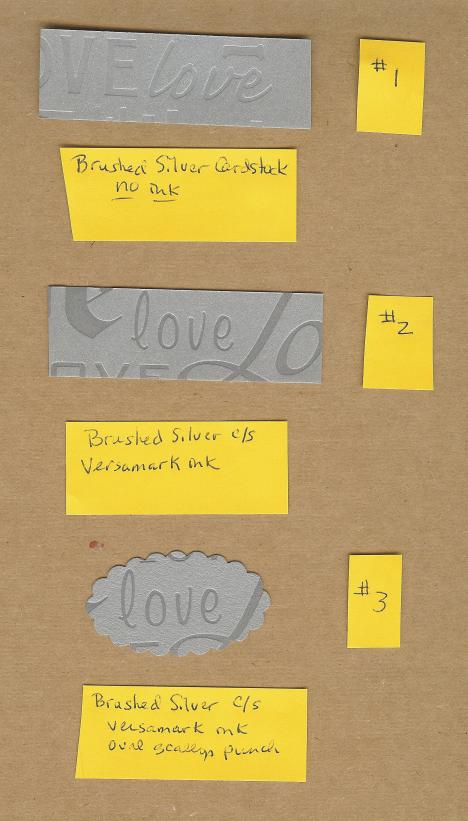
The Brushed Gold and Brushed Silver Cardstock look Fabulous when you use with Versamark! You can see an example of the Silver down below.
Lots of Love Letterpress plate
The Textured Cardstock offers another very cool look but you’ll get a deeper impression with a backing piece of paper behind it. Just make sure you put the textured side face down. Had I used a piece of regular cardstock as my backing piece I think I would have gotten a deep impression. Also keep in mind that the textured cardstock is slightly thinner than most of our other cardstocks so a lighter impression will always be made.
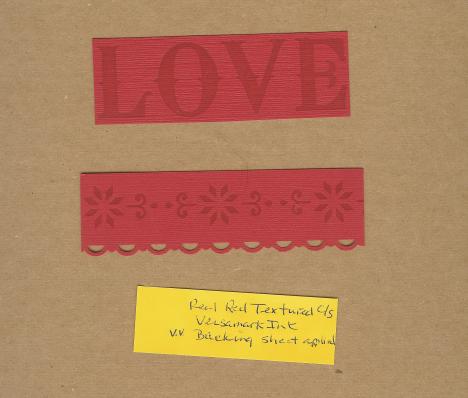
Lots of Love and Northern Trim Letterpress Plates
Another trick for a slightly deeper impression is to spray your cardstock with a slight amount of water or alcohol and let rest for a minute so the fibers in the paper will “relax” (who knew alcohol works on paper just like on people :D) before “pressing” much as with the SU embossing folders. Sorry no sample pics of this trick just yet.
***
Ink: While Craft ink is recommended by Stampin’ Up! I found myself with lots more smears since the paper easily slips across the slightly more oily surface. I was much happier with the Classic and Versamark inks. Pretty much the same coverage when using the Naturals or Confetti papers especially and a cleaner crisper image overall. The Versamark ink was my favorite. Not only because I love the tone on tone look but because you can actually press the paper of whatever type slightly into the ink and it holds the paper in place while you put the “embossing plate” in place. Love what it looks like with the darker colors like Bravo Burgundy especially.
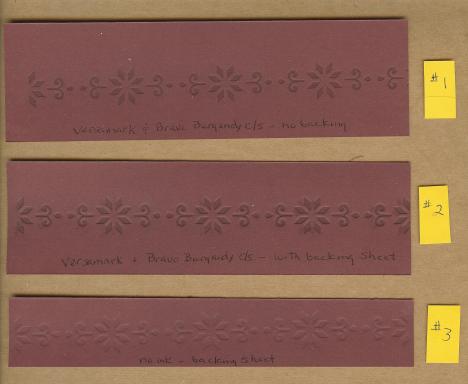
Northern Trim Letterpress Plate, Versamark and Bravo Burgundy C/S
As you can see in the above picture the bottom piece #3 is a plain embossing, #2 shows versamark with a backing piece used and #1 shows something in between Versamark that brings out the design but with no backing sheet used and thus a less deep impression.
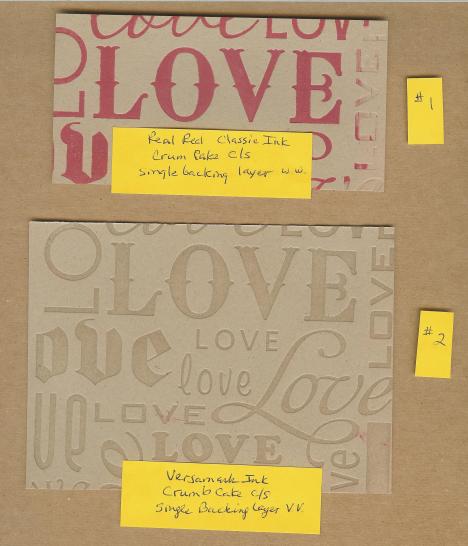
Lots of Love Letterpress Plate & Crumb Cake C/S
Applying ink with a sponge dauber gives you more control, important when using multiple colors, but may not be fast enough to beat the drying time if you are using Classic inks. And Brayer is the messiest applicator method – at least when my hands are on the wheel! Classic spots worked well though and had a bit more control and less mess than the full sized pads.
Tip: Very Important! When using Versamark with your Letterpress Plates. Wash your hands…frequently! Or keep a hand towel nearby to wipe your fingers. Since the plates get covered with Versamark ink…and you are picking up and putting down possibly in an area previously inked…and since Versamark creates watermarks….guess what happens when you get it on your fingers and then you pick up the piece of paper with those same versamarked fingers??? Yep watermarked fingerprints…not where you want them! Makes using tweezers to lift the paper or grabbing by the edges carefully (think handling records or CD’s or DVD’s) something to think about!
Tip: Check out Kay Kalthoff’s tip about using post it notes to keep your plates cleaner and your hands less inky – http://www.stampingtoshare.com/2010/09/927-using-northern-trim-letterpress.html
Image: Something I noticed on the new Lots of Love Letterpress in particular. There are some imprint sections I just don’t like and others that while I like them in general on a larger piece of paper…when I downsize the paper I don’t like some of the partial imprints that result. So note to self: When I want a smaller section. Start with a piece of paper larger than I want as a finished piece. Then I cut out the portion I do want and I have some options to work with in the placement of the desired section.
Tip: If you are creating multiples of a project or when using at a Stamp Camp for customers you can outline the placement you want for the paper by using post it notes (the larger wider ones are ideal for this) to mask off the area not to be used. Makes layout a no brainer that way! 😀

***
Helpful links and resources:
Stampin’ Up Training Video: http://www.youtube.com/user/stampinupvideo#p/u/2/BJpeQ7fL5mw
SU Letterpress instruction sheet: http://www.stampinup.com/us/documents/Letter_Press_instructions.pdf
Di Gibbs Letterpress with Versamark Tutorial & Video – http://dianagibbs.typepad.com/stampin_with_di/2010/10/letterpress-with-versamark-tutorial.html
Kay Kalthoff’s Tips on Letterpress – http://www.stampingtoshare.com/2010/09/927-using-northern-trim-letterpress.html
http://understandblue.blogspot.com/2010/11/love-ly-letterpress.html – Lydia’s basic review and samples
http://www.youtube.com/watch?v=v7dtu96Av70&feature=player_embedded – Letterpress on Fun Foam
http://www.nwstamper.com/experimenting-with-the-stampin-up-letterpress-dies – experiments with paper and ink
http://pattystamps.com/pattys_stamping_spot/2010/09/letterpress-plates-samples-luv-2-stamp-group-meeting.html – samples
http://thestampcamp.com/blog/10/08/stampin-up-letterpress/
http://crazystampinwomen.typepad.com/crazystampinwomen/2010/10/stampin-up-halloween-letterpress-plates-trick-or-treat-gift-bag.html
http://www.splitcoaststampers.com/gallery/photo/1836784?&si=letterpress
http://militarywifestampinspot.blogspot.com/2010/10/vintage-annivesary-card.html
https://jlfstudio.wordpress.com/2010/11/11/letterpress-love-stampin-up-style
History of Letterpress links for those interested in something more than our Stampin’ Up craft interpretations:
http://en.wikipedia.org/wiki/Letterpress_printing
http://www.fiveroses.org/intro.htm
http://www.youtube.com/watch?v=Iv69kB_e9KY – video showing the basics
http://www.youtube.com/watch?v=yE0OoWX6TQs – video
***
And in case you’re wondering…here’s a spoiler for you…SU released digital copies of the Occasions and SAB mini’s to demo’s yesterday (now don’t you wish you had joined my demonstrator team? You still can…and at half price for the next 2 weeks!) and while I can’t share all the details or any of the images…let me just say, in case you were wondering, the Letterpress Big Shot feature has a future – hee,hee, hee!
Hopefully the above will give you some encouragement to try your own experiments. One of the things I love as a “frugal” stamper is the low cost of the plates and the fact that you don’t need to buy any extra accessories to use them. Every thing you need comes with your Big Shot!
Come back later in the week for more samples and pictures of my experiments in progress. To see all Letterpress plates available check out my Stampin’ Up online store (click the icon in the sidebar) and select die cutting, then letterpress. Or Click for my Letterpress flyer.
Letterpress Flyer
Hugs and Blessings – Jean
Filed under: 2010 Holiday Mini, Big Shot, Fun Facts, Letterpress | Tagged: 2010 Holiday Mini, Big Shot, Fun Facts, Holiday Projects, Letterpress, tips & ideas | 2 Comments »


