Welcome everyone to the Wacky Watercooler October Blog Hop where this month we’re featuring projects for Thanksgiving, Christmas and all the days in between.
I’ve been away from the hops and blogging for awhile as many of you know but it’s a joy to be back and hopping again with my favorite wacky watercooler crew of hoppers.
We’re an international crew so don’t be surprised if you see a few different spellings and price guides along the way. Links to Catalogs will vary by country as well. Which reminds me…have you seen the newest Holiday assortment found in the Holiday Supplement? It just went live this week.

Here’s the U.S. 2014 Holiday Supplement (US version) .
Holiday Supplement (PDF)
HolidaySupplement Stampin’ Supplies (PDF)
Spanish Flyer (PDF)
Want to see the variety of stars you can create with the Holiday Supplement Many Merry Stars Kit? Check out the Stampin’ Up Pinterest Board here! And the Stampin’ Up Youtube site for related videos.
If you are moving in hop order you’ve arrived from the very talented Kath R’s All That Scrap blog. I love the title of her blog…love Kath too! Amazing what she gets done with all that reconstruction going on. You’ll definitely want to go back and check her past posts after the hop especially if you love dragons or are addicted to the new Curvy Keepsake box die. If you are working in reverse order weren’t your socks knocked off by Deb’s wonderful projects? Deb has been a regular on our Watercooler Hop schedule and never fails to show me something I have to CASE! Another dear friend I discovered through stamping and hers is another blog to investigate after the hop for sure EH? Yep..Deb’s Canadian. I couldn’t resist. 😀
How ever you are viewing the hop, we’ve built it in a circle so you can join and hop on and off at will. If you get lost just click the hop banner or the home watercooler button to get back to our hop home site with the list of participants. You may want to keep an eye on that site in between blog hops as we are trying to post members without blogs projects there somewhat regularly as well.
*****
As it’s October and Fall is still in full swing here in Southern Oregon (yep my two lonely non-pine trees are now all red though after last nights wind storm only a brave few are left to admire) I thought I’d start off with a Fall inspired card, perfect for gifting those at your Thanksgiving or other fall event table. My Grandmother used to tell me I was always gilding the lily with my stories and modes of dress so of course I thought of her when I decided to gild the leaves (and every other part of the card) on this one.
*****
Golden Leaves Fall Card

Supplies:
Stamps: Trust God, Apothecary Art, Pumpkin Welcome Kit stamp (spots – you can also use Gorgeous Grunge), Itty Bitty Banners
Ink: Early Espresso, Always Artichoke, Versamark, Encore Gold
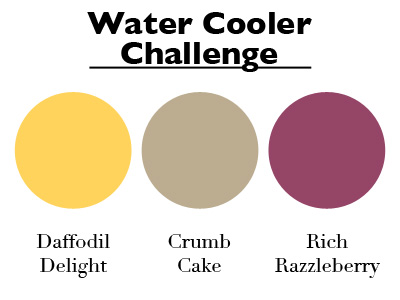
Paper: Always Artichoke, Naturals Ivory, Crumb Cake, Brushed Gold Cardstock
Punches: Scallop Oval, Decorative Label, Extra Large Oval, Envelope Punch Board
Other: Big Shot, Autumn Accents Bigz die, Bitty Banners Framelit or paper snips to cut the banner, Fancy Fan embossing folder, Big Polka Dots embossing folder, Heat Tool, Gold Embossing Powder, Very Vintage Designer Buttons, linen thread
Found this video that showed a cool gilded leaf technique (works on buttons too) and that set me on the path for this card. Turned out to be a hit at my September Stamp Camp though people kept asking…what do we add gold to next? {grin} I decided to draw the line at gilding the linen thread, though to be honest…I did consider it for more than a few seconds. 😀 Tried several different embossing folders too but the Large Polka Dot folder proved to be the most popular. Adding a single rounded corner to the base and two to the focal piece added to the “mod” look of the piece too. Of course it all glitters even more in person.
Gilded spots, gilded button, gilded leaves and a bit of brushed gold cardstock (the mat behind the sentiment) makes for a project that’s truly “golden” don’t you think?
Here’s the project PDF if you’d like to recreate it:
Golden Leaves Fall Card – September 2014 Stamp Camp
*****
Endless Wishes Aurora Card

Endless Wishes is turning out to be one of my favorite stamp sets. I’m very grateful to Stampin’ Up! for bringing it back for this years Holiday Catalog. We endlessly wished for its return and…Voila!…here it is! Last years run of stamp production ran out in two weeks…this year we get it for the whole run of the Holiday Catalog…so if you love it as much as I do…order it before January 5th or you’ll be wishing you had. This is a set that works all year round with words like joy, cheers and more.
This is another CASE of a card I saw last year and couldn’t get out of my mind. Also another case in point of similar ideas occurring to many minds at the same time . I had a similar idea but never got around to making it and then found this card on the Iguana stamp blog and loved her version. To me the colors swirling about remind me of a stylized Aurora Borealis. We were supposed to be able to see that phenomenon in the lower part of North America last month but I’m afraid it never quite made it far enough south for me to see it. So instead…I’ve made my own. LOL
Supplies:
Stamps: Endless Wishes
Ink: Tempting Turquoise, Wisteria Wonder, Elegant Eggplant, Basic Black Marker, Project Life Pens, Memento Black or Black Stazon
Paper: Tempting Turquoise (11” x 4-1/4”), Elegant Eggplant 5-1/4” x 4”), Whisper White (5” x 3-3/4”)
Punches: Scalloped Oval, Large Oval
Other: Stampin’ Sponges, basic jewel rhinestones, Post-It’s, Dazzling Diamonds, 2 way glue stick. 1/8” gold or silver ribbon.
One of the very cool things I discovered…punches can cover a number of boo boo’s if your hand with the ink pen is a tiny tad unsteady. You can also add a bit of extra sparkle quite easily with Dazzling Diamonds and a two-way glue pen if glitter is a must.
Here’s the project PDF if you’d like to recreate it:
Endless Wishes Aurora Card
*****
Last and perhaps the sparkliest yet (hm…is sparkliest a word?) is my Jingle, Noel, Joy Tree card also known as the Little Letters Form a Tree Card. Originally I set myself the challenge of creating a fun Christmas card using only items from the Annual Catalog but as you can see…my hand strayed from grabbing the Moonlight Designer Series Stack and instead found the Trim the Tree paper stack. Everything else you see though can be found in the Annual Catalog (eta: well oops…the frosted snowflake sequins is a holiday catalog item too). My favorite component being the Little Letter Thinlit dies. Amazing the words you can spell with die cuts isn’t it? A tad tricky to get the alignment just right unless you have the magnetic platform to use with your Big Shot…but it can be done!
Little Letters Form a Tree Card

Supplies:
Stamps: none (unless you want to add some to the inside).
Ink: none
Paper: Garden Green Cardstock. Trim the Tree Designer Series Paper Stack, Red Glimmer Paper.
Other: Whisper White Baker’s Twine, Big Shot, Little Letters Thinlit dies, Star Framelit Collection, Basic Jewel Rhinestones, Frosted Sequins (holiday catalog), dimensionals and glue dots.
*****
The design started when I flipped through the paper stack and wondered what I would do with that almost neon looking lined paper. Then the light went on as I thought the lines reminded me of learning to write on that big lined paper block my Mom had lots of when I was growing up. Then my eye lit on the Little Letter dies and a design was born. Lots of words that describe the Christmas season and experience but I wanted a stacked tree looking set like that of a die from another company that I came across awhile ago so after brainstorming words I settled on Jingle, Noel and Joy. Happy occurrence since those are three of my favorite Christmas season words and the letters work into just the right lengths to form the tree. Add a star from my favorite new set of framelits (the Star Collection) and Bob’s your Uncle (or in my case my Brother in Law!). Of course the little Frosted Sequin snowflakes from the Holiday Catalog came in handy too. Oops…that’s a second thing I used from the Holiday Catalog. So cute though…can you blame me?
One design note when working with the Little Letter thinlits. I think they really pop when you separate the layers with dimensionals so the letters have some visual depth to them. Then it’s up to you if you want contrast like the glimmer or metallic papers we have or a basic contrasting cardstock paper background behind the die cuts. Boy do I wish you could see the shimmer and shine of the glimmer paper on the actual card. While cutting the words is a tad time consuming I think a few people on my card list will definitely be getting this design!
For a few more fun ideas with the Little Letters die take a look at this video from the Stampin’ Up office in the UK (United Kingdom).
*****
That’s it for my post for this October Watercooler Hop. Hop along now to see the fabulous and talented Deb Smart and the rest of the holiday hop entries and look for our Wacky Watercooler crew every month as we create more new hops for your viewing and crafting pleasure. Click the appropriate watercooler buttons to find your way. And if you would like to view past hops…check out our hop home page and scroll to see links to other hops and hoppers. Always a creative treat!


Filed under: 2014 Holiday Catalog, 2014-2015 Annual Catalog, Big Shot, Blog Tours, Cards, Christmas/Winter, Envelope Punch Board | Tagged: 2014 Holiday Catalog, 2014-2015 Annual Catalog, Big Shot, Blog Tours, Cards, Christmas/Winter | 10 Comments »