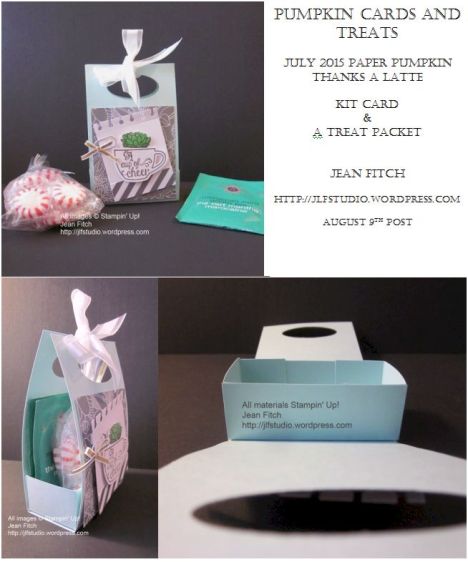
WCC30 – A Cup of Cheer in 3D

  WCC30 Susan’s 3D Challenge

Welcome to a new Challenge.

This time around we are doing 3D!


WCC - Susan's 3D Project

 **************

Whatever trips your trigger as a friend of mine likes to say…if it has several sides or depth to it…you’re in.   And we hope you will join us in submitting your very own 3D creation here.

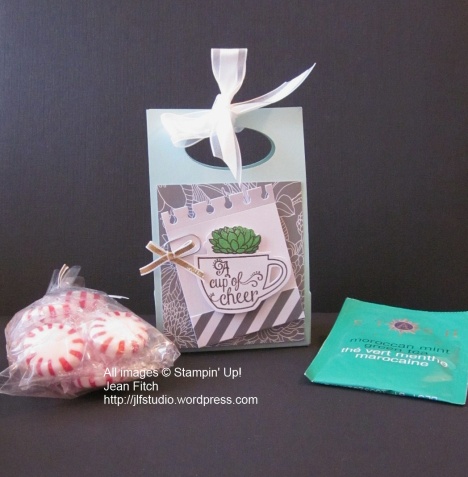
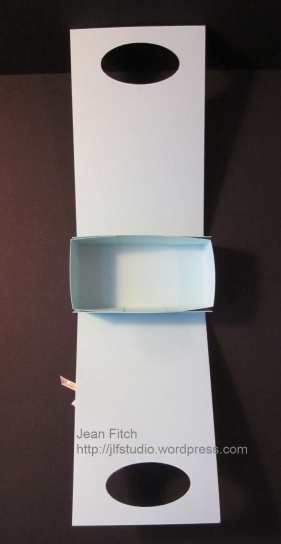
Here’s my simple 3D treat holder:

WCC30 - Susan's 3D Challenge - Jean Fitch

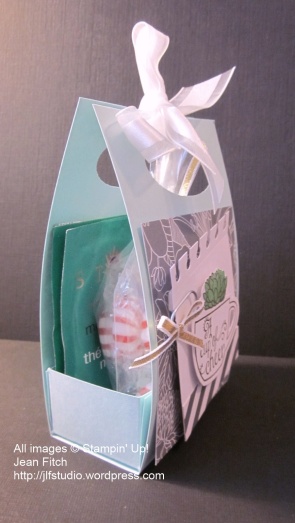
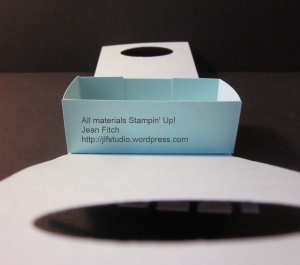
And a side view so you can see how it all fits together.

WCC30 - A Cup of Cheer - Side View - Jean Fitch

Do you remember this little treat or card holder?  People have been making them for over a decade (possibly more).   Perfect for little gift cards just under 3″ wide and about 3″ – 4″ tall.    Or in this case a little package of teas and sweets…perfect for someone recovering from a cold or flu or other malady.

I’ll let you in on a secret that I discovered years ago…the tea in the picture is Moroccan Mint tea from STASH.  That tea is a wonder drug all on it’s own.  Whether for morning sickness or the upset stomach and dizziness you get from chemotherapy this stuff is magic!   And I can guarantee you that it tastes just like the mint tea that I had in Morocco back in 1975.   The only brand I’ve found that does.  I’m not sure if it’s the lemongrass or the blend of various mint teas or the combination but this stuff is powerful…and very good tasting.   Fun to suck on a peppermint too and hold it in your teeth while you drink the tea through it.   Just don’t let the mint go down the wrong way.  Yeah…been there…done that.

And yeah…I should probably add the disclaimer that I’m not a doctor and take my suggestion with a grain of sense and salt.  It may not work for everyone as I’ve described but I’ve given it to many, many people for whom it did work and used it myself.   And no…I don’t work for STASH or get a commission.  LOL

Are you wondering yet where the stamps and several of the papers came from?   My latest (July) Paper Pumpkin is the source.  Three wonderful sentiments, the cup, tea bags, steam and the plants that you’ll be able to use when the kit contents are gone.    Have you tried that monthly pumpkin delight yet?  Trust me…you will want to.   Especially…because…drum roll please…you can get two months right now for 50% off!

Contact your demonstrator (I’m available if you don’t have one already Click the highlighted text to sign up :D) and ask them about the 50% off offer.   It’s available until September 10th.   Want the August Kit…sign up by August 10th…get going…what are you waiting for…today is the 9th!!!

Here are a few other views of the inside with it open and treats removed.

 Click on the images to see a larger view


WCC30 - A Cup of Cheer interior

WCC30 - Cup of Cheer - inside box

Supplies:

Stamps: My Paper Pumpkin July 2015 Kit – Thanks a Latte

Ink:  Early Espresso, Cucumber Crush

Paper: Pool Party, Paper Pumpkin Kit papers and stickers

Punches: Large Oval

Other:  Clip from kit, 1/8″ Gold Ribbon, Whisper White Organza Ribbon, Small Cellophane bag,  tea bags, Stampin’ Trimmer, Dimensionals, SNAIL

It’s a fairly simple construction that you can adapt to any size.   In this case a 3″ x 11″ strip of cardstock that is scored at 4-1/2″ and 6-1/2″.  Use the large oval punch to create the handles near the top.   The small box is 4″ x 5″ and scored at 1″ all the way around on all sides.  Cut along the score line up to the other score line on two sides at both ends.  Fold and crease along score lines and adhere tabs as needed to form the box.   Adhere bottom of box to the inside score area of the long cover piece.  Decorate…tie some ribbon to hold the handles in and fill with your desired contents.

Thanks a Latte Treat Packet


************************

Please join the rest of the design team over at the Challenge blog website here to see the rest of the teams designs and to add your own with the linky doodad.  When you add your own design and there are more than three entries, one of you will be a challenge winner and have the option to place the winner’s badge on your own site.  Of course…you’ll also win bragging rights!

That’s it for this challenge.   You can see the winner for the linky added projects for the last challenge here.  It was a hard choice as all the entries were wonderful.  If you haven’t looked already…take a look here.  You’ll be inspired.   I also hope this time you’ll join in the fun and grab a friend or two as well and get creating!  Check the challenge site for rules on competing for this and future challenges.

Hugs and Blessings to all my friends and readers.

Jean Fitch in pink


More Cards in the Mail from Convention!

My mailbox runneth over….with more cards in the mail from Convention.  Yep…that’s two out of the 2,984 that created that amazing Guinness World Record for Stampin’ Up!  You can read more about that remarkable achievement here in my previous post.

The friends I’ve made since I took up stamping in 2006 have been amazing.   Close, creative and inspiring.

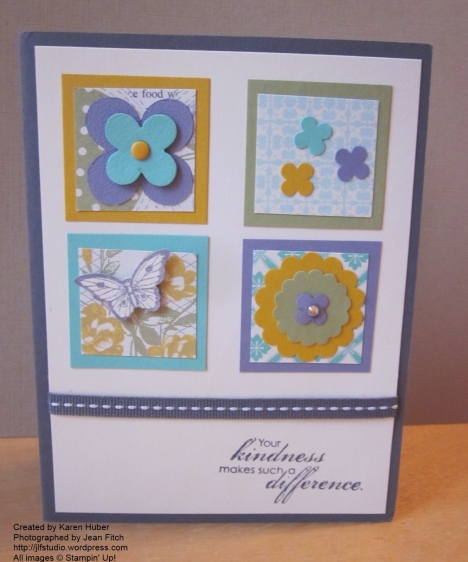
Karen Huber who sent me this very special & delightful card is one of them.   Karen and I met through Stampin’ Connection (a demonstrator online community site).   And the rest is history.   A fun one involving wacky watercoolers and more!

Blooming With Kindness - Karen Huber - watermarked

After a quick troll through the catalog here’s what I’ve found for Karen’s ingredients.

Stamps:  Blooming with Kindness, Papillon Potpourri

Paper: Afternoon Picnic Designer Series Paper, Very Vanilla, Basic Gray, Crushed Curry, Pear Pizzazz, Coastal Cabana & Wisteria Wonder Cardstocks

Ink: Basic Gray & Wisteria Wonder & Crushed Curry (inside)

Other: Big Shot, Floral Fusion Sizzlit die, Small Butterfly punch, Itty Bitty Punch Pack, Circle Scallop punches, Basic Jewel Rhinestones,  Regals Candy Dots, Basic Gray 1/4″ Stitched Grosgrain Ribbon, dimensionals and adhesive.

This is one happening card!   And a labor of love on Karen’s part.  I can see why this was a popular swap card that’s turning up on some pretty cool blogs all over the Stampin’ Up Ether.   Thanks Karen for making me part of a historic event!     Glad you survived Convention even though it involved hobbling on a broken foot!

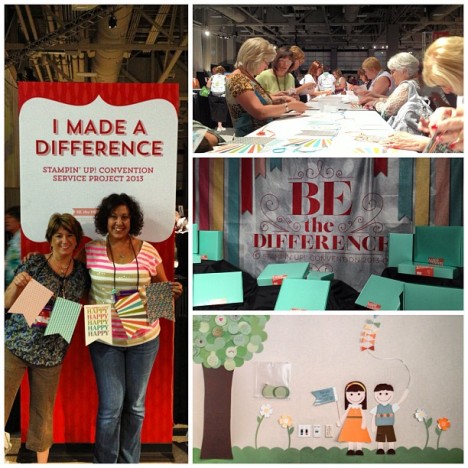
Here’s another record setting event Karen and many of my Convention friends also took part in:

Convention 2013 Service Project

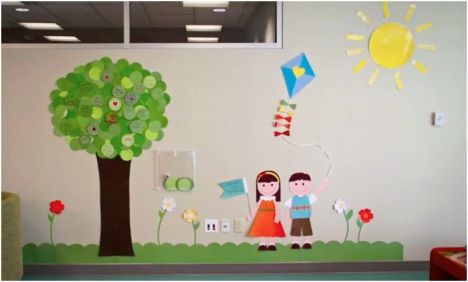
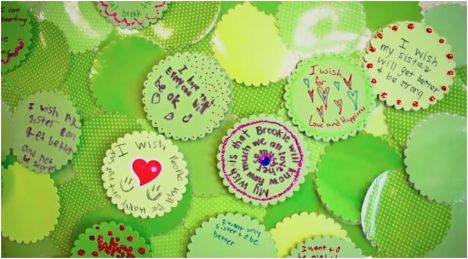
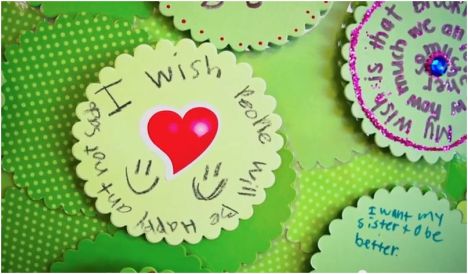
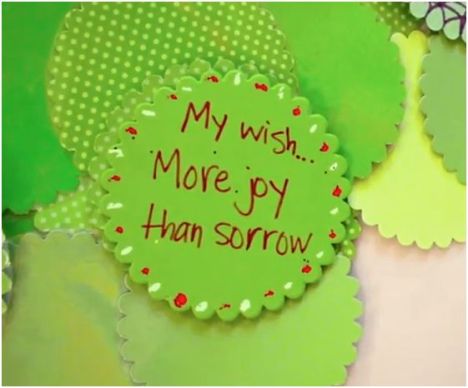
While it didn’t earn a plaque or other memento it was certainly memorable as 5800 demonstrators came together to build and fill over 2,000 kits for kids who spend their birthdays in a local Children’s Hospital.   That’s a personal record for Stampin’ Up and a wonderful way to fulfill the 25th Convention goal to Be the Difference!    Do you see that wall art from the Children’s ward?   That’s a Wish Tree Stampin’ Up provided with die cut pieces for kids and their families to add their wishes to the tree on the wall in the Children’s ward.   Here’s a few more pictures showing what it’s all about.

Stampin' Up Wishing Wall Tree at Children's Hospital in SLC

Wish medallions on the wishing tree

Wish medallions on the tree

Stampin Up's wish on the wishing tree

Don’t those wishes blow you away?  It certainly does me.  Also makes me proud to be a part of a company that cares and gives back for and from all of us.   Stampin’ Up works during the year to keep the kids craft cupbards filled as well as providing special things like the birthday kits.   Way to Be the Difference Stampin’ Up!

My wish for you and your families is a joy filled life.   And if you find yourself in hospital on a birthday…I hope you find a box with banners and other celebratory goodies waiting to help you make it a better day.   Of course NOT spending your birthday in a hospital would be even better right?

Hugs and blessings – Jean

Card in the mail heralds a world record!

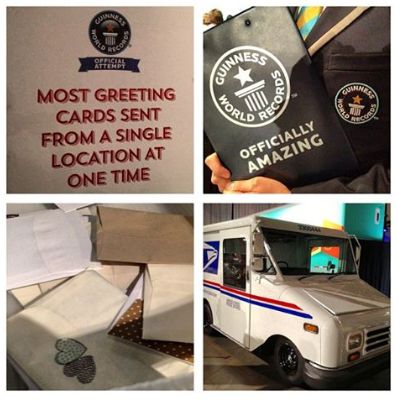
If you hang out in the Stampin’ Up world you’ve probably heard.  Stampin’ Up is the proud owner of a Guinness World Record that was set at our recent annual Convention in Salt Lake City.  Nice achievement to celebrate a 25th Anniversary don’t you think?

So what was the record and what does it have to do with my card in the mail?  So glad you asked…..

Guiness World Record

Did you see…most greeting cards sent  from a single location!

Guiness World Record - Most greeting cards sent from one location - it's official

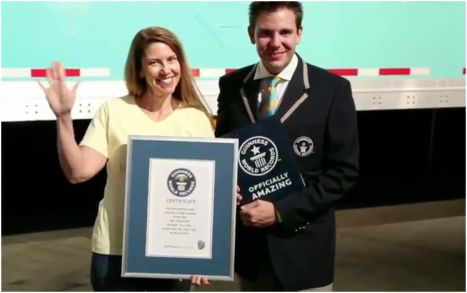
And of course a nice plaque to hang in the Home Office.

Guinness World Record Plaque

So what did I get?

This!!

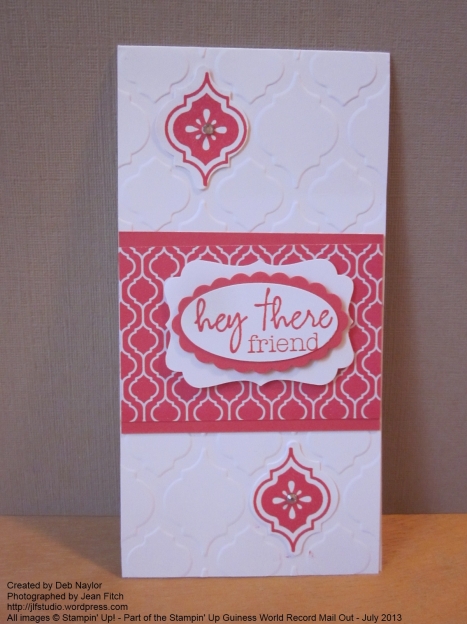
World Record - Hey There Friend - Deb Naylor - watermarked

My very own card from the thousands (2,984 to be exact) that were sent to set the record.  How’s that for owning a piece of Stampin’ Up history?  I love it!    My heartfelt thanks to friend and fellow demonstrator Deb Naylor for including me in this record setting convention experience.   You can read Deb’s excellent blog here.   Lots of inspiring projects and of course the latest news on Stampin’ Up products.   Stay tuned on her blog for grandkid updates.  Deb’s been visiting in my own home state of Oregon with family.  Here’s hoping her kitties forgive her though I bet they’ve been loving on the housesitter in her absence.  Cats are like that right?

Here’s the Supplies  I’ve sussed out that Deb used in her card.   It was one of her popular swap cards for convention.

Card Details:

Card dimension (folded):  3″ x 6″

Brilliant sizing as it means she got 4 card bases per sheet of Whisper White 12″ x 12″ cardstock.  And it gave her lots of room to play.  Apart from the basic layers the rest uses up scraps.

Layer sizing:

DSP: 3″ x 2″     Cardstock Mat: 2-1/4″ x 3″

Stamps: Mosaic Madness, Paper Pumpkin Welcome Kit stamp (hey there, friend)

Ink: Strawberry Slush In Color Ink Pad

Paper: Whisper White & Strawberry Slush cardstock, Quatrefancy Specialty DSP

Punches: Mosiac, Decorative Label, Extra Large Oval, Large Oval, Scalloped Oval

Other: Big Shot, Modern Mosaic Embossing Folder, Basic Jewel Rhinestones, Dimensionals and adhesive.

*****

So there you have it.   Another installment of Cards in the Mail and a little slice of Stampin’ Up history.   That’s a lot to fit in my mailbox on the highway!

Hugs and blessings to you all – may your week be sunny and filled with joy! –  Jean

Fabulous Phrases – more goodies from the Llama Blog Hop!

Hi All,

Here’s another fun idea that had its origins in the Llama Blog Hop!   Speaking of which I hope you enjoyed that hop.  I’m still returning to my fellow llamas blogs to find more inspiration and ideas.    All the original hop posts are still accessible from this link – http://stampinllamas.blogspot.com/2011/09/doing-llama-hop.html

AND…we have another hop scheduled for October 22nd that will feature various holiday projects from Thanksgiving to Chinese New Years and any other holiday that enters our wild and wooly llama thoughts.  So stay tuned for more llama fun and inspiration.

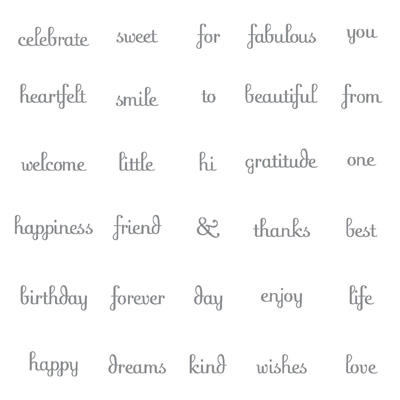
In my hop post here in addition to the birdhouse template and directions I shared yesterday I  showed you what can be done with Stampin’ Up’s Fabulous Phrases stamp set and the birdhouses.     As I started building more houses I needed more ideas for what other word or phrase I could use so I returned to the stamp set and discovered a fun new game. 

Check this out…..

Fabulous Phrases pg. 163 in the catalog

Wood Mount: #117002  $37.95     Clear Mount: #120501  $26.95

*****

Whether you use them together or apart these words add a lot to any project.

*****

How many phrases do you see?   And here’s another hint….with selective inking you can create more words from what you see here.

Get your pen and pencil out and join in the fun then download my list (or just scroll down).

 Fabulous Phrases Word List & Game sheet  – PDF

And here’s the Game Sheet all by itself:

Fabulous Phrases game sheet – PDF

Now that you’ve tried it here’s what I’ve come up with.  Though I must admit…I’m still seeing new and fun bits every day the more I think about it.

Phrases

 happy birthday

happy birthday to you

forever friend

celebrate today (place to and day close together with SAMJ)

enjoy life

love life

celebrate love

celebrate life

welcome little one

welcome beautiful little one

heartfelt wishes

thanks to you

best wishes

heartfelt best wishes

heartfelt gratitude

gratitude forever

to you

best friend

sweet thanks

sweet dreams

to celebrate one sweet little one

welcome to life little one

enjoy life little one

enjoy one sweet birthday

welcome happiness today (place to and day close together with SAMJ)

fabulous forever friend

enjoy dreams, love, life

birthday wishes

heartfelt birthday wishes

hi & welcome to life little one

wishes for happiness

friend to friend

heartfelt wishes for happiness

kind, sweet, fabulous friend

Words within words (selectively ink with a marker):

joy – from enjoy

ever – from forever

come – from welcome

birth – from birthday

mile – from smile

rate – from celebrate

heart – from heartfelt

felt – from heartfelt

today (combine “to” and “day” )

we – from sweet

a – from day

thank – from thanks

wish – from wishes

end – from friend

More selective phrases

you rate

you rate sweet birthday dreams

come & celebrate

thank you for life (now that’s something a mother would love to hear on Mother’s day)

a day for love, a day for happiness (wedding card text or Valentines Day)

we love you

we wish you love

best wishes for a beautiful life

heart to heart

 *****

Hope you enjoyed the game.   I bet you’ll never look at a set of words the same way again!   Bet this also makes this set seem much more reasonably priced too!    Feel free to click on over to my online store and order your own set today!    And if you come up with more phrases or words built from these I’d love to hear from you so I can expand my list!

Hugs and blessings my friends – Jean

Quick Tip: Stampin’ Up’s Ribbon Dotted Scallop Ribbon Border Punch works for Counted Cross Stitch!

Hi All,

Just a quickie post tonight.  I wanted to show you my latest addiction…actually a renewed addiction – Counted Cross Stitch Stampin’ Up style!

Year’s ago and back when my eyes were still eagle sharp I was a Counted Cross Stitch freak.  I have almost nothing to show for it as I tended to give away everything I made but most days found me with a needle in hand adding color to aida cloth.  There are a few incomplete pieces that maybe one day I’ll finish and keep for myself…sigh… another item for the to do list.   😀   

Anyway when I got a chance to play with the Dotted Scallop Ribbon Border Punch (more commonly known as the ribbon punch) I realized the spacing was perfect for cross stitching.  And I couldn’t resist playing with the idea.  Turns out the White Baker’s Twine from the Summer Mini is the perfect pairing.  Slightly thinner than the mixed color versions and no worries about how the striping will work on the stitches too.    This little tag card  is from a May Stamp Camp and  a set I created to fit inside the Milk Carton from the Mini Milk Carton die also from Stampin’ Up.  Turns out you can fit about 12 of these little beauties inside the mini milk carton.   When I get a good picture of the birdhouse Cheryl made from the milk carton I’ll show you the rest of the little mini cards.  The sizing on the little cards is 1-1/2″ x 1-3/4″ (folded).   Great little scraplings basically and limited only by your imagination and the scraps on your table.

I could also say this is a sneak peek from the new Idea Book & Catalog coming July 1.   Both Pretty Postage stamp set and the Bakers Twine are in the new catalog!  YAY!

Supplies list:

Stamps: Pretty Postage (Summer Mini & new IBC)

Ink: Cherry Cobbler Classic Ink

Paper:  Cherry Cobbler, Not Quite Navy & Crumb Cake Cardstock

Other: Small Tag Punch, Dotted Scallop Ribbon Border Punch, White Baker’s Twine, needle

I used my Stampin’ Up White Gel Pen to mark where you would make your first set of  diagonal stitches then go back the other direction to make the crosses.   Quick and easy and I can do a short piece like this in under 3 minutes.

*****

Don’t you think this little guy has a bit of a nautical feel (maybe its just the colors everyone is using with Open Sea these days)?  Did you know sailors used to do needlework too?  Besides stitching and repairing the canvas sails?   I’ve seen some amazing examples of Colonial era sailors stitch work in East Coast museums.   Hm…wonder if those tuna fisherman today keep up the traditions?   

May your stamping dreams be filled with little x’s….

Hugs and blessings – Jean

What’s in your Future?? Stampin’ Up’s Fortune Teller Basket of course!

Hi All,

Stampin’ Up! to the rescue once again.   I’ve been trying to remember for some time now how to make the paper fortune tellers I remember from my youth (turns out they’re popular once again so I should have gone straight to Google but couldn’t figure out what to call them).   Stampin’ Up on a nostalgia kick came up with a cute project that takes one of these fortune tellers and turns it on its head to create a cute little mini treat basket.     Fits in perfectly with the cute new spinner themed game projects coming soon in the Occasions mini this January.

Want to play along?  Grab a 6″x6″ square of Designer Series Paper and prepare to fold!

Now that I’ve got the folding down I’m off to make my fortune!  

Hugs and Holiday Blessings – Jean

Letterpress is in the House…and…Stampin’ Up Letterpress Plates are definitely da bomb!

Hi All,

Courtesy of my friend and SU partner Linda….Letterpress is in the house and the playtime has been something fierce!!  Linda was kind enough to loan me 3 of the 4 current Letterpress plates from the Holiday Mini so I could figure out all the ins and outs for our local group of demonstrators.  Poor Miss Wicketcat has been sadly ignored the last few weeks and I’m going nuts trying to figure out where to start in sharing all that I’ve learned.  I’m also putting a flyer together with some of the salient points as well as links to very cool projects and tutorials.  And given all the cool pieces I experimented with this post may have to extend over the next several days.  The scans of pieces alone will fill columns and columns.  So to get started…..

***

Turns out there is booklearning or what I’ve learned from:

1) Other demo’s experiments,

2) What Stampin’ Up says about the plates in text and video,

3) Letterpress info in general on the web and then….

there’s….WHAT I’VE LEARNED FOR MYSELF!!    Yep yelling all the way on that last one.  

My infinite thanks goes out to my pal Di Gibbs for saving my sanity with her recommendation about using Versamark with the letterpress plates.  As much fun as ink can be I’ve decided Versamark is the sane and safe method especially for sharing with large groups at events.  After my experiments with Craft Ink I shudder to think about using it in a large group.  Trust me on this one ladies….can you say MESSY!!

So what have I learned????

Letterpress is very, very cool and can be on occasion frustrating until you get the hang of them.   It’s definitely more of an Art, than a Science as Ben Franklin, if he was still around, would probably have warned me.

What is Letterpress and why would Ben Franklin know about it?

Basically letterpress is the typesetting and printing you think of when you think of Ben Franklin and other printers and the early colonial broadsheets with type being composed on sticks with the type backwards (thus the saying mind your p’s and q’s), inserted into forms and locked down, rolled with ink, then paper being placed and an impression made from pressure applied that not only transferred the ink but also placed an indented (debossed) impression into the paper.  Generally, Gutenberg is listed as the creator of this technique though he may only be the most famous example (the Gutenberg Bible is considered a premier example of his work and the first major work printed with moveable type). You might even say that a typewriter creates a letterpress document of a sort though it’s a different process with the keys striking the paper though the end result does leave both ink and an impressed or debossed form of the type in the paper.

Letterpressing can include images as well as text. We actually approximate the process when we brayer an Impressions folder with ink, insert paper and run through the Big Shot or when you ink one of our textures plates then add paper and pressure from the Big Shot. What many are calling faux letterpress since we aren’t using moveable foundry cast type and images. Wood Cuts and other printing type techniques that also leaves an inked impression in the paper also fit the bill.

Basically a debossed image (impression with depth into the paper) that also transfers ink qualifies in the modern sense to be called letterpress. Just like the word sounds…letters pressed into paper = letterpress.

Basic notes:

Set the Multipurpose Platform for the Big Shot on Tab 1.   The letterpress plate goes directly on the Multipurpose Platform (MPP) with no cutting pad under it.  The basic sandwich is MPP, Letterpress Plate, Paper, new unmarked cutting pad. 

My preferred sandwich:  MPP set to Tab 1, Letterpress Plate, Paper, Cushioning or backing paper (Same size as or slightly larger than the piece you are using), Clear plate (henceforward known as the “embossing plate”.

Which brings me to a very important point….Use a dedicated perfectly clean unscratched cutting pad as your dedicated “embossing plate”.   Mark the plate with a sharpie or other label making device then, and this is important, store it separately from the letterpress plates (loose in a box those plates will scratch the heck out of a pristine cutting pad) and anything else.  My brilliant friend Cheryl came up with a padded envelope that is now protecting my precious new “embossing” plate.   A file folder cut down to size will also work but the padded envelope is aces!

Stampin’ Up recommends using Dotto to adhere your inking piece to the “embossing clear plate” but if you do that you can’t sandwich in an additional piece if needed.  And exact placement becomes something of an issue so I choose to go “commando” with no Dotto and take my chances that no wind would “lift or shift the skirt”! 

Not all Letterpress plates are created equal.  The smaller ones seem to be made out of a slightly different material than the larger Lots of Love plate.   And the larger plate may possibly hold onto the ink stain no matter what you use to try to clean it off.   So whatever you do…don’t use Stazon inks that will never come off!   I found even the waterbased Classic inks left some staining and in some cases it continued to impress that stain onto the paper even after I would have sworn it couldn’t actually be there.   Not a problem when working on darker papers but a bit of an issue with the lighter and whites.  The smaller plates also seem to be slightly thinner and pass through the Big Shot a bit more easily.

Cleaning the plates.   A green scrubby (okay they come in other colors too but I mean the kind that more or less mimics our scrubber cleaner for stamps) and Dawn dishsoap seemed the best.  That lets you get into the crevices of the plates reasonably well.    I did try our Mist Cleaner and that works more or less okay and I tried Stazon Cleaner but that leaves a residue you have to wash off anyway so dish soap and a scrubby seemed to work the best.   Pat dry as much as possible with a towel then let air dry.   This should tell you that using multiple colors all in one go is going to be a pain unless you are selectively inking with markers or spots!  Luckily the plates are pretty cheap so if you are a demonstrator, having more than one might not be outside the ball park if you want multiple colors at a single event.

In the interest of full disclosure:   Much as I love Stampin’ Up video tutorials….when it comes to Letterpress they make it look way easier than it is in real life.  Granted they probably got lots and lots of practice before filming the first video and chances are that more than one retake was done!    I’ve still got a way to go before producing the results Shannon achieved with the Craft inks.   Not complaining just being honest about the learning curve.  

My initial efforts with the various combinations were mixed though they did get better and I have to say I don’t feel a need to invest in lots of Craft inks since the Classic Inks worked quite well.  They don’t have quite the same depth of the Craft and there are some fun things you can do with the craft since it stays wetter longer.  But I found that distinction mostly with the watercolor paper.  When using regular Cardstock the benefit of the Craft was less noticeable.

***

(click on images for close up view)

Paper:  While the product guide recommends using only Watercolor Paper you can in fact use ANY Stampin’ Up paper as long as you take an extra step or two in doing so.   While Watercolor Paper works well it turns out that at least in my less than humble opinion I think the Naturals papers are the way to go for a light background paper.  Basically the same look as the Watercolor Paper and way less cost!  Bigger sizes possible too if you want to stay all SU in your paper choices. 
Lots of Love Letterpress Plate

For a deeper impression with regular cardstocks use a backing piece of cardstock paper on top of your imprinting paper.  And no you don’t necessarily need a clean backing piece every time.  This allows a depth of paper that imitates in part the thickness of the watercolor paper and gives the letterpress plates something more to work with as it cushions the actual piece you want to use in your project.   One of my happy discoveries was embossing the full front of a folded Base Card.  Place your folded card onto the plate and voila you have your backing paper built in!  And the cool thing is that the embossing transfers not only to the inside of the card but also leaves a shiny almost satin inked look on the back of the card as well.  Very cool.  You can see this effect in my Letterpress Valentine in Black card shown in an earlier post here.


After quite a few experiments I did come to the conclusion that Very Vanilla and Whisper White cardstocks gave the least favorable results and I doubt I’ll be using those much in future.  Even with a backing sheet the impression isn’t very deep and the inks don’t impress well into the ultra smooth surface.
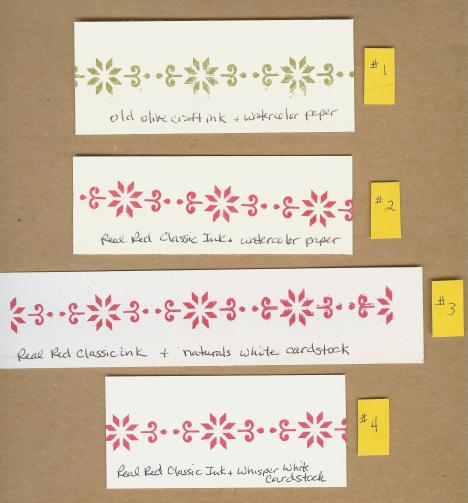
Northern Trim Letterpress Plate

 Sorry that my scanner doesn’t show the depth of image very well.   I have some links in the lower section to others letterpress posts that show that better.

The Brushed Gold and Brushed Silver Cardstock look Fabulous when you use with Versamark!  You can see an example of the Silver down below.
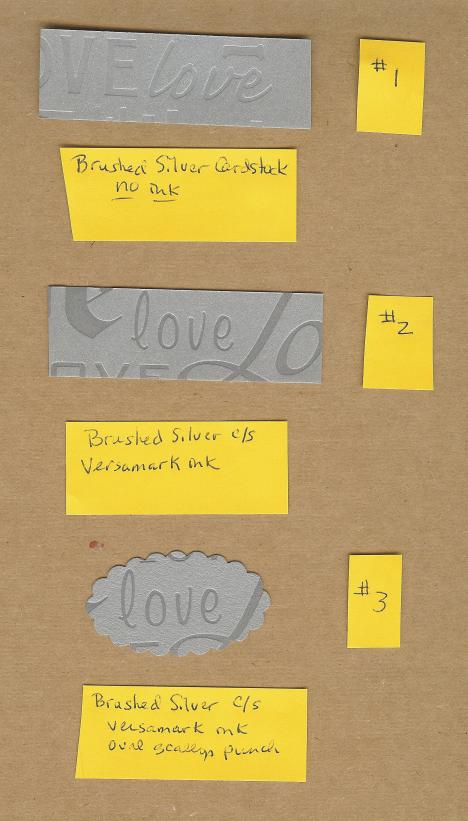
Lots of Love Letterpress plate

The Textured Cardstock offers another very cool look but you’ll get a deeper impression with a backing piece of paper behind it.  Just make sure you put the textured side face down.  Had I used a piece of regular cardstock as my backing piece I think I would have gotten a deep impression.  Also keep in mind that the textured cardstock is slightly thinner than most of our other cardstocks so a lighter impression will always be made.
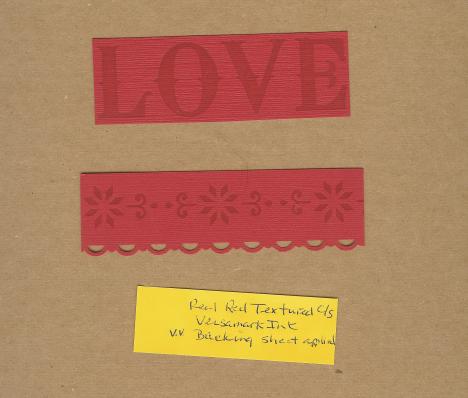
Lots of Love and Northern Trim Letterpress Plates

Another trick for a slightly deeper impression is to spray your cardstock with a slight amount of water or alcohol and let rest for a minute so the fibers in the paper will “relax” (who knew alcohol works on paper just like on people  :D)  before “pressing” much as with the SU embossing folders.   Sorry no sample pics of this trick just yet.

***

Ink:  While Craft ink is recommended by Stampin’ Up! I found myself with lots more smears since the paper easily slips across the slightly more oily surface.  I was much happier with the Classic and Versamark inks.  Pretty much the same coverage when using the Naturals or Confetti papers especially and a cleaner crisper image overall.   The Versamark ink was my favorite.  Not only because I love the tone on tone look but because you can actually press the paper of whatever type slightly into the ink and it holds the paper in place while you put the “embossing plate” in place.  Love what it looks like with the darker colors like Bravo Burgundy especially.
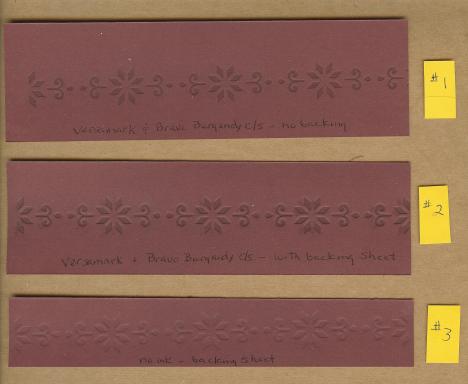
Northern Trim Letterpress Plate, Versamark and Bravo Burgundy C/S

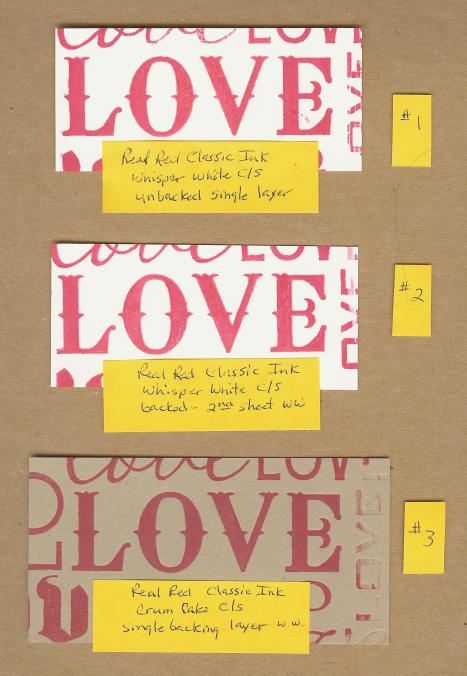
As you can see in the above picture the bottom piece #3 is a plain embossing, #2 shows versamark with a backing piece used and #1 shows something in between Versamark that brings out the design but with no backing sheet used and thus a less deep impression.
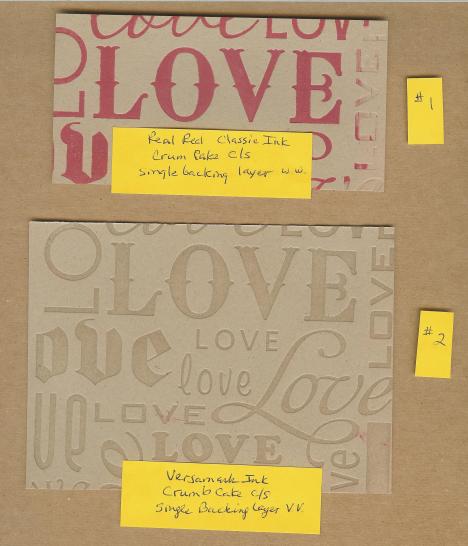
Lots of Love Letterpress Plate & Crumb Cake C/S


Applying ink with a sponge dauber gives you more control, important when using multiple colors, but may not be fast enough to beat the drying time if you are using Classic inks.  And Brayer is the messiest applicator method – at least when my hands are on the wheel!  Classic spots worked well though and had a bit more control and less mess than the full sized pads.

Tip:  Very Important!  When using Versamark with your Letterpress Plates.  Wash your hands…frequently!  Or keep a hand towel nearby to wipe your fingers.   Since the plates get covered with Versamark ink…and you are picking up and putting down possibly in an area previously inked…and since Versamark creates watermarks….guess what happens when you get it on your fingers and then you pick up the piece of paper with those same versamarked fingers???   Yep watermarked fingerprints…not where you want them!   Makes using tweezers to lift the paper or grabbing by the edges carefully (think handling records or CD’s or DVD’s) something to think about!

Tip:  Check out Kay Kalthoff’s tip about using post it notes to keep your plates cleaner and your hands less inky – http://www.stampingtoshare.com/2010/09/927-using-northern-trim-letterpress.html

Image:  Something I noticed on the new Lots of Love Letterpress in particular.  There are some imprint sections I just don’t like and others that while I like them in general on a larger piece of paper…when I downsize the paper I don’t like some of the partial imprints that result.  So note to self:  When I want a smaller section.  Start with a piece of paper larger than I want as a finished piece.  Then I cut out the portion I do want and I have some options to work with in the placement of the desired section. 

Tip:  If you are creating multiples of a project or when using at a Stamp Camp for customers you can outline the placement you want for the paper by using post it notes (the larger wider ones are ideal for this) to mask off the area not to be used.  Makes layout a no brainer that way!  😀

***

Helpful links and resources:

Stampin’ Up Training Video: http://www.youtube.com/user/stampinupvideo#p/u/2/BJpeQ7fL5mw

SU Letterpress instruction sheet: http://www.stampinup.com/us/documents/Letter_Press_instructions.pdf

Di Gibbs Letterpress with Versamark Tutorial & Video – http://dianagibbs.typepad.com/stampin_with_di/2010/10/letterpress-with-versamark-tutorial.html

Kay Kalthoff’s Tips on Letterpress – http://www.stampingtoshare.com/2010/09/927-using-northern-trim-letterpress.html

http://understandblue.blogspot.com/2010/11/love-ly-letterpress.html – Lydia’s basic review and samples

http://www.youtube.com/watch?v=v7dtu96Av70&feature=player_embedded – Letterpress on Fun Foam

http://www.nwstamper.com/experimenting-with-the-stampin-up-letterpress-dies – experiments with paper and ink

http://pattystamps.com/pattys_stamping_spot/2010/09/letterpress-plates-samples-luv-2-stamp-group-meeting.html – samples

http://thestampcamp.com/blog/10/08/stampin-up-letterpress/

http://crazystampinwomen.typepad.com/crazystampinwomen/2010/10/stampin-up-halloween-letterpress-plates-trick-or-treat-gift-bag.html

http://www.splitcoaststampers.com/gallery/photo/1836784?&si=letterpress

http://militarywifestampinspot.blogspot.com/2010/10/vintage-annivesary-card.html

https://jlfstudio.wordpress.com/2010/11/11/letterpress-love-stampin-up-style

History of Letterpress links for those interested in something more than our Stampin’ Up craft interpretations:

http://en.wikipedia.org/wiki/Letterpress_printing

http://www.fiveroses.org/intro.htm

http://www.youtube.com/watch?v=Iv69kB_e9KY – video showing the basics

http://www.youtube.com/watch?v=yE0OoWX6TQs – video

 ***

And in case you’re wondering…here’s a spoiler for you…SU released digital copies of the Occasions and SAB mini’s to demo’s yesterday (now don’t you wish you had joined my demonstrator team? You still can…and at half price for the next 2 weeks!) and while I can’t share all the details or any of the images…let me just say, in case you were wondering, the Letterpress Big Shot feature has a future – hee,hee, hee!

Hopefully the above will give you some encouragement to try your own experiments.   One of the things I love as a “frugal” stamper is the low cost of the plates and the fact that you don’t need to buy any extra accessories to use them.  Every thing you need comes with your Big Shot! 

Come back later in the week for more samples and pictures of my experiments in progress.  To see all Letterpress plates available check out my Stampin’ Up online store (click the icon in the sidebar) and select die cutting, then letterpress.  Or Click  for my Letterpress flyer.

Letterpress Flyer

Hugs and Blessings – Jean

October is National Breast Cancer Awareness month…Have you gone pink yet?

Hi All,

Hard to believe another October is here and almost gone already.   The Supreme Court is back in session (time to watch that grand old movie “First Monday in October” again),  Halloween is looming and we’ve been celebrating National Breast Cancer Awareness month all month long!   Not that Breast Cancer isn’t something to be thinking about every month right ladies?   Ah,ah,ah…you guys too should be concerned, for yourselves and for the women in your life.   Monthly breast exams are no longer just a female thing!

Stampin’ Up!  with their wide array of colors, embellishments and stamps that all work “Pink” give you unlimited possibilities to share your support for Breast Cancer Awareness and those affected by the disease in your life.

If you would like a flyer of the following grid and information click for my SCRIBD files here (PDF) or here (Word version)- or this will get you the PDF here  Pink Grid Flyer.  Fellow Demonstrators – Please feel free to share, alter and use as needed though I wouldn’t object to a wee bit of credit or a link to my blog (LOL!).

October’s National Breast Cancer Awareness Month

Inspire, Create & Share with Pretty in Pink to Spread Awareness

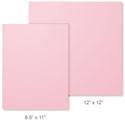
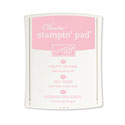
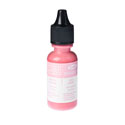
cardstock 2 sizes1 2classic ink stamp pad 3classic ink refill
4Stampin Write Marker 5 6Craft Ink Refill
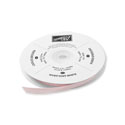
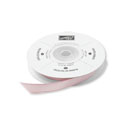
7Ribbon - quarter inch grosgrain 8 9Ribbon - Taffeta
10 11glitter - Supernova Fine Stampin' Glitter (includes pink) Ribbon 1/8" Taffeta12
13Decor Element - Manhattan Flower 14 15Decor Element - Upsy Daisy
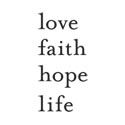
16Jumbo stampin' around cartridge 17Ribbon of Hope - Single Stamp 18Decor Element - Love,Faith,Hope, Life


Pretty in Pink Products

  1. Cardstock – 8-1/2 x 11 & 12 x 12 pkgs.

  2. Classic Ink Stamp Pad  

  3. Classic Ink Refill

  4. Stampin’ Write Marker

  5. 5/8” Grosgrain Ribbon

  6. Craft Ink Refill – use with new uninked Craft Pad (Holiday Mini item)

  7. 1/4″ Grosgrain Ribbon

  8. 1-1/4” Wide Striped Grosgrain Ribbon

  9. 3/8” Taffeta Ribbon

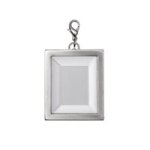
 10. Simply Adorned Charm – pink the insert

 11. Supernova Fine Stampin’ Glitter (inc. pink)

 12. 1/8” Taffeta Ribbon (white borders)

 13. Décor Element – Manhattan Flower

 14. Simply Sent Sweet Hello Kit – includes pink ribbon rosette flowers to attach to card

 15. Décor Element – Upsy Daisy

 16. Jumbo Stampin’ Around Cartridge (blank) – ink with the classic or craft pink reinker of your choice

 17. Ribbon of Hope – Single Stamp

 18. Décor Element – Faith, Hope, Love & Life


Many of these products are also available in other light or “ dark pink” colors: Rose Red, Melon Mambo and the lighter newly returned Pink Pirouette or Blushing Bride!


There are more Pretty in Pink Décor items and Stencil images for inking in the new Definitely Decorative Catalog.  More wonderful stamps too in the full catalog.


Décor Elements can be broken up into smaller pieces for small projects and applied to mugs, tiles, votive candle holders, plates, laptops, pictures. Many other imaginative uses as well – apply to walls, mirrors, windows, Cars or other large surfaces.

*************************************************************************

Tip:  Besides the Ribbon of Hope stamp several other stamp sets are also perfect for inspiring Think Pink projects.  Inspired by Nature’s text stamp Live With Passion is the perfect text for Breast Cancer Projects and is available in several languages.   Just Believes text stamp “Some things have to be believed to be seen” has many applications as well.  Particularly in our search for a cure and our fundraising efforts to bring it to fruition.  Cottage Garden is another terrific stamp with flowers, butterfly and a great text “Love life & it will Love you back”.  All great stamp sets for creating Think Pink Projects.


Think Pink – Breast Cancer Awareness Stamp Project and Event ideas:

http://www.maryrindal.com/2010/10/pink-out-afterthoughts.html

http://www.maryrindal.com/2010/10/in-memory-of-geri-hoffman.html

http://zindorf.blogs.splitcoaststampers.com/2010/10/05/breast-cancer-awareness-tutorial-365/

http://igotstamps.com/?p=2629 – a bouquet that lasts forever

http://fastamper.blogspot.com/2010/06/relay-for-life-update.html – Ribbon of Hope

http://igotstamps.com/?p=2717

http://kimevans.typepad.com/stamping_with_kim/2010/08/catching-up.html – Breast Cancer Awareness Journal

http://www.littlemissscrapalicious.com/2009/10/pals-paper-arts-14.html – Pink Punch Owl

http://www.littlemissscrapalicious.com/2009/07/stampin-out-breast-cancer-fundraiser.html – Going pink scrap page

http://createdbyu.blogspot.com/2010/09/diva-coffee-break-designs-team-color.html

http://just-add-ink.blogspot.com/2010/10/just-add-ink-38.html

http://kerrids.wordpress.com/2010/10/10/jai-38-challenge

http://southerncaliforniastamper.blogspot.com/2010/10/praying-for-you-anita.html – check out the inked pink ribbon behind the text

http://stampinbythesea.com/goals-exceeded

http://www.maryrindal.com/2010/10/in-memory-of-geri-hoffman.html

http://www.stampinup.net/blog/2045107/entry/a_treat_for_you_blog

http://www.maryrindal.com/2010/10/pink-out-afterthoughts.html – afterthoughts

http://totallyawake4-stampin.blogspot.com/2010/09/setting-up-for-gilbraltar.html

http://totallyawake4-stampin.blogspot.com/2010/09/marvelous-magnets.html – magnets

http://totallyawake4-stampin.blogspot.com/2010/09/bookmarks.html – bookmarks

http://totallyawake4-stampin.blogspot.com/2010/09/trick-or-treat.html – Fancy Favor boxes – did you know Halloween comes in Pink? 😀

http://totallyawake4-stampin.blogspot.com/2010/09/five-more-cards-for-run-for-cure.html – cards

http://www.maryrindal.com/2010/10/in-memory-of-geri-hoffman.html 

http://www.stampinup.net/blog/2045107/entry/a_treat_for_you_blog


http://www.maryrindal.com/2010/10/pink-out-afterthoughts.html – afterthoughts 


http://totallyawake4-stampin.blogspot.com/2010/09/setting-up-for-gilbraltar.html

http://totallyawake4-stampin.blogspot.com/2010/09/marvelous-magnets.html – magnets

http://totallyawake4-stampin.blogspot.com/2010/09/bookmarks.html – bookmarks

http://totallyawake4-stampin.blogspot.com/2010/09/trick-or-treat.html – Fancy Favor boxes – did you know Halloween comes in Pink? 😀

http://totallyawake4-stampin.blogspot.com/2010/09/five-more-cards-for-run-for-cure.html – cards


In addition to the stamping info, here are a few links to resources and information about Breast Cancer and what you can do to help find a cure or find answers to questions for yourself or others you know affected by the disease.  


In last years post here there are even more links and general info as well as some stamping links for Ribbon of Hope projects.

Information sources:

 http://breastcancercare.org/

  http://breastcancercare.org/resources.php – List of online resources

http://www.nbcam.org/index.cfm 

Breast Cancer Awareness Image Sources for blogs, letters, emails etc.:

http://webclipart.about.com/od/ribbonclip/l/blbc1.htm

http://www.redhatclipart.com/bca.html

http://photobucket.com/images/breast_cancer_awareness%20ribbon/?&userinit=true&source=header

http://photobucket.com/images/breast_cancer%20awareness%20%20month/?&userinit=true&source=homepage

 ***

And two last notes….


During the rest of October, anyone placing an order of $50 or more on my website that includes a product from my Think Pink flyer will be rewarded with free shipping.  I’ll also donate some Think Pink cards to a local Cancer Charity for any sized order placed in my online store.  


 I considered writing the whole post in hot pink but decided it was a bit too hard on the eyes even if it would be appropriate for the subject matter.  Hopefully the special deal will reward you for reading through it – LOL!


And lastly… here’s a fun video I also shared last year:


The smiles and the dancing and the hope are catching…aren’t they!

Hugs and Blessings – Jean


Quick Tip: Embossing Folders and Chipboard


Note added later:  I’ve discovered a very freaky thing.  The computer world and my blog seem to be playing tricks.  One time I log on the pictures show the correct embossed and debossed images.  The next hour the images appear to be the reverse of what they are marked.  Not sure how its doing that.  When I scanned the images something similar happened.   The initial picture looked correct as to what parts of the design were raised and what impressed into the paper.  Then when I would open them up in a viewer the design areas were reversed!  However when I first posted them on the blog they showed up as they should.  Now they are alternating.  Anyone know what’s up with that??

Hi All,

Turns out embossing folders and chipboard are the perfect ingredients for a new playtime!  What inspired that…besides my insatiable need to play with my Big Shot?

I was scanning the various forums on Stampin’ Connection the other day and came across a question from fellow (probably that should be sister – lol) demo Carol Markley (hi Carol!).  What’s Stampin’ Connection you ask?  A very cool online community sponsored by Stampin’ Up and available to Stampin Up Demonstrators only.  Another great perk when you join the team!

Question by Carol Markley:

Patty’s Stamping spot shows a convention demonstration using the lattice embossing folder with chipboard.  I have tried several different “sandwiches” and they are all either too thin or too thick.  Anyone have success with this?

***

Quick answer to Carols question…Yep!  

I played with that concept this morning.  And in case you’re interested, here’s what I came up with.

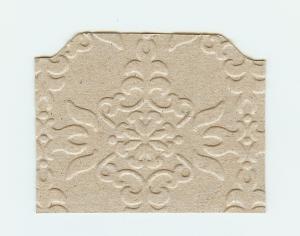
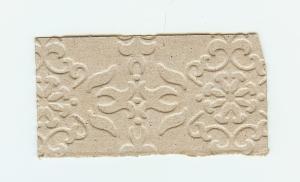
Chipboard #1 - Embossed

***

Chipboard #2 - Debossed

Each Big Shot seems to take sandwiches somewhat differently and of course it also depends on the chipboard used. I didn’t have any of our SU Longboard Chipboard on hand so I used a cereal carton for my “chipboard” – the poor woman’s version don’t you know – LOL!

Here’s the sandwich that worked for my Big Shot machine (from the bottom of the stack up):

Multipurpose platform set to Tab 1
cutting plate
Vintage Wallpaper folder (I don’t have the lattice one yet) with chipboard inserted
Cutting Plate

I did this twice and the first time it went through quite easy and impressed well. The second time it was stiffer going through and when I examined the piece I think that was because there was a a slight bit of extra paper adhering to a glued spot of the box top I’d grabbed to play with. Though it still embossed okay it was a good reminder to check my piece carefully for flaws.

Since the SU chipboard is thicker I would suggest using the bottom no tab setting and then adding cardstock shims until the sandwich feels right for your machine.   While the machines have a 3 year warranty (yay!  SU and Sizzix) you really don’t want to break yours …so play carefully my friends.

I also played with brayering ink on the folder and trying both embossing and debossing depending on which side of the folder was inked. Very cool effect.  Thanks for getting me thinking along these lines  Carol.

Oh and in case you’re wondering.  Embossing is what happens when you have a raised image and Debossing is when you have a recessed image.   It’s pretty much all about which side of the paper you use when you are using an embossing folder – something you can get away with as long as there is no text to show up in reverse.  If text is involved than an embossing folder does just that…embosses.    The new Letterpress plates from the Holiday mini are a great debossing tool when you want text as well as image impressed into the paper.

****

Now, after this playtime,  I have an idea for creating storage folders for my embossing folders. Cut a card sized piece of cereal box (5-1/2″ x 8-1/2″) score halfway and emboss the front and back just like I would a card front and back using the folder to be stored! Then attach a Round tab punch piece with the folder name on it and Voila! A very cool storage device that will sit nicely in a box or basket. Might have to play with the folder sizing and maybe make it a wee bit bigger.    Once I get one completed I’ll post a picture.

That’s it for today.   Hope you enjoyed this quick tip and a fun new way to use the Big Shot.

Hugs and Blessings – Jean

Binary delight….10l10l10-10:10

 ETA: This post was supposed to go out this morning at 10:10 but whether it’s the computer or the blog service that can’t tell time it’s still sitting in the queue (appropriate I guess in some weird manner).  Luckily I can tell the date and caught it’s absence.  Fortunately its still 10/10/10 all the way up until midnight!   And adding to the hilarity and loss of hair (I really have to stop pulling it out!) and total computer likelihood when I went to fix and get this posted WordPress ate the post!!   Had to start over from scratch.   ARGHHH….knew I should have written it in binary!

Getting Comfortable With Binary

Hi All,

Just a quickie post to celebrate a fun day.

Something fun (possibly silly) this way comes…Today’s date reads 10/10/10 – now is that a computer programmers dream or what!  Those binary bits in that order won’t recur for another hundred years and even then it will only be the last 2 digits of the year that make that date. 

I had considered writing the post in binary but then realized only the computers of the net or a few programmers would be able to read it!  

Can’t quite decide on the appropriate greeting either, should it be Happy Digital Day or  Bright Binary Day or what…with only on/off, yes/no, 1/0 as the appropriate structure I’m having a hard time getting in the proper constrained spirit.   Yes I know programming has its creative sides but some days it feels as if dealing with computers is like dealing with a two year old!  It knows what it wants and really could care less what I want.  Not mind you that a two year old is known for order or discipline – LOL!

So Happy Digital Binary Day!

Or in binary:

0100100001100001011100000111000001111001001000000

100010001101001011001110110100101110100011000010110

11000010000001000010011010010110111001100001011100

100111100100100000010001000110000101111001

Too bad computers hadn’t been invented in 10/10/1010 (so we could have had the original celebration)  but then neither had indoor plumbing or much of anything else we consider a necessity today.  Funny thing too is that it falls on a Sunday!  Do you thing that means God is a programmer at heart?  Could be – LOL! 

I bet a computer could tell me what day of the week the original fell on if I could only find the right file.  Wouldn’t it be cool if that day was also a Sunday?  Probably depends on the calendar in use at the time. 

If I had the set this would be the perfect day to do a Lots of Bots card with the binary bits stamp image.  Perfect day to watch that Star Trek Next Generation episode about the Binars (culture and language built on binary) as well.  Hmm….now where are my DVD’s……

Whatever you choose to do today to celebrate I hope it’s a wonderful day.   

Hugs and blessings…now go do something digital or turn yourself on and off in true binary fashion! – Jean